Forking
In the world of open source, forking a project has traditionally meant that someone took the project’s current code base and used it as a basis for a separate, alternative project. In this context, the term “fork” carries some negative connotations, as forking a project can mean that the community of developers and users of the original project splits into two groups.
In the world of Git, the meaning is similar but the connotations are different. While a fork can be used as a basis for a separate project, a fork is also often used to contribute to the original project. Furthermore, a fork can be used to include a project in your own codebase with some modifications, or just to play around with a project. The fact that the Ruby on Rails project has over 18,000 forks on GitHub at the time of writing doesn’t mean that there are 18,000 competing versions of Rails out there.
A fork is not a built-in feature in Git itself, but rather a concept provided by several Git hosting services. Put simply, a fork of a repository is a copy of that repository, with all its code, branches and history, on the server. The fork will also “know” from which repository it has been forked. A fork can be thought of as a server-side clone of a repository, whatever the mechanism behind the fork really is. GitHub, Bitbucket and GitLab all offer forking functionality.
Contributing to a Project Through a Fork
As mentioned, a common use-case for a fork is to contribute to a project. While there are other ways to do this, like pushing directly to its repository or mailing patches around, a fork-based workflow is convenient as it allows you to use the familiar concepts of branches and remotes in Git without having write permissions in the original repository. Developers can fork the project and push code to their own forks instead of the original repository, while a maintainer is responsible for integrating the changes into the original repository. In this case, a pull request is often used to integrate the changes into the original repository. We’ll look at pull requests in the next chapter. For now, let’s look at creating a fork and cloning it locally in GitHub.
Below, I’m looking at a repository in GitHub. To create a fork — my own copy — of this repository, I just press the “fork” button in the upper right of the screen. If I’m a member of some organizations, I get to choose where to fork the repository — I’m going to select my own user account.

Now I have a fork of the original repository in my own GitHub account. To work with the code locally, I need to clone the repository just like I would clone any other repository. I’ve added my GitHub account to Tower, so by selecting this account in the services view, I get a list of my repositories on GitHub. Here, I just have to click “Clone” next to “my-project” to get a local clone of the repository:

Now the code is available locally on my computer. I can now use it for whatever I intended (providing that the license of the original project allows my use-case, of course). As mentioned, one of these use-cases include contributing to the original project, the one that I forked initially. We’ll look at this in detail in the next chapter, but for now, let’s fix one thing to make things easier for us going forward. Note that my local repository currently has one remote named origin, which is pointing at the fork:

Add Upstream Remote
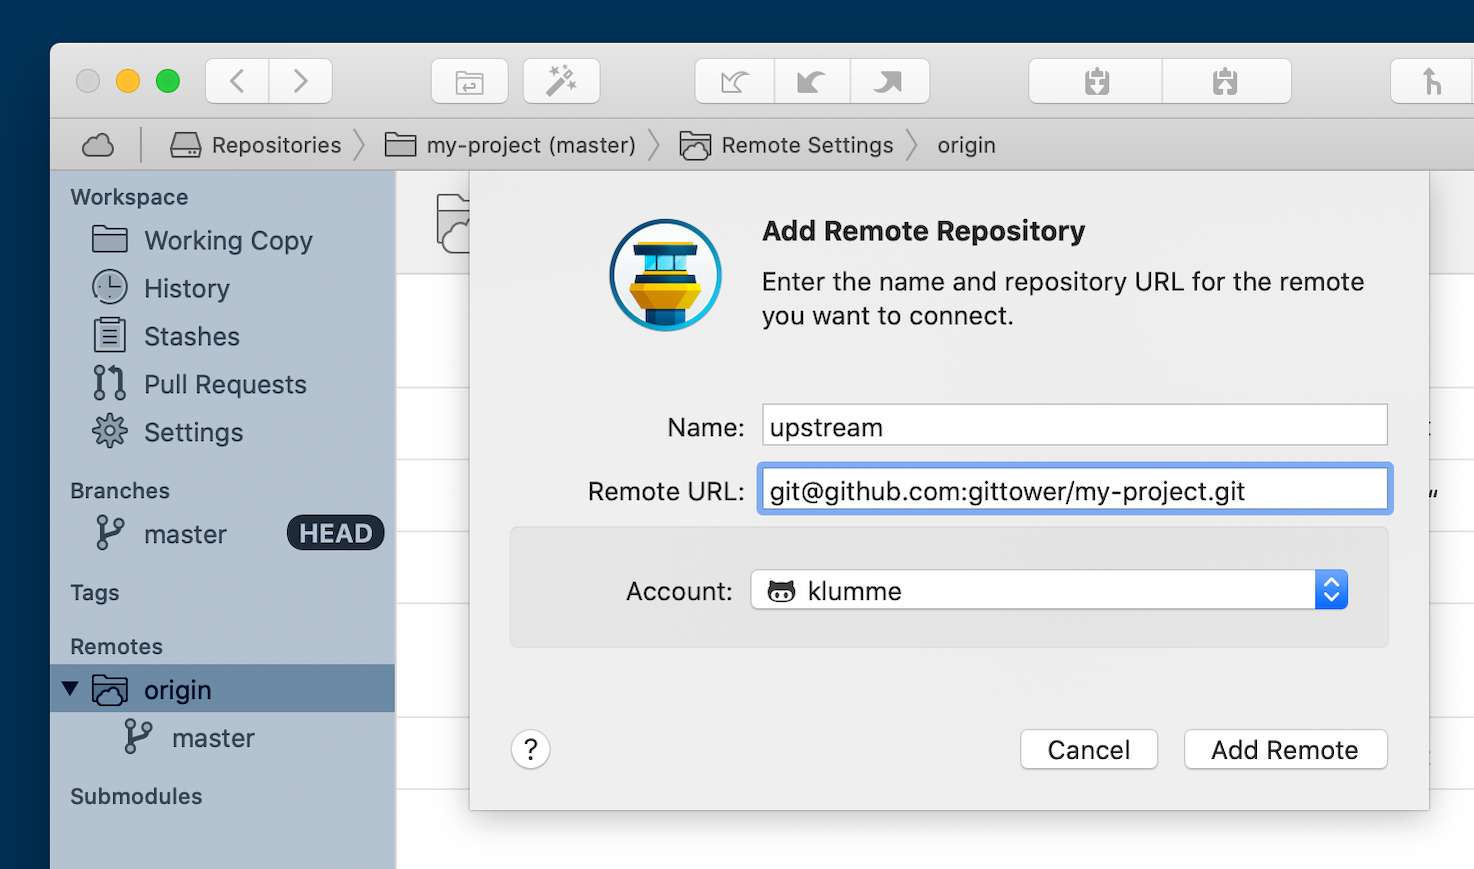
As I work away on my changes locally, it may be useful to incorporate changes done in the original project, especially if I plan to integrate my changes back there at some point. Some services allow you to sync your fork with the original repository in the service, which then allows you to pull down these changes from origin, your fork, locally. However, it’s also possible to pull down changes directly to your local repository from the original repository. By convention, the original repository is referred to as “upstream”, so let’s add a remote called upstream pointing at the original repository by selecting “Add New Remote” from the “Repository” menu in Tower (here I use the URL from the original repository on GitHub, not my fork):

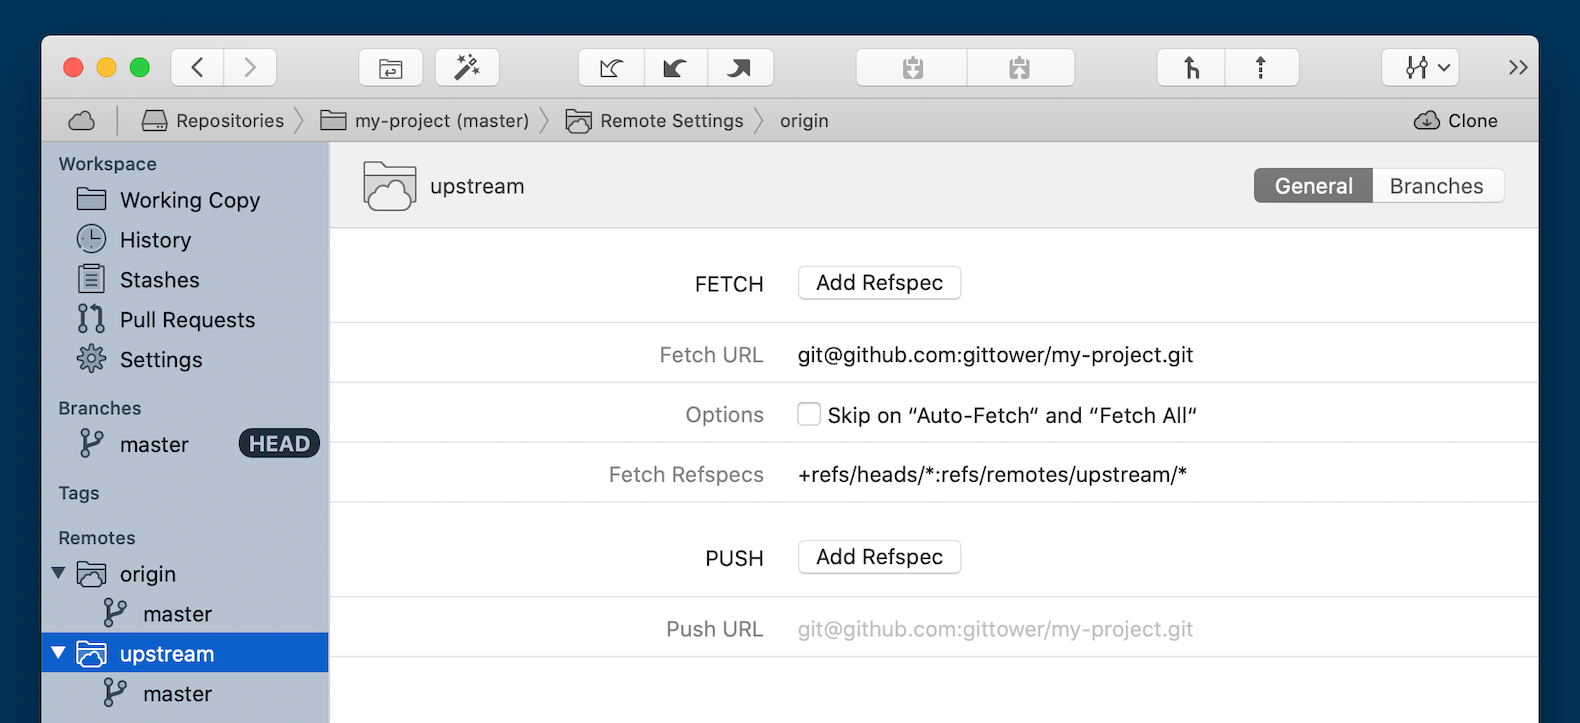
We now have two remotes: upstream, pointing at the original repository, and origin, pointing at our fork:

We’re all set to take a look at pull requests and how they allow us to contribute changes back to the original repository.
