Handling Large Files with LFS
Working with large binary files can be quite a hassle: they bloat your local repository and leave you with Gigabytes of data on your machine. Most annoyingly, the majority of this huge amount of data is probably useless for you: most of the time, you don't need each and every version of a file on your disk.
This problem in mind, Git's standard feature set was enhanced with the "Large File Storage" extension - in short: "Git LFS". An LFS-enhanced local Git repository will be significantly smaller in size because it breaks one basic rule of Git in an elegant way: it does not keep all of the project's data in your local repository.
Let's look at how this works.
Only the Data You Need
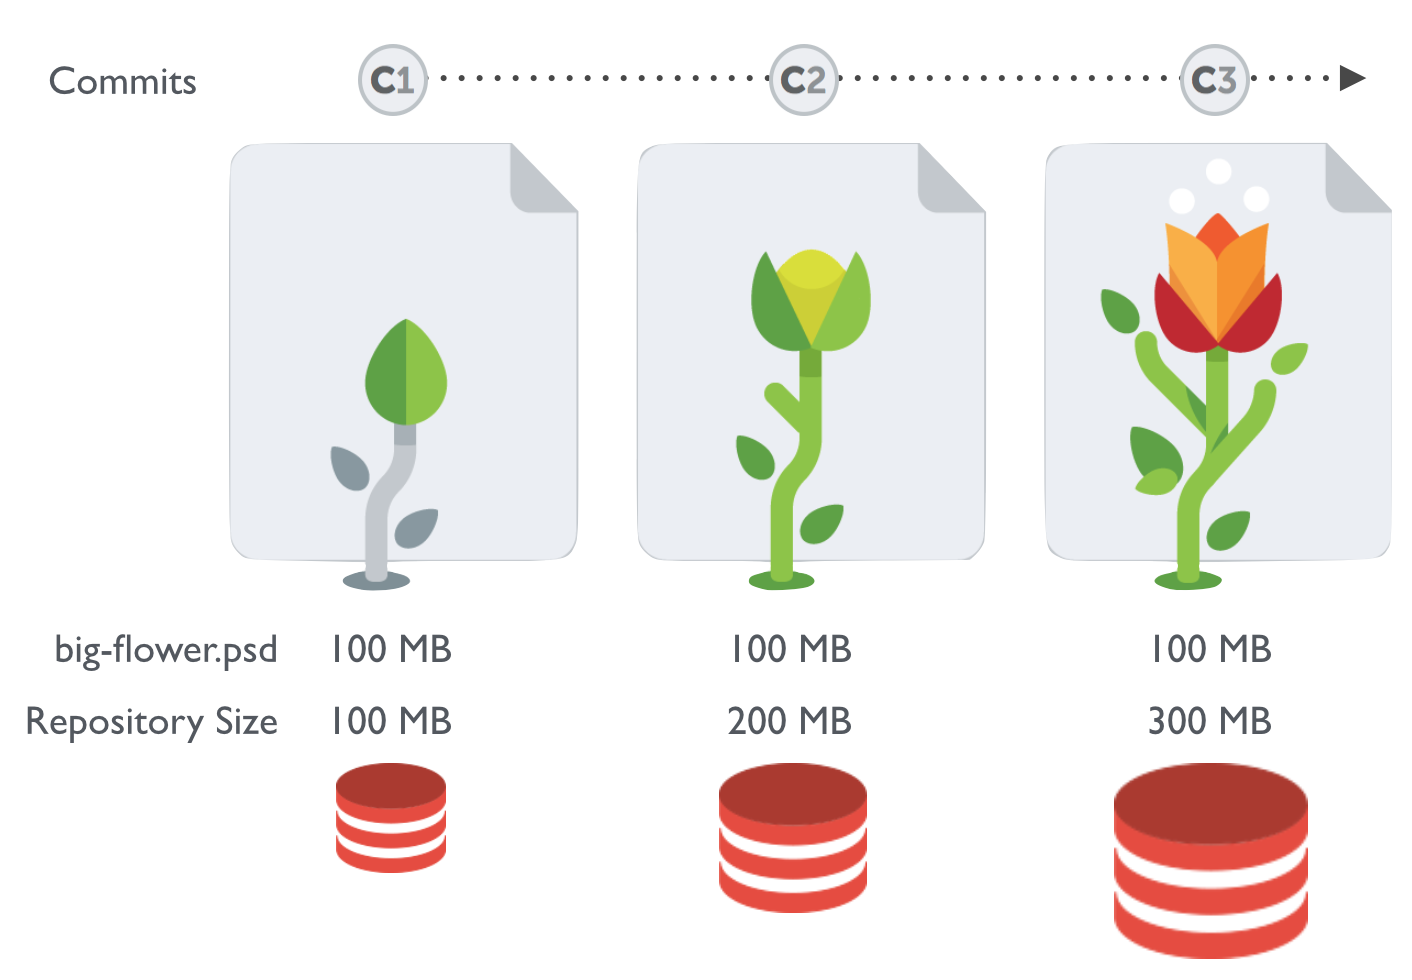
Let's say you have a 100 MB Photoshop file in your project. When you make a change to this file (no matter how tiny it might be), committing this modification will save the complete file (huge as it is) in your repository. After a couple of iterations, your local repository will quickly weigh tons of Megabytes and soon Gigabytes.

When a coworker clones that repository to her local machine, she will need to download a huge amount of data. And, as already mentioned, most of this data will be of little value: usually, old versions of files aren't used on a daily basis - but they still weigh a lot of Megabytes...
The LFS extension uses a simple technique to avoid your local Git repository from exploding like that: it does not keep all versions of a file on your machine. Instead, it only provides the files you actually need in your checked out revision. If you switch branches, it will automatically check if you need a specific version of such a big file and get it for you - on demand.
Pointers Instead of Real Data
But what exactly is stored in your local repository? We already heard that, in terms of actual files, only those items are present that are actually needed in the currently checked out revision. But what about the other versions of an LFS-managed file?
To do its size-reducing wonders, LFS only stores pointers to these files in the repository. These pointers are just references to the actual files which are stored elsewhere, in a special LFS store.
An Additional Object Store
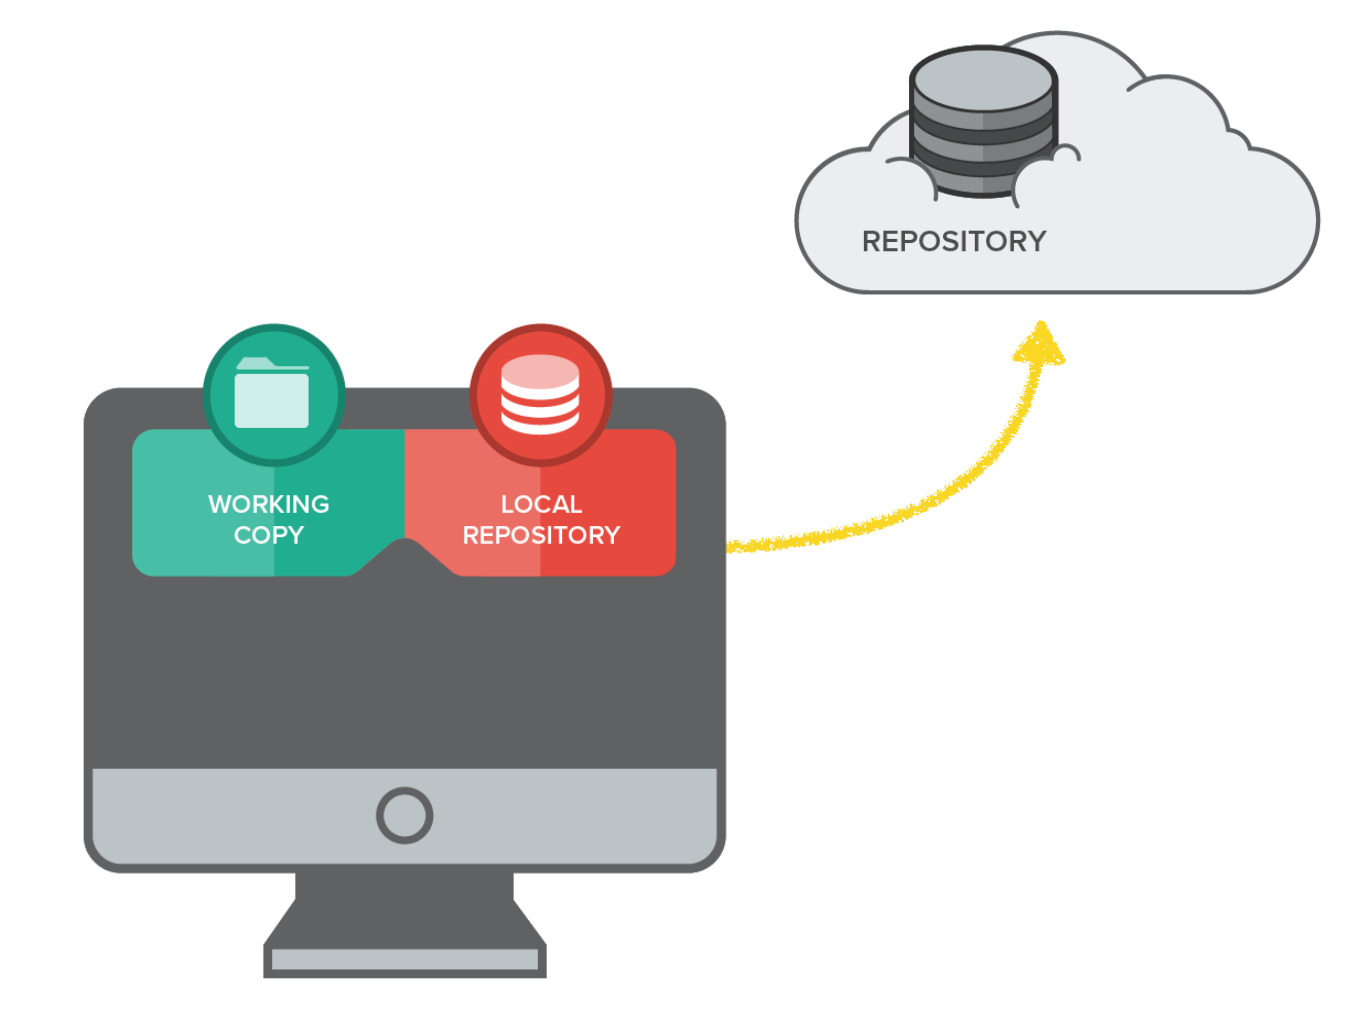
The usual Git setup is probably old hat to you:
- Your local computer is home to a local Git repository and the project's Working Copy.
- Most likely (although not mandatory) there's also a remote server involved which hosts the remote repository.

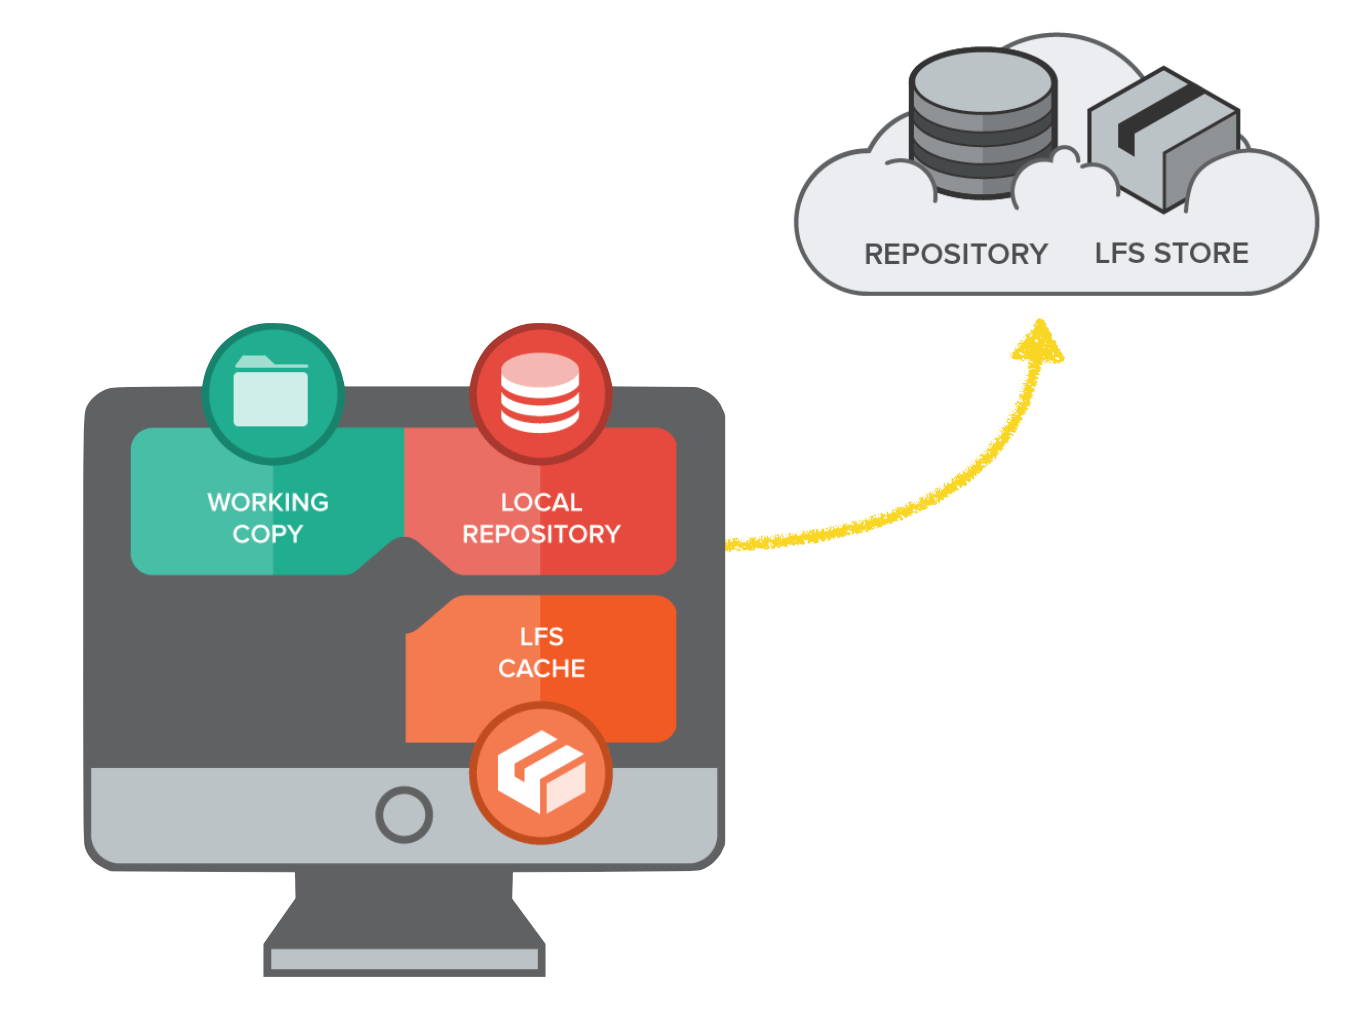
With LFS, this classic setup is extended by an LFS cache and an LFS store:
- Remember that an LFS-tracked file is only saved as a pointer in the repository. The actual file data, therefore, has to be located somewhere else: in the LFS cache that now accompanies your local Git repository.
- On the remote side of things, an LFS store saves and delivers all of those large files on demand.

Whenever Git in your local repository encounters an LFS-managed file, it will only find a pointer - not the file's actual data. It will then ask the local LFS Cache to deliver it. The LFS Cache tries to look up the file by its pointer; if it doesn't have it already, it requests it from the remote LFS Store.
That way, you only have the file data on disk that is necessary for you at the moment. Everything else will be downloaded on demand.
Before we get our hands dirty installing and actually using LFS there's one last thing to do: please check if your code hosting service of choice supports LFS. Although most popular services like GitHub, GitLab, and Visual Studio already offer support for LFS, it's nothing to take for granted.
Installing Git LFS
LFS is a fairly recent invention and not (yet) part of the core Git feature set. It's provided as an extension that you'll have to install once on your local machine.
Installation is quick and simple:
- Linux: Debian and RPM packages are available from PackageCloud.
- macOS: You can either use Homebrew via "brew install git-lfs" or MacPorts via "port install git-lfs".
- Windows: Use the Chocolatey package manager via "choco install git-lfs".
To finish the installation, you need to run the "install" command once to complete the initialization:
$ git lfs installConcept
Good news if you're using the Tower desktop GUI: all recent versions of the app already include LFS. You don't have to install anything else!
Tracking a File with LFS
Out of the box, LFS doesn't do anything with your files: you have to explicitly tell it which files it should track!
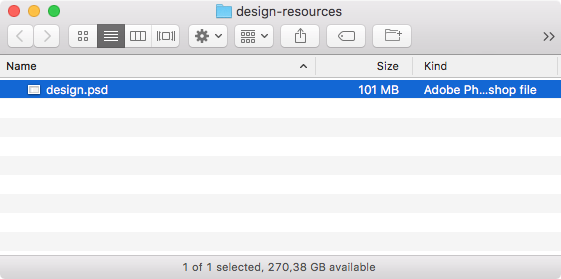
Let's start by adding a large file to the repository, e.g. a nice 100 MB Photoshop file:

With the "track" command, you can tell LFS to take care of the file:
$ git lfs track "design.psd"If you expected fireworks to go off, you'll probably be a bit disappointed: the command didn't do much. But you'll notice that the ".gitattributes" file in the root of your project was changed! This is where Git LFS remembers which files it should track.
If we look at it now, we'll be happy to see that LFS made an entry about our "design.psd" file:
design.psd filter=lfs diff=lfs merge=lfs -textJust like the ".gitignore" file (responsible for ignoring items), the ".gitattributes" file and any changes that happen to it should be included in version control. Put simply, you should commit changes to ".gitattributes" to the repository like any other changes, too:
$ git add .gitattributes
$ git add design.psd
$ git commit -m "Add design file"
Tracking Patterns
It would be a bit tedious if you had to manually tell LFS about every single file you want to track. That's why you can feed it a file pattern instead of the path of a particular file. As an example, let's tell LFS to track all ".mov" files in our repository:
$ git lfs track "*.mov"To avoid some slippery slopes, keep two things in mind when creating a new tracking rule:
- Don't forget the quotes around the file pattern. It indeed makes a difference if you write git lfs track "*.mov" or git lfs track *.mov. In the latter case, the command line will expand the wildcard and create individual rules for all .mov files in your project - which you probably do not want!
- Always execute the "track" command from the root of your project. The reason for this advice is that patterns are relative to the folder in which you ran the command. Keep things simple and always use it from the repository's root folder.
Which Files Are We Tracking?
At some point, you might want to check which files in your project you are effectively tracking via Git LFS. This is where the "ls-files" command comes in handy: it lists all of the files that are tracked by LFS in the current working copy.
$ git lfs ls-files
3515fd8462 * design.psd
Whenever you're in doubt if a certain file is really managed by LFS, simply assure yourself with the "ls-files" command.
When to Track
You can accuse Git of many things - but definitely not of forgetfulness: things that you've committed to the repository are there to stay. It's very hard to get things out of a project's commit history (and that's a good thing).
In the end, this means one thing: make sure to set your LFS tracking patterns as early as possible - ideally right after initializing a new repository. To change a file that was committed the usual way into an LFS-managed object, you would have to manipulate and rewrite your project's history. And you certainly want to avoid this.
Cloning a Git LFS Repository
To clone an existing LFS repository from a remote server, you can simply use the standard "git clone" command that you already know. After downloading the repository, Git will check out the default branch and then hand over to LFS: if there are any LFS-managed files in the current revision, they'll be automatically downloaded for you.
That's all well and good - but if you want to speed up the cloning process, you can also use the "git lfs clone" command instead. The main difference is that, after the initial checkout was performed, the requested LFS items are downloaded in parallel (instead of one after the other). This could be a nice time saver for repositories with lots of LFS-tracked files.
Working with Your Repository
Undeniably, the best part about Git LFS is that it doesn't require you to change your workflow. Apart from telling LFS which files it should track, there is nothing to watch out for! No matter if it's committing, pushing or pulling: you can continue to work with the commands you already know and use.
