When you're looking to enforce policies and ensure consistency among team members, Git Hooks can be a helpful solution. By running custom scripts before or after Git operations occur, you can prevent commits from being added to a repository and notify team members that there are changes needed to be made.
Let's see how this works in practice with Husky, a popular JavaScript package that allows us to add Git Hooks to our JS projects with ease.
How you use hooks is largely up to you, but there are a few popular use cases worth highlighting in this post. Let's have a look at five of them.
In this guide, you'll learn how to:
- Validate branch names.
- Run a linter to check commit messages.
- Run a linter to style/format committed code.
- Compress any images added to the project.
- Run Jest tests to ensure that nothing will break.
For this fun project, we'll be using a fresh installation of Gatsby, but any JavaScript project would do. Let's get started!
Getting Started with Husky
Like any node package, you can install Husky with npm or yarn:
$ npm install husky --save-devOnce installed, you will also need to run this command to enable Git hooks:
$ npx husky installFinally, let's edit the package.json file so that it automatically runs this last command after installation:
// package.json
{
  "scripts": {
    "prepare": "husky install"
  }
}
That's it! Husky is ready to be used on the command line, but we should also make sure everything is set up nicely in Tower, our Git client, as well.
Not a Tower user yet?
Download our 30-day free trial and experience a better way to work with Git!
Husky and Tower
When you have some Git hooks configured in Husky, you will get an error message in Tower when you attempt to add a commit. Something like:
.husky/pre-commit: line 4: npx: command not found
husky - pre-commit hook exited with code 127 (error)
husky - command not found in PATH=/Library/Developer/CommandLineTools/usr/libexec/git-core:/Applications/Tower.app/Contents/Resources/git-flow:/Applications/Tower.app/Contents/Resources/git-lfs:/usr/local/bin:/usr/local/sbin:/usr/bin:/usr/sbin:/bin:/sbin
Let's fix that!
As described here, this happens because GUI apps don't know the environment set up by your shell. To fix this, we will need to add an environment.plist file in ~/Library/Application Support/com.fournova.Tower3/ and define the PATH environment.
The location will vary depending on your environment. I'm using asdf-nodejs to manage my Node.js versions, so my environment.plist file looks like this:
<?xml version="1.0" encoding="UTF-8"?>
<!DOCTYPE plist PUBLIC "-//Apple//DTD PLIST 1.0//EN" "http://www.apple.com/DTDs/PropertyList-1.0.dtd">
<plist version="1.0">
  <dict>
    <key>PATH</key>
        <string>/usr/local/bin:/usr/local/sbin:/usr/bin:/usr/sbin:/bin:/sbin:/Users/brunobrito/.asdf/shims</string>
  </dict>
</plist>
After saving this file and restarting Tower, everything looks good to go.
Back to the command line — time for our first hook!
1. Validating Branch Names
This hook can be handy when you want to make sure that every branch name follows a specific pattern, such as starting with feature, fix, or release.
There's a little npm package that can help us in this process: validate-branch-name. It comes with nice defaults out of the box, that you can further customize with some regex knowledge.
First, let's install this package:
$ npm install validate-branch-name --save-devNow, let's add it to Husky as a "pre-commit" hook by running the following command:
$ npx husky add .husky/pre-commit "npx validate-branch-name"You'll notice that the npx validate-branch-name has been added to Husky's pre-commit file inside Husky's hidden folder (.husky/pre-commit).
Let's try it! Start by creating a branch that does not follow this naming convention, like "test". As soon as you add a commit, you will be presented with the following error message:
Result: "failed"
Error Msg: Branch name validate failed please rename your current branch
Branch Name: "test"
Pattern:"/^(master|main|develop){1}$|^(feature|fix|hotfix|release)\/.+$/g"
husky - pre-commit hook exited with code 1 (error)
Great! It's working as intended. Let's shift gears to commit messages.
2. Linting Commit Messages
If you already follow the guidelines from the Angular team, you're in luck: we'll use commit-msg-linter, a package that enforces them.
Setting it up is similar to the previous example. First we run the usual installation command...
$ npm install git-commit-msg-linter --save-devAnd now we'll add it to Husky (as a "commit-msg" hook this time):
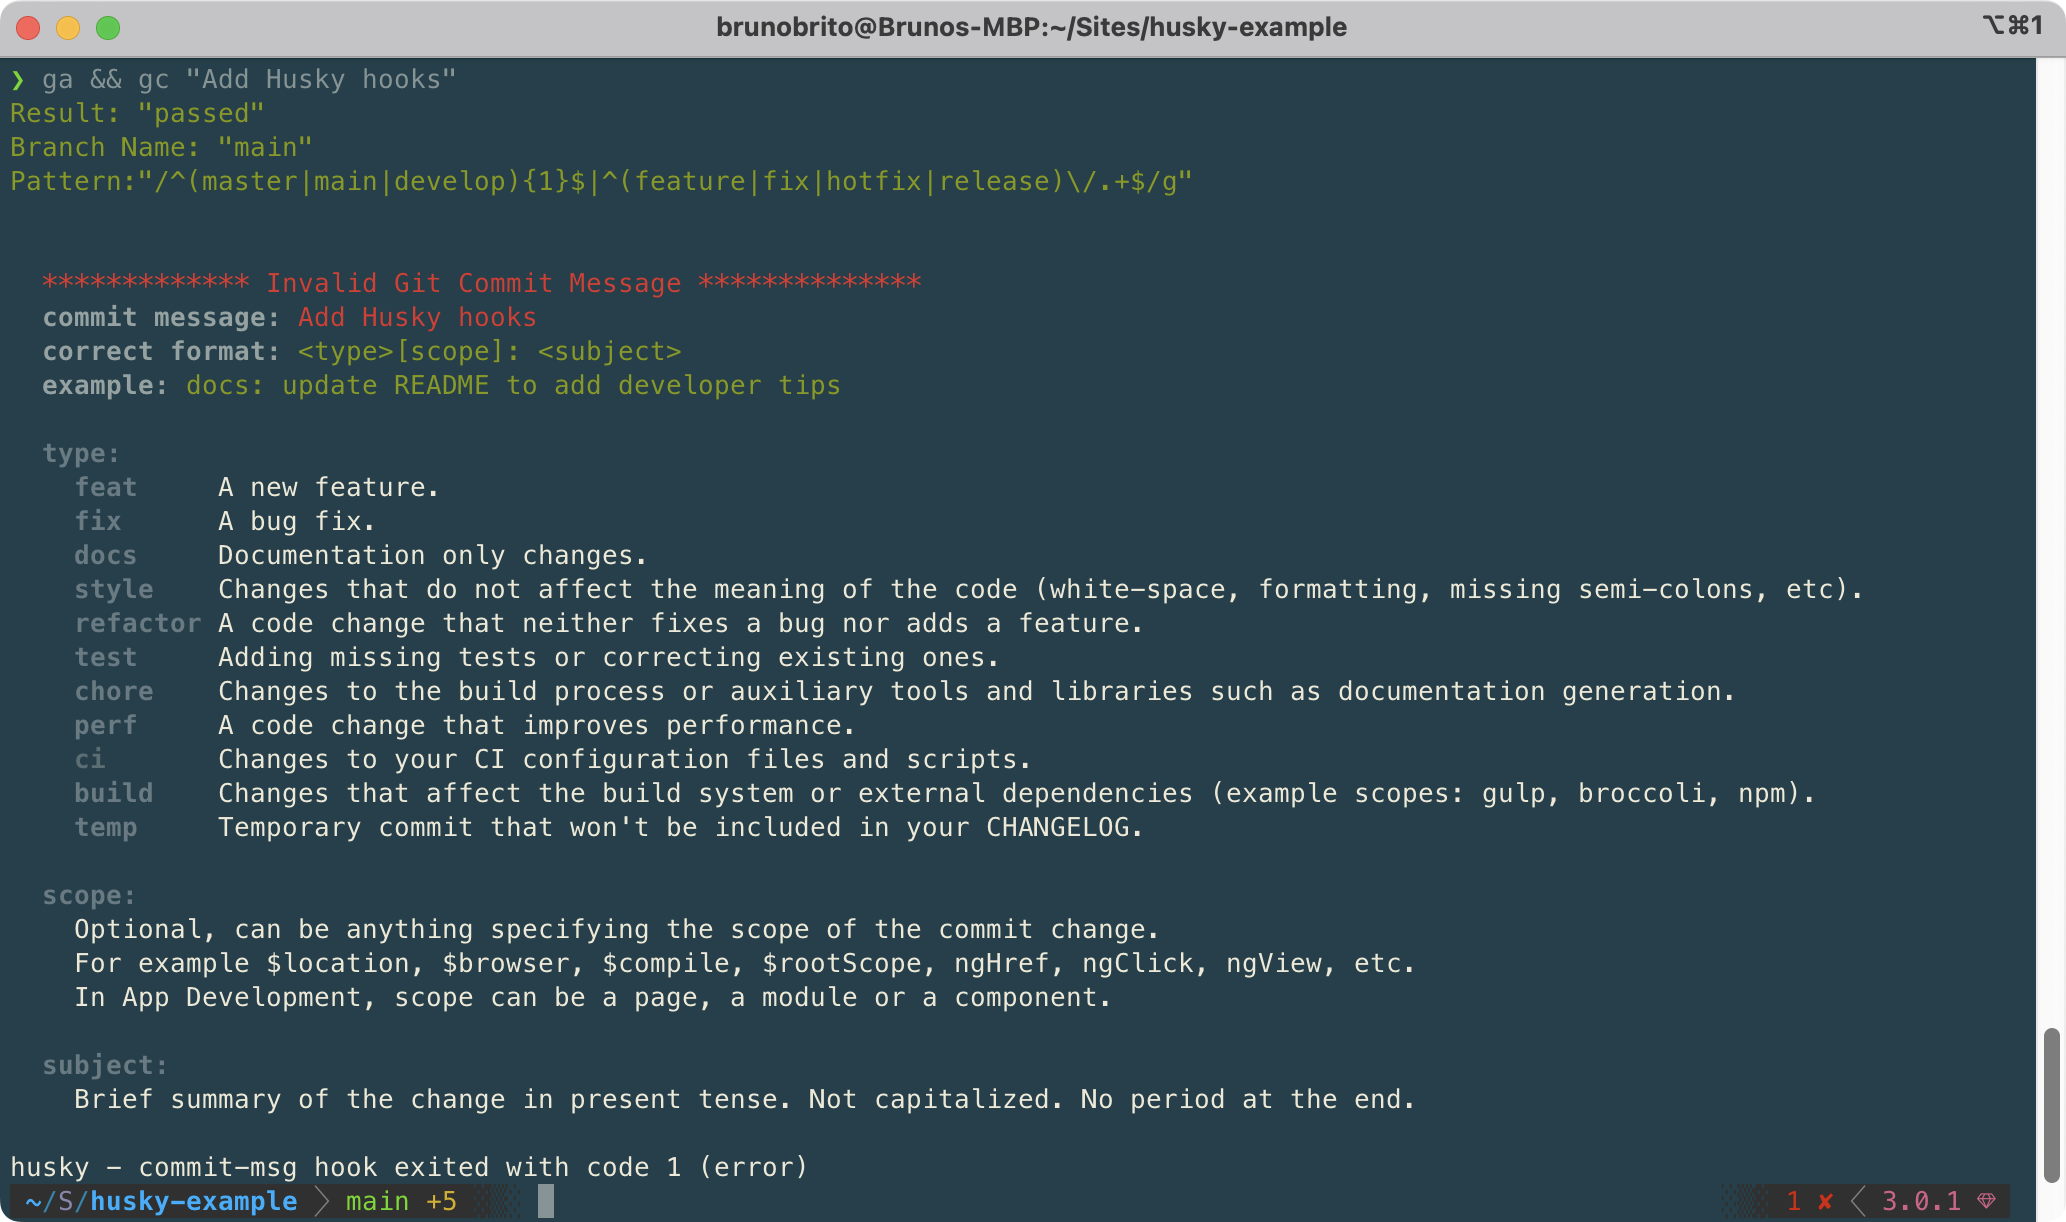
$ npx husky add .husky/commit-msg ".git/hooks/commit-msg \$1"To try it out, let's add a commit message that does not follow Angular's guidelines, such as "Add Husky hooks". The branch's name, main, is accepted, but the commit message isn't, so the commit is aborted:

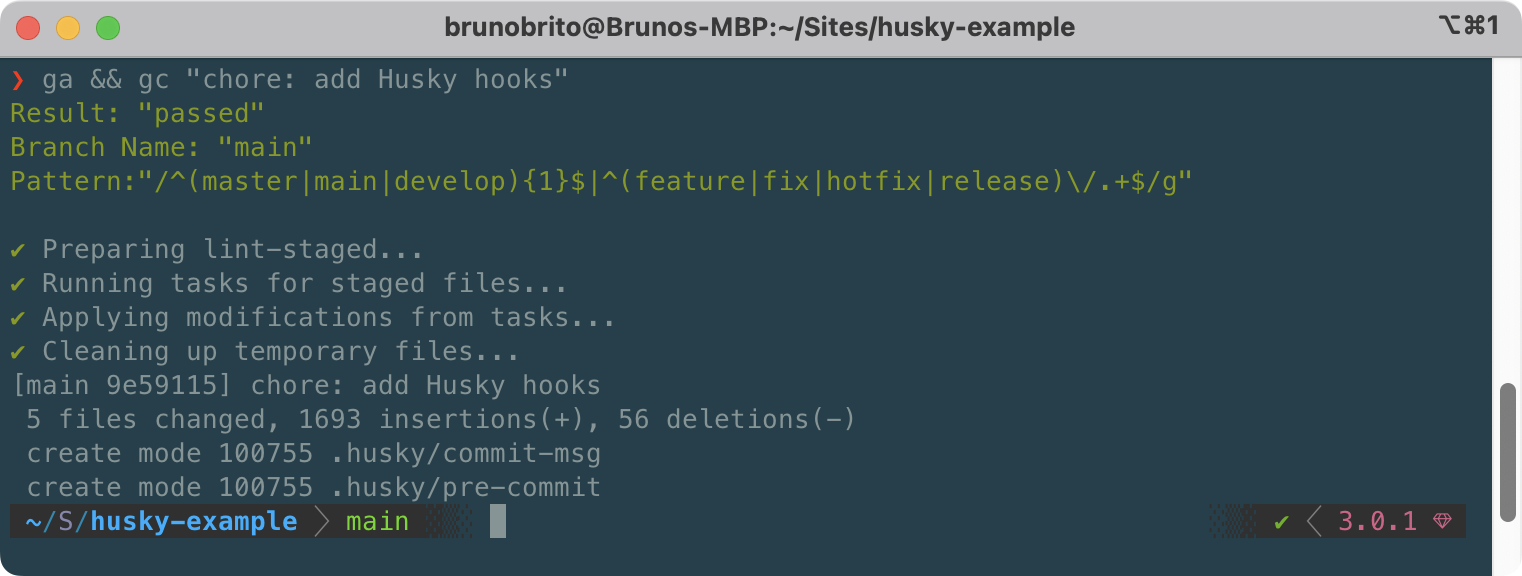
If we actually follow the Angular conventions, the commit will go through. Two down, three to go!
3. Linting Code
We're big believers that linters boost developer productivity, so let's make sure that any code submitted to the repository is properly linted.
We will use not one, but two node packages to achieve this task: lint-staged and Prettier.
lint-staged will be used to run checks on staged files (instead of checking the entire project). Then, Prettier will be responsible for the actual formatting and linting (you could definitely go for ESLint instead!).
Let's install both packages:
$ npm install lint-staged prettier --save-devNow, let's add the npx lint-staged command as a new line to the "pre-commit" hook:
$ npx husky add .husky/pre-commit "npx lint-staged"Finally, let's set up lint-staged in the `package.json file so that it runs Prettier on JS files:
// package.json
{
  "scripts": {
    "prepare": "husky install"
  },
  "lint-staged": {
    "**/*.js": "prettier --write --ignore-unknown"
  },
  ...
}
Done! Our JS code will be properly formatted before our commit is added.

Not a Tower user yet?
Download our 30-day free trial and experience a better way to work with Git!
4. Compressing Staged Images
While Gatsby does a great job at delivering the best possible images to the user, that's not always the case with other frameworks — and running tools like ImageOptim every time can be tedious and easy to forget.
Let's add a little script that automatically compresses any images added to the project. We'll use ImageOptim-CLI to accomplish this task. You can, of course, use squoosh or imagemin instead.
Let's first install it (globally):
$ npm install -g imageoptim-cliSince we only want to compress staged files, let's add the imageoptim command to lint-staged (ImageOptim is smart enough to only look for image file formats):
// package.json
{
  "scripts": {
    "prepare": "husky install"
  },
  "lint-staged": {
    "**/*.js": "prettier --write --ignore-unknown",
    "**/*": "imageoptim"
  },
  ...
}
That's all there is to it! ImageOptim will automatically launch, compress any images you had in the staging area, and close.
5. Running Tests
Last one! Let's install Jest to run tests by typing a command I'm sure you already know by heart:
$ npm install --save-dev jestNow, let's add a "test" script to our package.json file:
// package.json
{
  "scripts": {
    "prepare": "husky install",
    "test": "jest"
  },
  "lint-staged": {
    "**/*.js": "prettier --write --ignore-unknown",
    "**/*": "imageoptim"
  },
  ...
}
After adding a new JS file and a .test.js file with the actual test, we can run npm test to run Jest.
The output should look similar to this:
> jest

 PASS  ./sum.test.js
  ✓ adds 1 + 2 to equal 3 (1 ms)

Test Suites: 1 passed, 1 total
Tests:       1 passed, 1 total
Snapshots:   0 total
Time:        0.213 s
Ran all test suites.
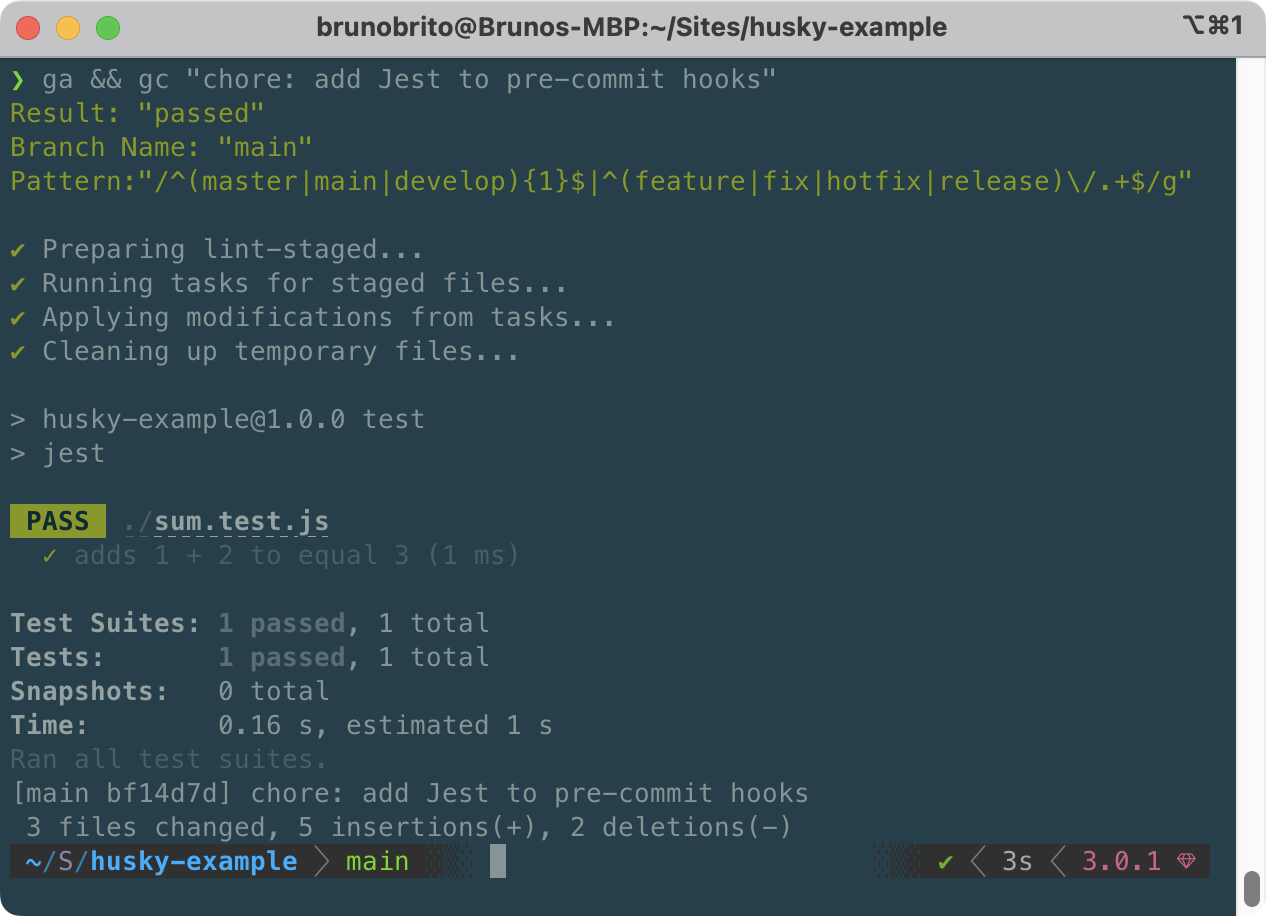
Finally, let's add our npm test script to our "pre-commit" hook by following the steps mentioned previously:
$ npx husky add .husky/pre-commit "npm test"Now, when we add a commit, all five hooks will run. A thing of beauty!

Hurray! We have successfully set up five different Git hooks! 🥳
While hooks can be helpful, there will be times where skipping the execution of these scripts can make sense. While it should be the exception, not the norm, let's figure out how we can bypass them.
Skipping Hooks
In the terminal, you can bypass hooks by adding the --no-verify option, like in this example:
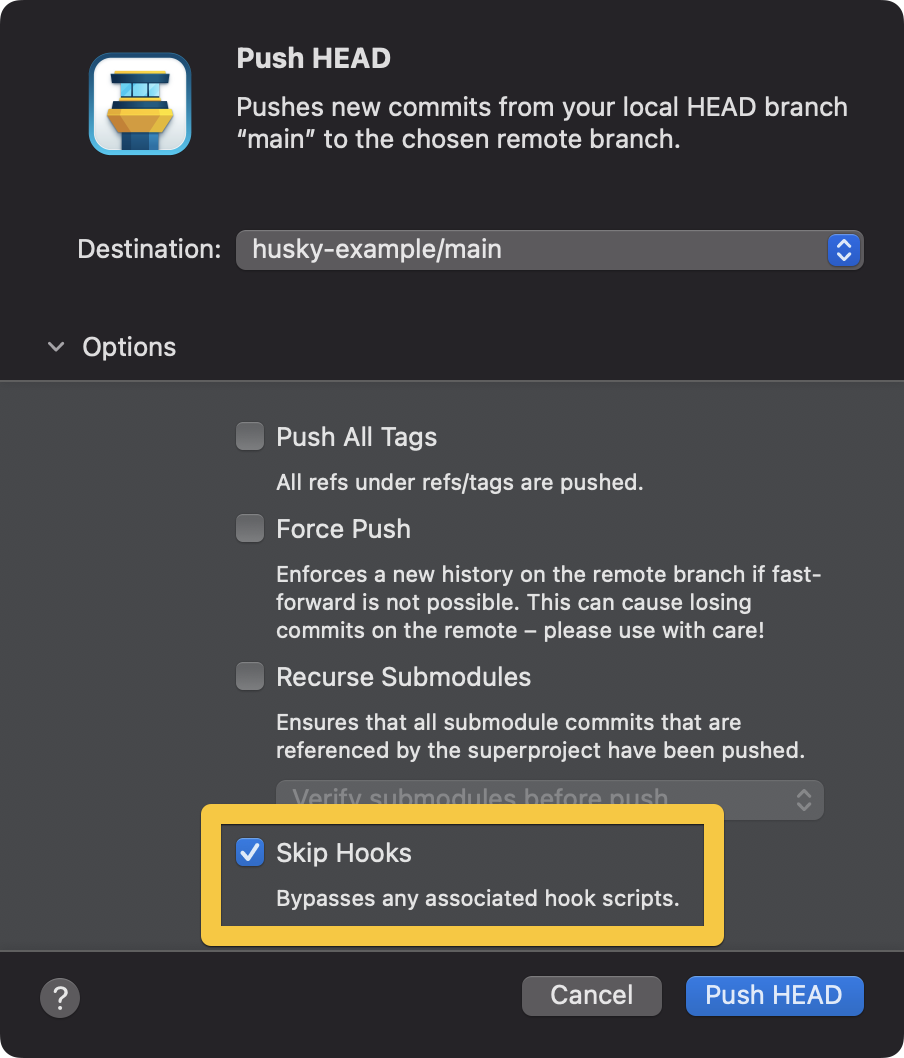
$ git commit -m "skipping hooks" --no-verifyIn Tower, you can easily skip the execution of hooks by checking the "Skip Hooks" checkbox in the "Commit Composing" window. The option will automatically be displayed if you have any "pre-commit" hooks configured.

To skip the execution of hooks for push, pull, merge, rebase, and apply operations, click on "Options" to access the list of additional options.

Final Words
When it comes to automation, each case is unique, and the sky is the limit — hooks are no exception. We hope you found this post useful to get started with Husky!
For more tips, don't forget to sign up for our newsletter below and follow Tower on Twitter and LinkedIn!
Join Over 100,000 Developers & Designers
Be the first to know about new content from the Tower blog as well as giveaways and freebies via email.
