Apple's operating system is known for its sleek design and intuitive user interface. However, many users may not be aware of some of the hidden features that can greatly enhance their Mac experience. From advanced keyboard shortcuts to hidden settings, there are plenty of tricks and tips that can make using a Mac even more efficient and enjoyable. In this post, we'll explore some of the lesser-known features of MacOS and show you how to take full advantage of them.
At Tower, we're all big fans of Apple's operating system. It has come a long way (check out our Illustrated History of macOS to see how it has evolved), but before the WWDC events, we're still very excited to see what new features will be added.
We asked around and put together a comprehensive list of the best macOS tips worth knowing. This guide has something for everyone; while some tips may not impress advanced users, we'll go over some of the newer features of Ventura, as well as some hidden gems, so you'll likely learn something new even if you're a Mac enthusiast.
Let's get started!
New Series: "10% More Productive"
This is part 6 of our series titled "10% More Productive". Be sure to check out our tips on:
- Mastering the Keyboard
- Mastering Sublime Text
- Mastering the Terminal
- Mastering Tower for Mac
- Mastering Google (for Developers)
- Mastering macOS ← you are here!
- Mastering SEO for Developers
- Mastering Tower for Windows
Sign up for our newsletter to get notified about the next episode!
1. Unlocking Extra Powers with the Option Key (⌥)
The Option key (⌥) can reveal additional features in the menu bar of many apps. Next time you open an app, try holding down the Option key to see if any new functions are presented to you — Safari and Finder are good examples.
The toolbar buttons can also behave differently. As a native Mac app, Tower, our Git client, also has some tricks up its sleeve. By holding down the Option key, you can access additional options, such as a quick Fetch or a quick Pull.
Drag and drop can also behave differently; in Finder, holding down the Option key while dragging a file will copy that file instead of moving it (which is the default behavior when working within the same disk volume). This can be useful if you want to keep the original file in its original location while creating a duplicate in a new location.
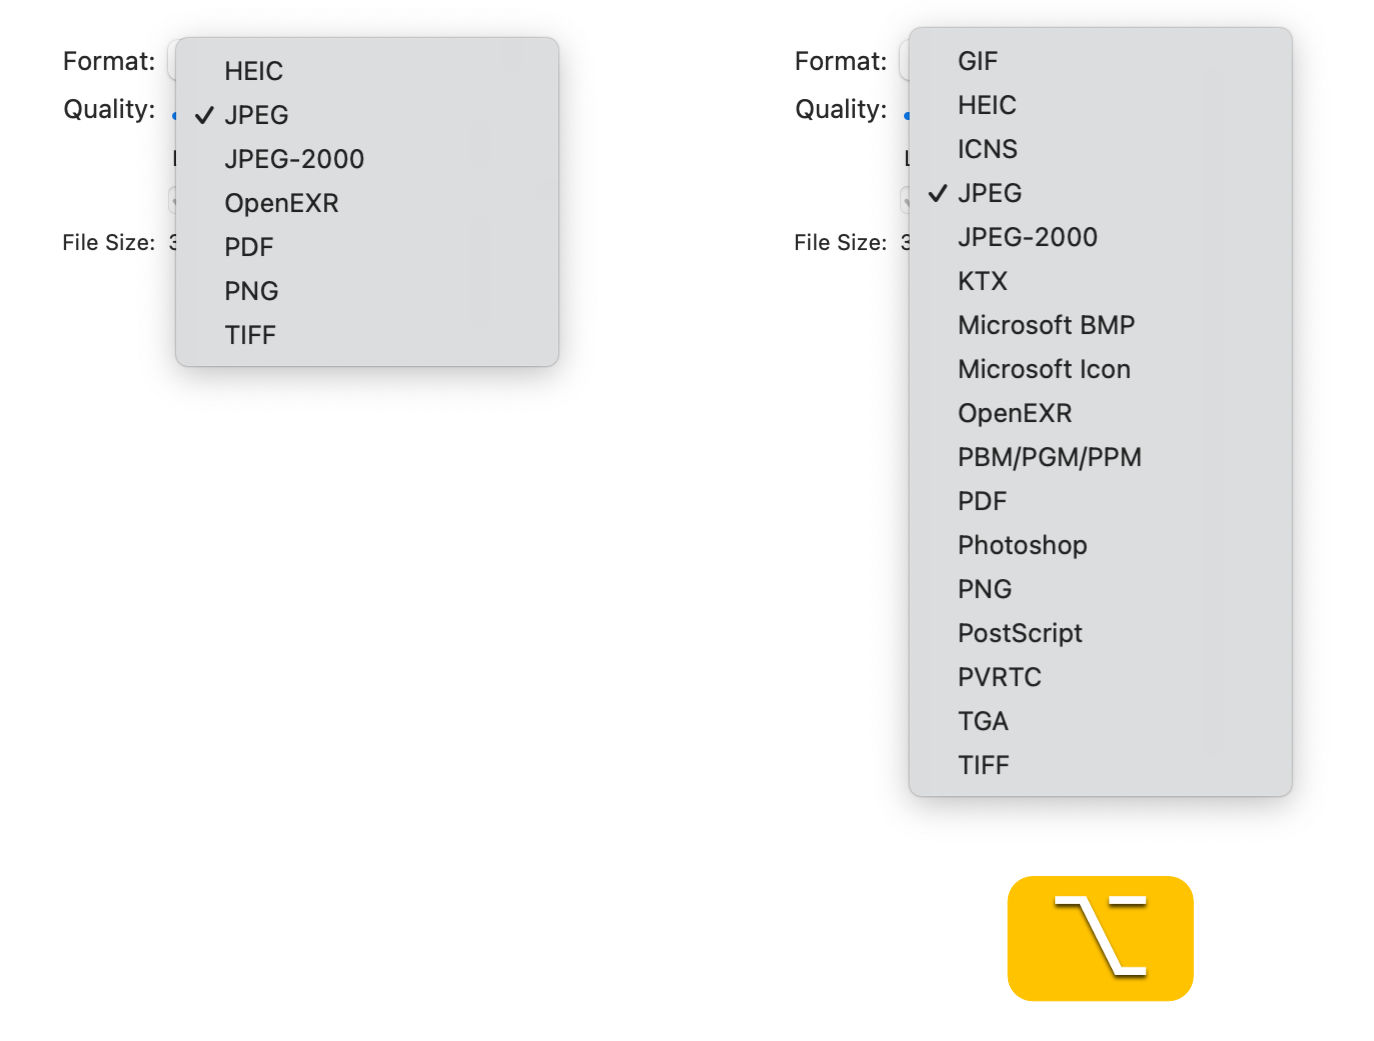
Even dropdown menus can present different options when the Option key is held down while clicking. One of my favorite Easter eggs in Preview is when you are about to export a file and hold down the modifier key while clicking the "Format" dropdown. You will be presented with more file types than before.
In the Dock, you can Option-click any app icon to reveal a "Force Quit" action.
This modifier key is so versatile that it can even be used for typing special characters! By holding it down while typing, depending on your keyboard layout, you can access a wide range of additional characters, making it a great tool for anyone who needs to type special characters frequently.
Last but not least, the items in the menu bar can also surprise you with some powerful hidden features! Here is what happens if you hold down the Option key:
- The clock will toggle "Focus" mode.
- The sound icon will allow you to select your input devices in addition to the outputs.
- The Wi-Fi icon will present you with additional network information (the same applies to the Bluetooth icon).
As you can see, the trick is to keep experimenting! Keep pressing that Option key and see what you can uncover.
2. Editing Images, Video, and Audio with Quick Look
Chances are, you're probably already familiar with Quick Look — it's heavily praised by the Mac community, and for good reason. If you want to give it a try, simply press SPACE while selecting a file in Finder to quickly preview it.
Quick Look works with many different file formats, and what's cool is that it brings extra features to some of them. Images are a great example: you can rotate them or add annotations without opening any other app.
But there's more!
Background Removals
Ventura comes with new machine learning algorithms that are capable of detecting and copying subjects within images, while removing the background.
To try it out, just open a picture in Quick Look and right-click on it. A "Copy Subject" option should appear and, if selected, you will see a glowing selection surrounding the subject. You can then paste the subject on a different app.
This is not exclusive to Quick Look — you can use this feature in Photos or Safari as well ✌️
Editing Video and Audio
You can also rotate videos or even trim them! This also works with some audio file formats, such as WAV or AIFF. The option is easy to miss, but it's definitely handy if you want to do some quick editing without launching a dedicated app.
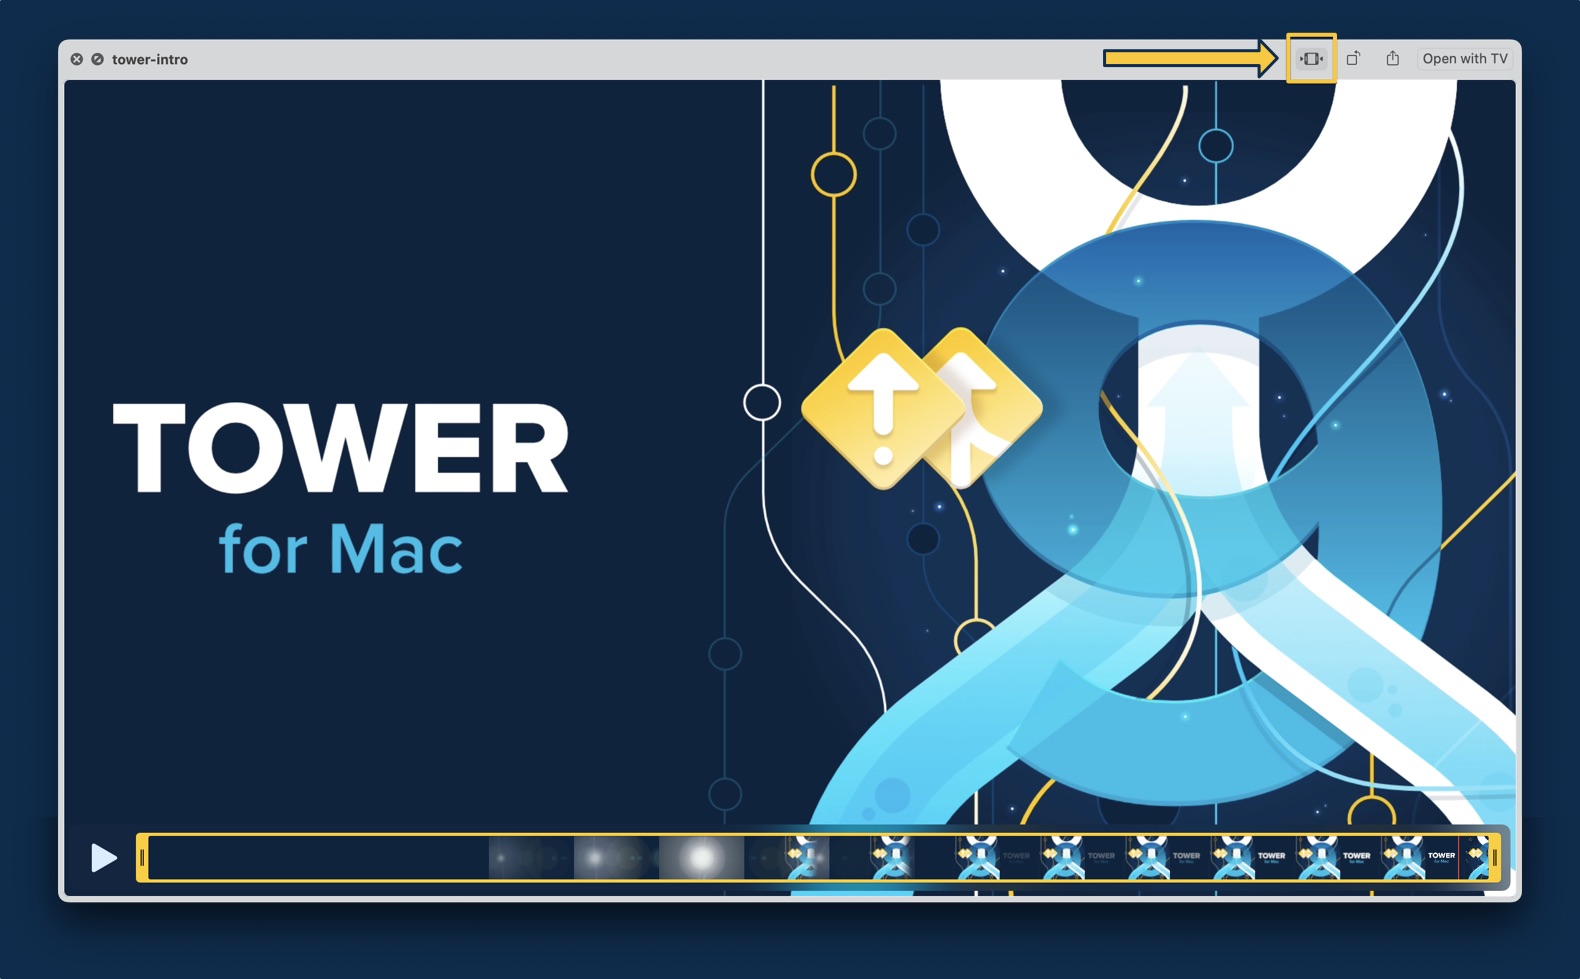
As a bonus tip, if you drag another video to the window, they will be merged.
3. The Hidden Powers of the Accessibility Settings
While designed for users with disabilities, the accessibility features listed here can be leveraged by anyone to increase productivity.
Enabling Dragging Without Drag Lock
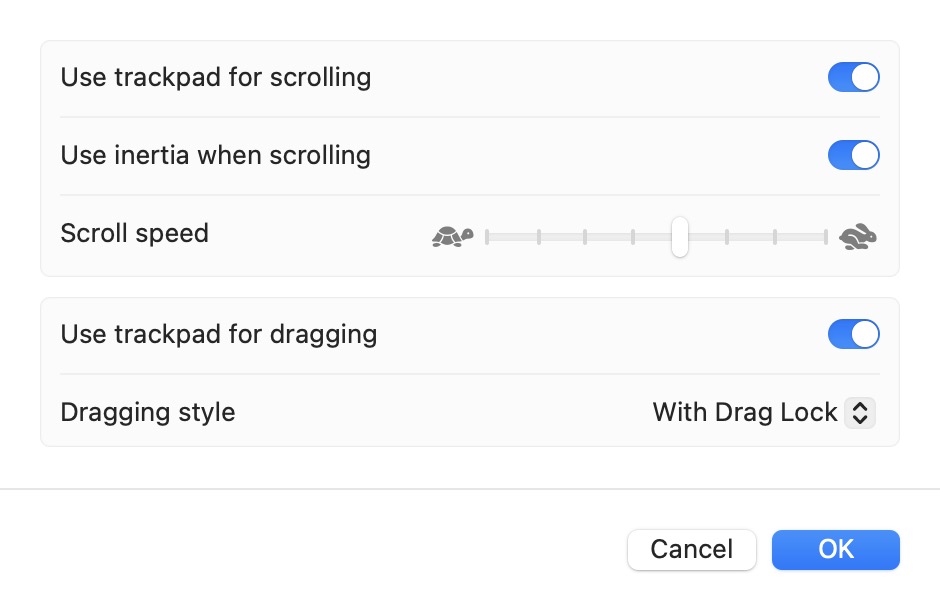
Drag and drop fans will enjoy this one. By enabling "drag lock", you will be able to lift your finger and continue dragging windows or items. After double-tapping, keep moving your finger and you'll notice you can drag anything without holding the trackpad down. It may take some getting used to, but it's worth trying.
You can enable this option by going to System Settings > Accessibility > Pointer Control > Trackpad Options.
Live Captions to Convert Audio to Text
If you have an Apple Silicon chip and macOS Ventura or later, you may be able to take advantage of a useful feature called Live Captions (it is not yet available in all languages and countries).
If you meet the requirements, you're in for a treat! Live Captions can generate real-time captions for media playback or microphone input. Additionally, it can also convert typed text to speech.
To enable this feature, head over to the "Accessibility" settings and click on "Live Captions". Keep in mind that you will need to download additional language data from Apple's servers.
Live Captions will be at your service whenever you play a video or audio clip that contains speech, so it can come in handy even if you don't have a hearing impairment (such as when you just want to keep the volume low). It even works in FaceTime group calls.
You can use the "Live Captions" icon on the menu bar to tweak some settings, including the input source; if you switch from "Computer Audio" to "Microphone" there, you can convert your voice to text on the go!
Playing Relaxing Background Sounds
Did you know that macOS can generate background noise? Some folks love the sound of rain or white noise to get things done.
Inside the "Accessibility" settings, go to "Audio" and enable "Background sounds". You should hear some noise right away.
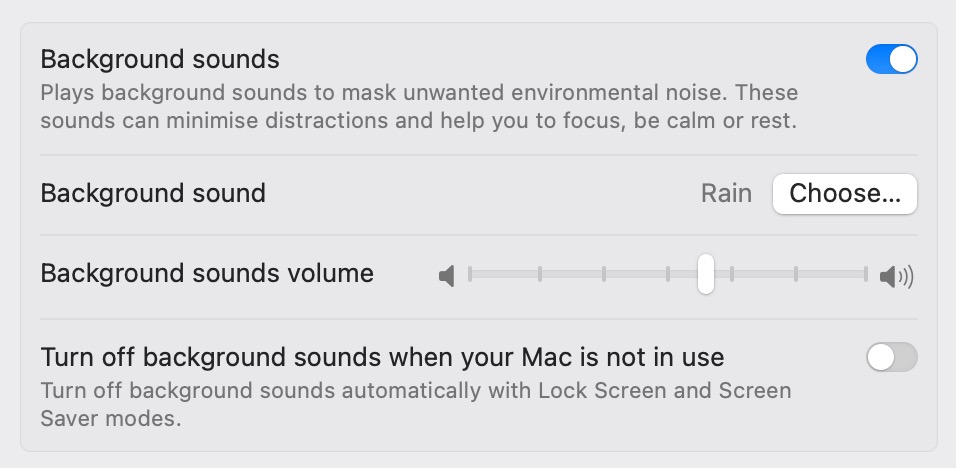
"Rain" should be the default sound, but you have other options, like "Ocean" or white noise variations.
Zooming In and Out
This feature is extremely useful when giving presentations and you need to zoom in, either because something is too small or you want to declutter your screen.
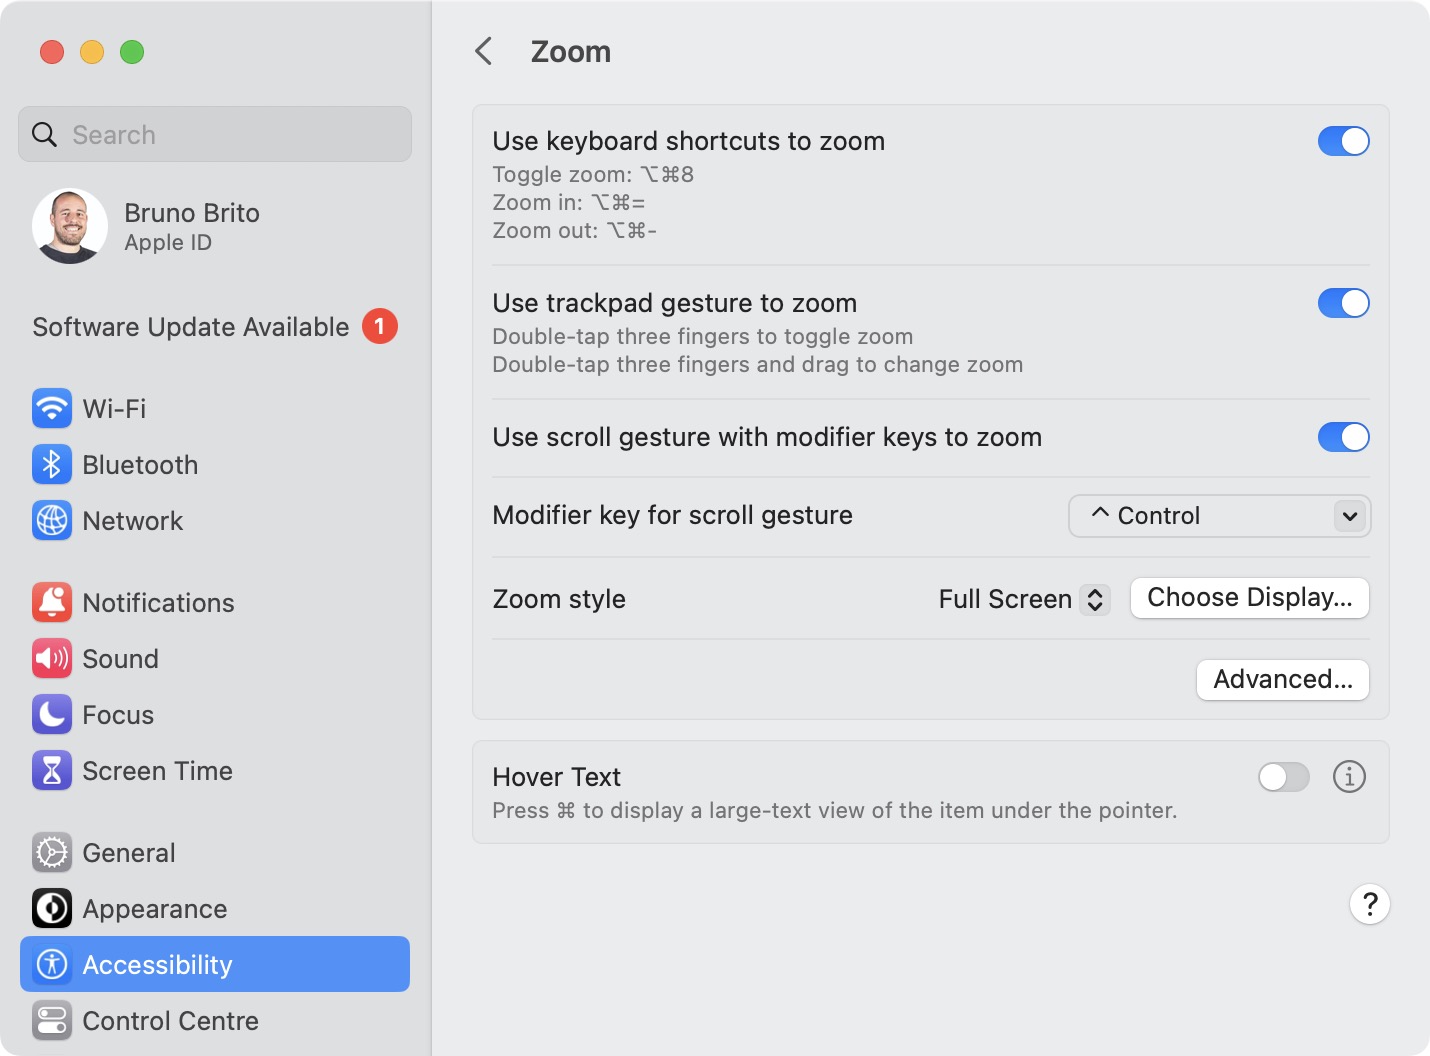
It gets much easier to toggle this feature on and off if you set a modifier key. To achieve this, go to "Zoom" under the "Accessibility" settings (I personally use the CONTROL key as my shortcut).
Now, to use this feature, simply place the cursor on the area you want to focus on, hold down the hotkey, and use two fingers on the trackpad to scroll up and down to zoom in and out of the screen, respectively.
4. Automating Repetitive Tasks with Automator
Just like Tower automates the boring stuff of Git (such as fetching, stashing, and updating Submodules), Automator can save users a significant amount of time and effort.
Not a Tower user yet?
Download our FREE trial and experience a better way to work with Git!
With the help of a Graphical User Interface, you can create a series of Workflows or Quick Actions that perform custom repetitive tasks, such as file conversions, image resizing, or PDF creation.
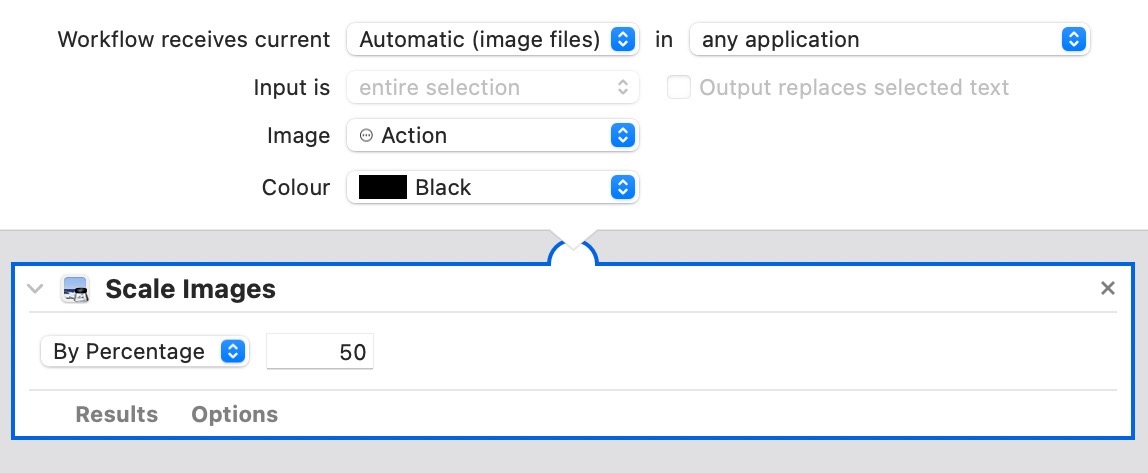
Here is a simple workflow that I often use to quickly scale an image to half its size. After saving it, I can right-click any image and find the new option under "Services". Look how simple it is!
Automator is a popular choice for image format conversions, but if that's all you're looking for, you can quickly convert an image to JPG, PNG or HEIF by right-clicking an image in Finder and selecting "Quick Actions > Convert Image". You can also pick a different size if you prefer.
5. Keyboard Shortcuts
By providing quick access to frequently used commands or features through a few keystrokes, keyboard shortcuts can significantly enhance productivity and efficiency.
We recommend starting by mastering "universal" keyboard shortcuts, i.e., those that can be used on almost every macOS application or that are reserved for the Operating System. Good examples would be ⌘ + T to open a new tab or ⌘ + , to open the "Preferences" window of the current active app.
Apple's official list is a great starting point. There are still some shortcuts missing though. For instance, did you know that you can press 1, ↑ or ↓ while performing ⌘ + TAB to reveal other windows of the same app? That's pretty handy!
Working with Files
You probably spend a lot of time opening or saving files. ⌘ + ⇧ + G is one shortcut worth memorizing, as it presents you a location bar from which you can type the directory you want to go to.
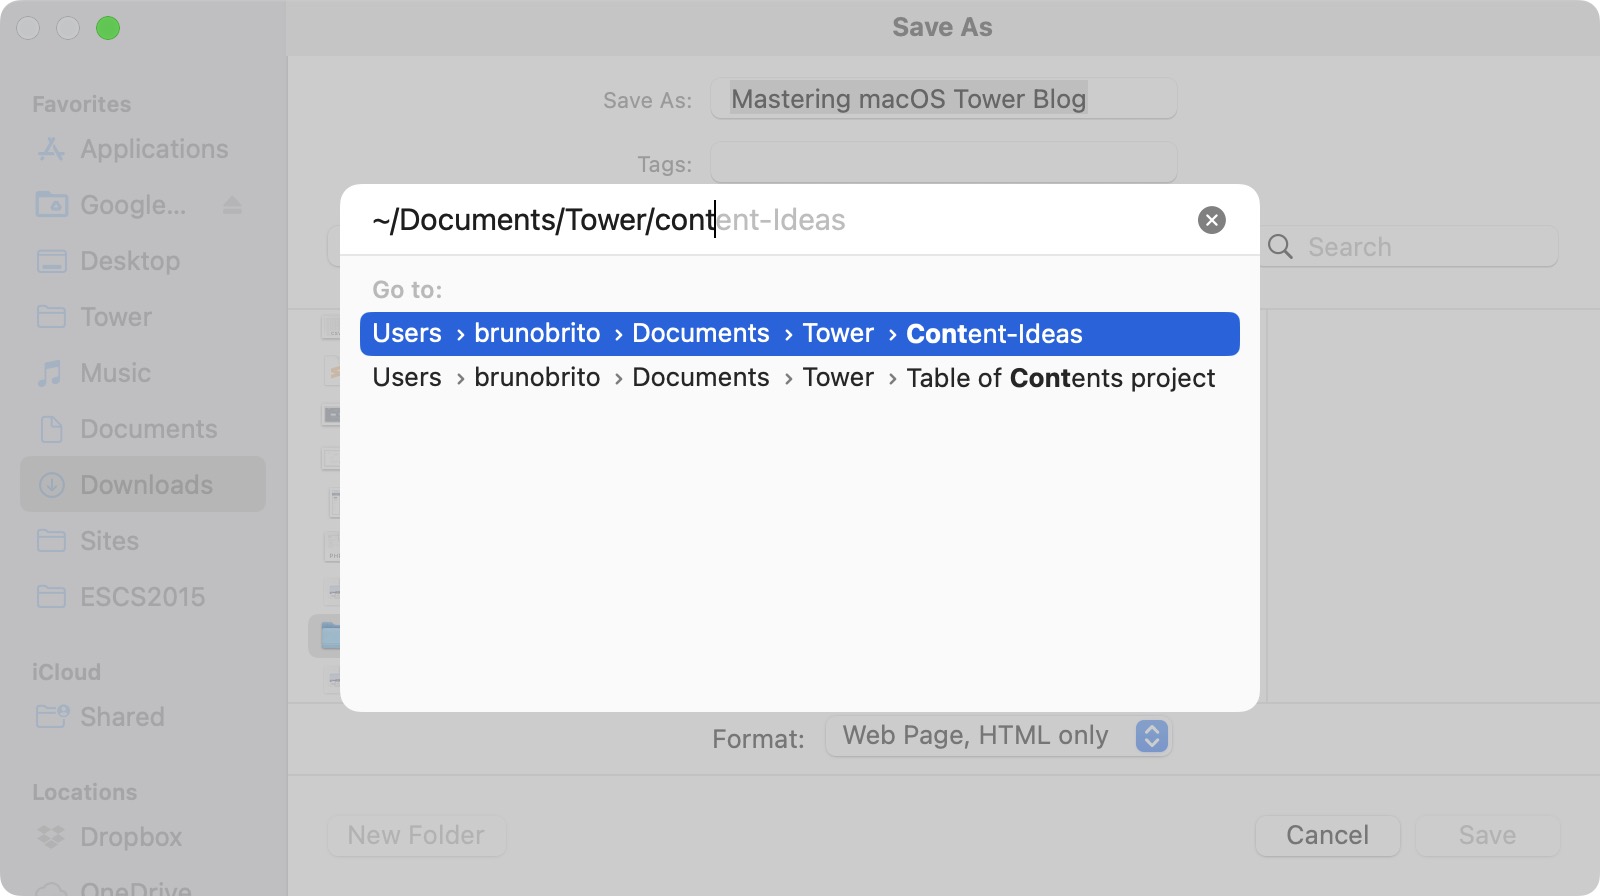
I'm also a fan of ⌘ + R, which will instantly reveal the selected file/folder in a new Finder window. Then, there are some more specific ones, such as:
- ⌘ + ⇧ + D to select "Desktop" as the destination folder.
- ⌘ + ⌥ + L to select "Downloads" as the destination folder.
- ⌘ + ⇧ + O to select "Documents" as the destination folder.
- ⌘ + ⇧ + I to select "iCloud Drive" as the destination folder.
All these tips work in Finder, too. But my favorite Finder tip is that ⌘ + ⌥ + C will copy the file's path to the clipboard.
Finally, when working on a document, you can click and drag the document icon from the top of the window title bar to make a copy or attach it to an email.
Adding a Custom Icon to a Folder
To easily identify the folders you usually work on, you can replace the default blue folder icon with custom ones.
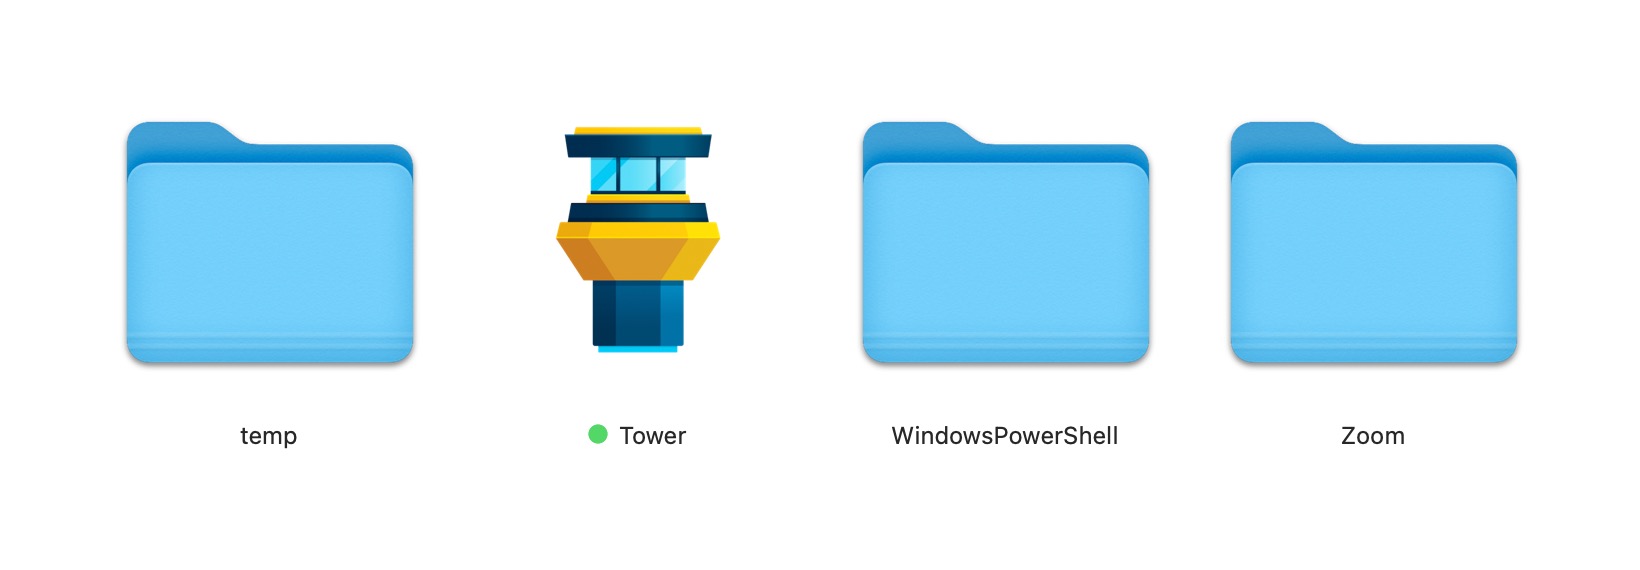
To add a custom icon to a folder, start by right-clicking the folder, selecting the "Get Info" option, and locating the folder icon. Then, if you have a ICN file, all you need to do is drag and drop that icon to the folder, replacing it.
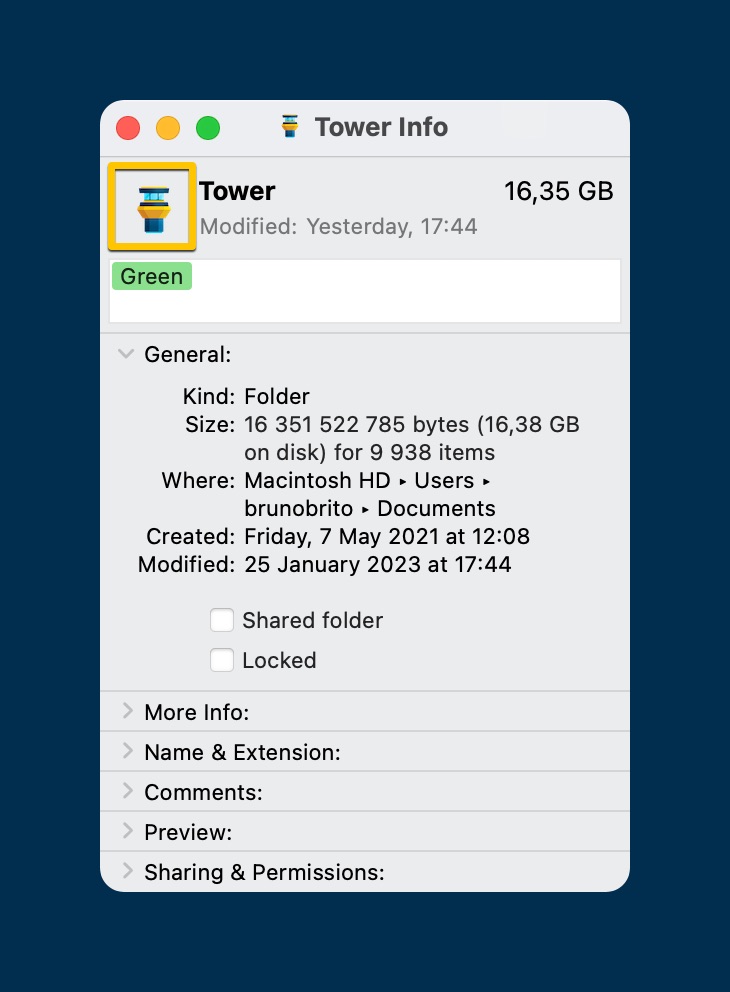
If your icon is a PNG or JPG file, there's an extra step: you’ll have to open it in Preview first, copy it, and then paste it into the folder info window.
Screenshot Tool - Easter Eggs
The Screenshot tool can also surprise you every now and then. Most Mac users know that ⌘ + ⇧ + 3 takes a screenshot of the entire screen(s), while ⌘ + ⇧ + 4 is useful to capture just specific portions. If that sounds like too much to memorize, you can access all these options by pressing ⌘ + ⇧ + 5, which will also be your best friend for screen recordings.
That's far from it, though. If you're capturing a portion of the screen, you can hit SPACE to take a screenshot of the highlighted window, complete with a drop shadow and a transparent background (if you don't want the drop shadow, press the Option key ⌥ before the final click).
Here are some more nuggets:
- Hold SPACE while drawing a capture area to reposition it.
- Hold ⌥ while drawing to resize the capture area in all directions.
- Hold ⇧ while drawing to only expand/contract the selection in one direction.
Creating Custom Keyboard Shortcuts
You can create your own custom keyboard shortcuts without the need of an external app. To do this, go to System Settings > Keyboard and click on "Keyboard Shortcuts".
You can set app-specific shortcuts that you feel that are missing by typing the exact command and the desired key combination — we explain how in detail here.
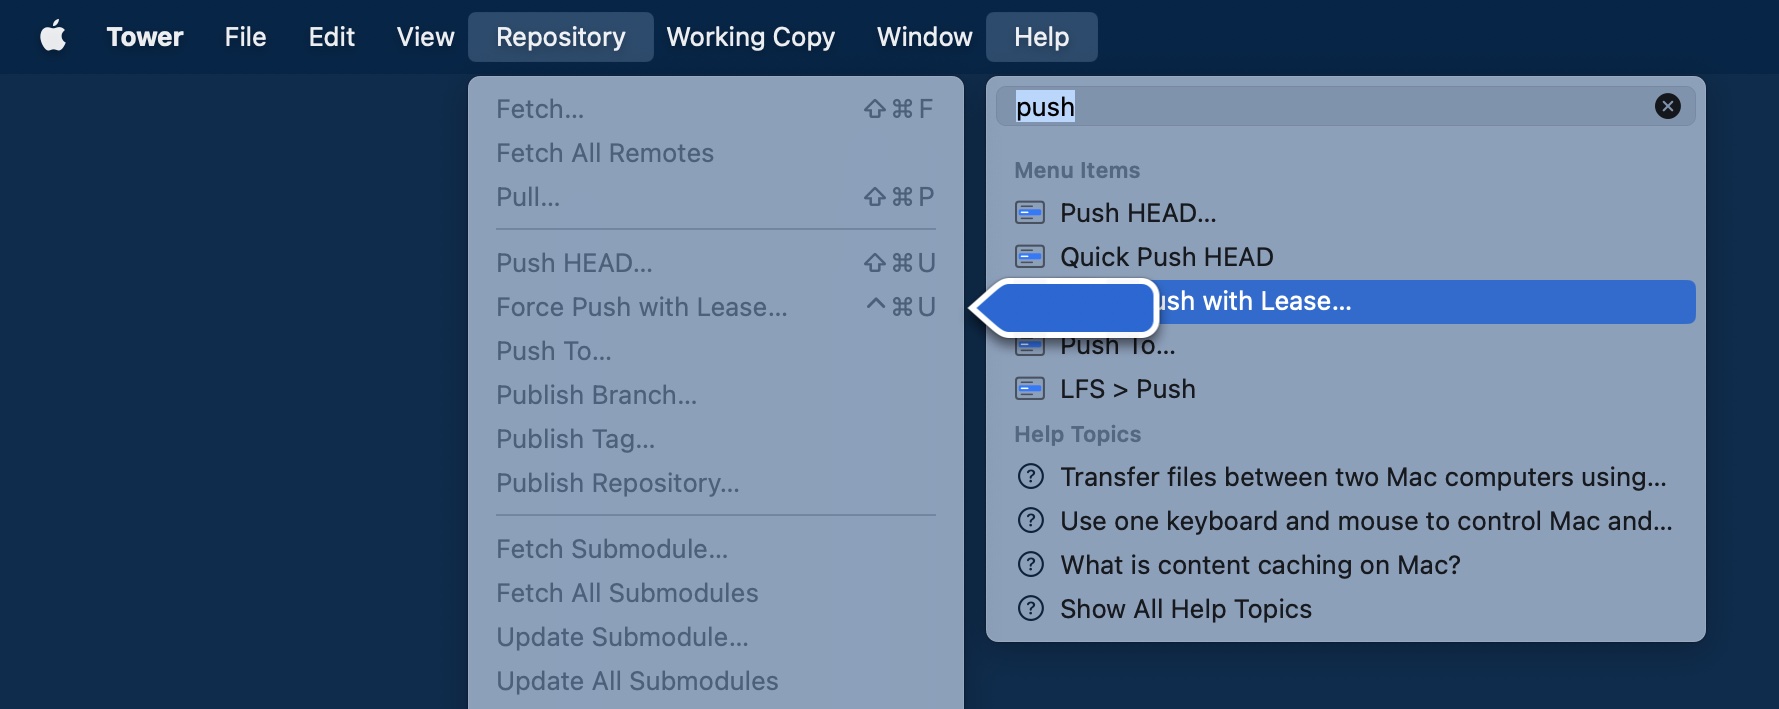
For more information, you can also look for the command in the "Help" section in the app's menu. Search for any word and identify the command you're looking for. macOS will tell you where that item is located with a big blue arrow and show you any associated shortcuts.
Final Words
Mastering the many features and shortcuts of macOS takes time and discipline, but it can greatly enhance your productivity and workflow! We hope that this collection of tips has inspired you to keep exploring and optimizing your use of the Mac.
It doesn't matter how long you've been using a Mac — there is always something new to discover in this wonderful operating system. The secret is to keep experimenting! 💪
Thanks for reading and happy exploring! For more productivity tips, don't forget to sign up for our newsletter below and follow Tower on Twitter and LinkedIn!
Join Over 100,000 Developers & Designers
Be the first to know about new content from the Tower blog as well as giveaways and freebies via email.
