Git is an incredibly popular tool for developers, and for good reason. The way it tracks changes to files and enables large teams to collaborate easily deserves a lot of praise; however, the general public still does not know what Git is for, how they can benefit from it (without learning how to code), and what is GitHub's role in all of this.
That includes Marketing professionals. So, today, let's change that.
A Marketing team can work on multiple projects every day. They can be busy planning events, creating content for the website, updating spreadsheets or defining which images to use in their next campaign. Some tasks take a couple of hours, while some others can spread over a couple of months.
Git can help any team in the development of long or short-term projects. As a member of a marketing team, here are some tasks that Git can facilitate:
- Creating documentation;
- Writing and publishing blog posts;
- Managing Media Assets (images and videos).
But why take the time to learn yet another tool? Git has 3 advantages that you may find valuable:
- Better organization: say goodbye to
document.docx,document_updated.docx,document_03102022.docxanddocument_final.docx. You will work on a single file and Git will keep track of all the changes. Need to go back in time to recover a previous version? Git has your back. - Greater autonomy: you won't need to ask someone in the development team to make a simple change to the website, such as editing the title or replacing the image. As long as you know where the files are located, you're ready.
- Faster workflows: no more email requests or tapping on the shoulder. You can work directly in the project with confidence, knowing that it is very hard to mess things up with Git (you can quickly revert to the previous state). Any project can develop faster this way.
Now that you are aware of Git's advantages and use cases, it's time for a deep dive. Like many other tools, there's a bit of a learning curve, but fear not: this guide includes everything to get up and running.
Git can be used in the Terminal or with the help of a GUI (a Graphical User Interface). We will use the latter: our own tool, Tower, which will provide some important visual aid and useful features such as drag and drop, so that you can focus on what matters. The outcome will be the same as if you were using the Terminal, but the process will be a lot easier.
Let's get started!
1. How Git Works: An Introduction to Version Control
When learning about Git, the first word that should belong to your Git glossary is "repository". A repository works like a folder where you usually store your entire project (a website, for example).
Once the repository is initialized, Git will keep track of every new file you create inside the folder, or any changes made to existing files. When you're happy with the progress you've made, you can record a snapshot of your project.
Git works like a Time Machine: as your project gets more complex, you will be able to go back in time to view the status of the project at any point. Those snapshots are vital to time travel.
The way you record these snapshots is by adding "commits". We recommend you commit often, introducing slight changes each time, so that it will be easier to understand the differences when reviewing the project later. Your future self will thank you for that, as well as your team members!
Let's see how this works in practice: time to launch Tower. If you don't have Tower installed, you can download our 30-day free trial to follow along.
Tower is available for both macOS and Windows. We will use the macOS version in this guide, but you can accomplish the tasks described here in either version.
2. Getting Started with Git in Tower
Let's start with a basic task: we will write a blog post in Markdown format, add a featured image, and commit the two files. Then, we will make some modifications to the image and commit those changes to the project.
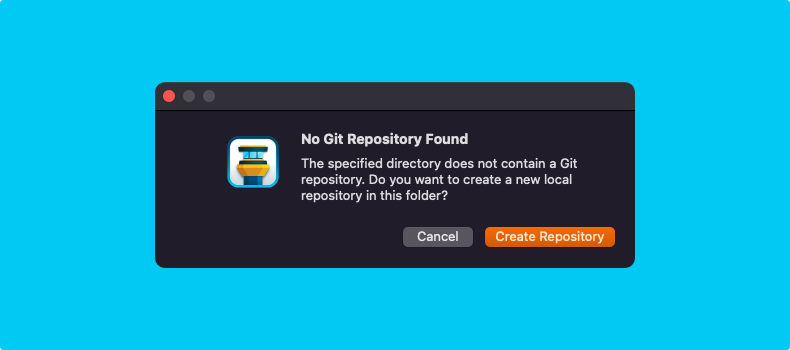
First, we will create an empty folder — I named it blog-example — and then open it in Tower, by going to "File > Open" and locating it. Tower will warn you that this is not a Git repository yet, so let's click on "Create Repository" to make this conversion.
Now, let's create our first file. Since it's a blog post in Markdown format, I named it learning-git.md. I also created a very simple featured image for this post. Both files are new to the repository, so Git is now monitoring them.
Time for our first commit! In Git, you need to tell explicitly which of your modifications shall be part of the commit. We call this "staging" our changes.
In Tower, staging couldn't be easier. Simply check the box of each file you want to stage. With text documents, you can even stage specific lines (instead of staging the entire file), but we will keep it simple: let's stage both files and type our first commit.
Commits should have a very descriptive message and are usually written in the imperative, present tense. "Add Learning Git blog post + featured image" should work nicely in this case.
Now, let's make a change. I will replace our featured image with a new one, with different colors. If I go back to Tower and select the image file, I can quickly see the difference between the old image and the new one.
The Image Diff feature is very helpful and works with all the most popular image formats (PNG, JPG, GIF, BMP, TIFF, JPEG2000, and HEIC).

For some file formats, such as PDF or DOCX, you will need to install a diff tool to view the "before and after". Here are our recommendations for macOS and Windows — Tower supports the most popular ones.
Finally, let's commit our change. "Replace Featured Image" seems like a good commit message for this one.
If you then head over to the "History" tab, you will see your entire commit history. We don't have a lot going on yet, but this will be a valuable tab in the long run. On the right, you can see the list of files that were modified and other interesting bits of information, such as the author and time of the commit.
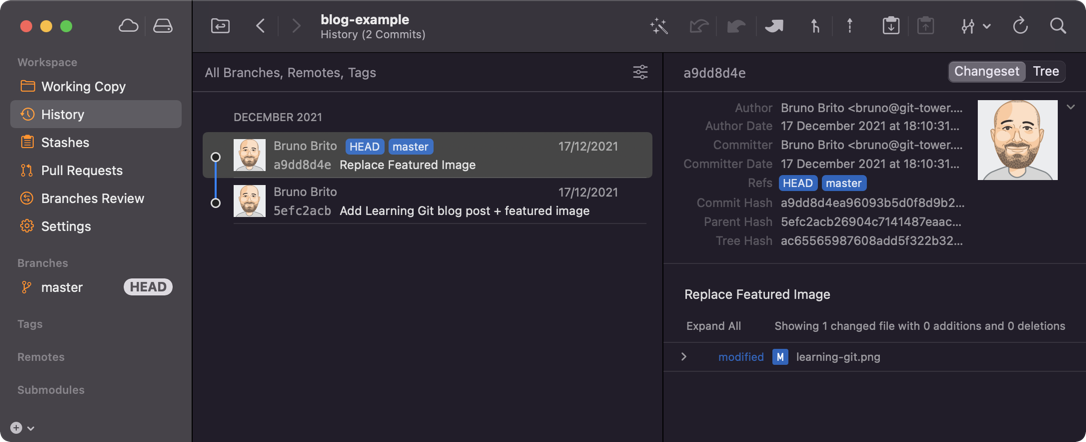
If you ever need to retrieve an earlier version of your work, click on the commit that has the version you are looking for, and right-click the file you want to recover. Choose "Export [file] at revision [revision]" and a location to place the file.
Congrats! You now understand the basics of Version Control! 🎉
On to the collaboration part...
3. How Git and GitHub Work for Collaboration
Many people can contribute to a single repository — we just need a cloud-based hosting platform so that everyone can work together on projects and keep everything in sync. That's where GitHub (or a similar platform, like BitBucket or GitLab) steps in.
You can upload your project to GitHub so that the entire world can see it, or make it private so that only your team can access it. Anyone with access to it can download the entire project (known as "cloning" the repository), saving everyone the hassle of emailing ZIP files back and forth.
"Clone" creates a linked copy that will stay in sync with the repository. This means that you can add commits to the repository right away. "Fork" is a slightly different action, that also downloads the entire repository, but keeps it completely independent — this is the best solution when you want to make changes but don't have permissions to update the original repository.
Not a Tower user yet?
Download our 30-day free trial and experience a better way to work with Git!
When working with a team, it's important to make sure you have the latest copy of the repository; we call this "pull" — the action of downloading the most recent changes to your local repository (the one in your computer) so that it stays up to date. Conversely, whenever you make a change and commit it, you should "push" it to the remote repository (the one hosted on GitHub or similar platform), so that everyone can find your work. Pulling and pushing are vital to keep everything in sync.
As projects grow, you may feel you should isolate your work from others, so that other changes do not affect the files you are working on. Welcome to the routine of "branching" — it's common practice to create a new branch whenever you want to implement a change, and then "merge" your branch into the primary branch. Branching is one of Git's most powerful features.
Pushing and merging will work as advertised as long as you have write access to the repository. But what if you wanted to contribute and this wasn't the case? There's a solution for that!
After forking the repository to add your changes and pushing them back to your remote repository, you can create a "Pull Request" on GitHub (or similar platform) so that the author(s) of the original repository can review your work and decide if they want to integrate your changes or not. Keep in mind that you can create PRs in repositories you have write permissions too, if you prefer to have someone review your work.
Phew, those were quite a lot of new concepts! Here is a small cheat sheet that sums everything we covered in this section.
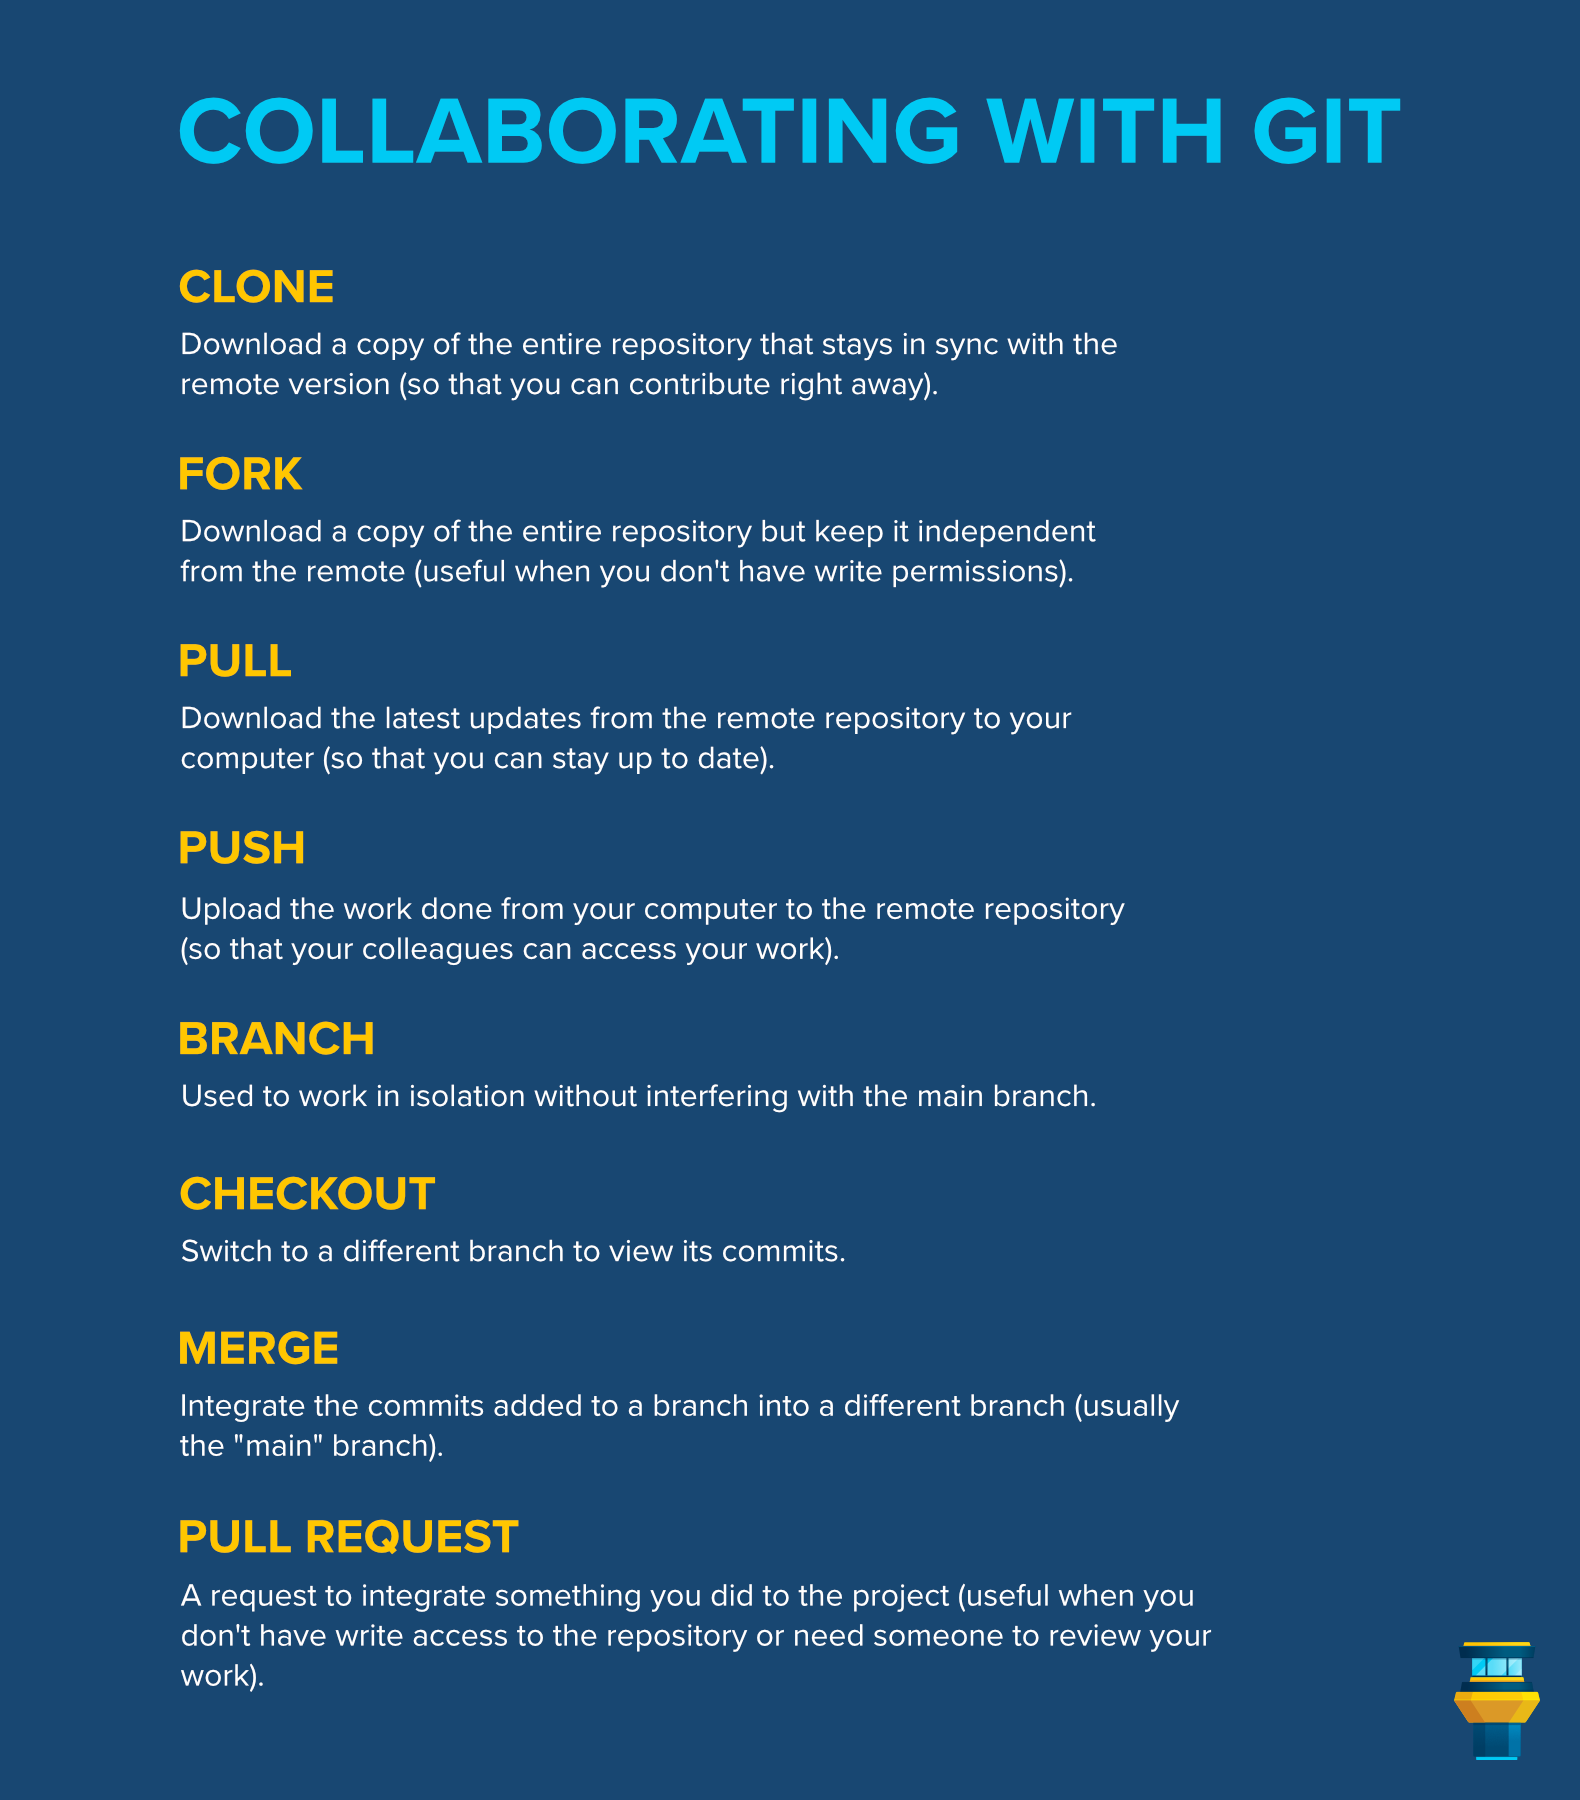
It can look intimidating at first, but after performing these actions a couple of times, you will be able to collaborate easily.
Let's see how Tower can help us in this scenario.
4. Collaborating in Tower
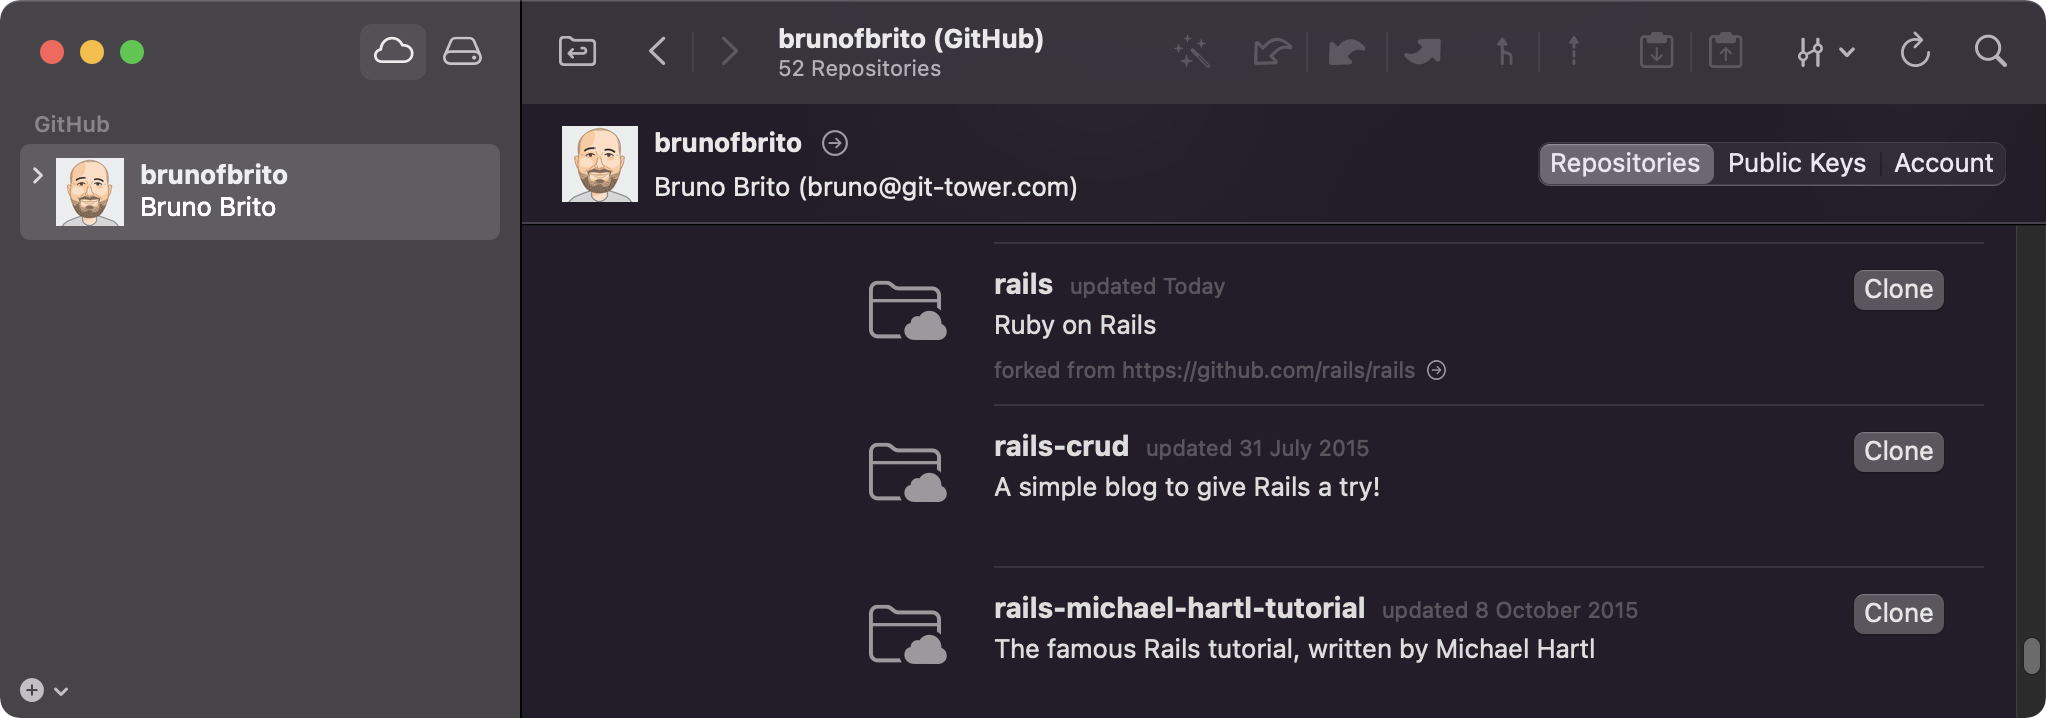
Let's start by witnessing how simple it is to clone a repository with Tower. Click on "View > Show Services" (or the "cloud" icon) to navigate to the "Services" view. Choose the online service that is hosting the repository, enter your credentials and voilà — Tower is now linked to all the repositories listed on that service.
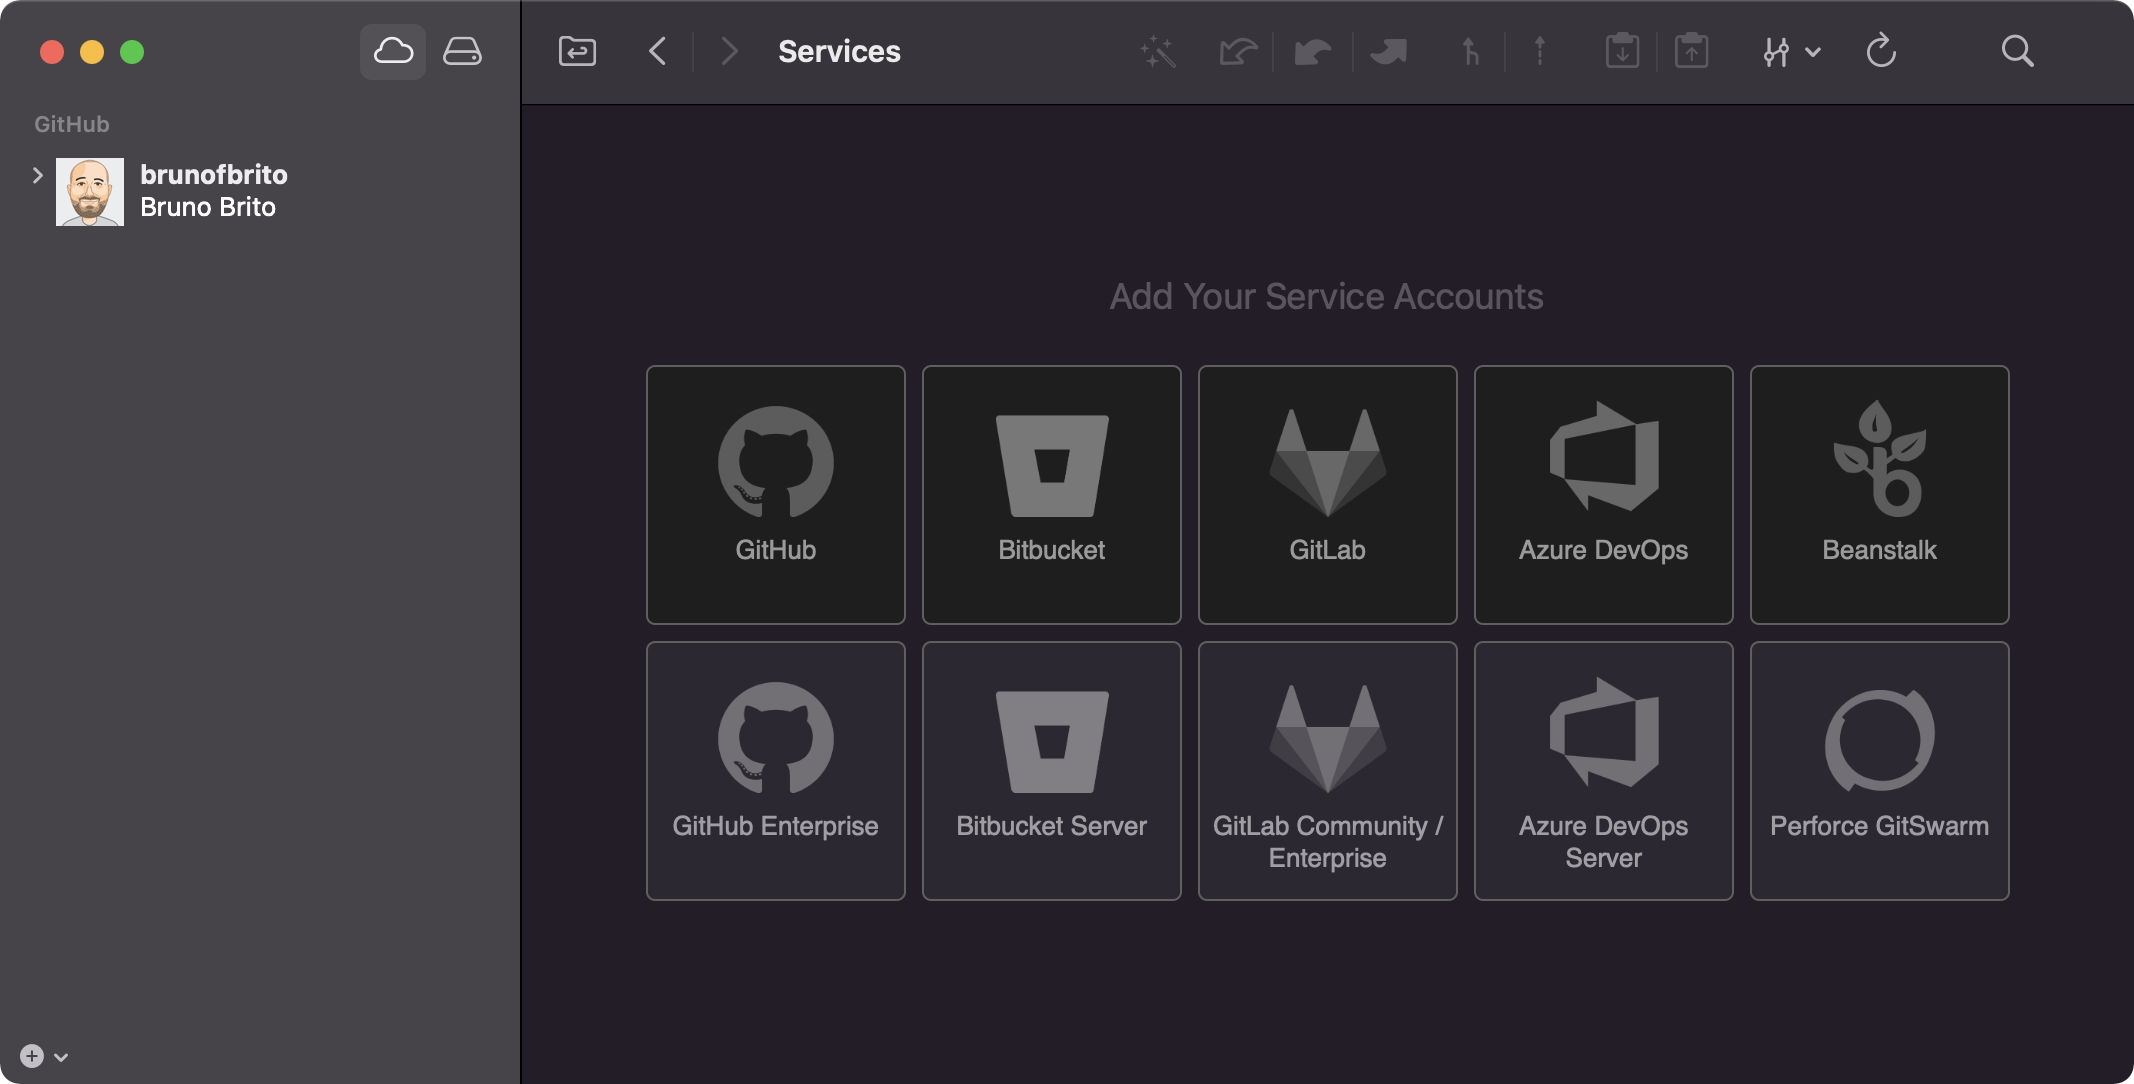
In the screenshot above, I had already entered my GitHub credentials. Once authenticated, I can view my entire list of projects and clone the repository I'm looking for.
Push and Pull
The repository is already up to date, but let's pretend it's been a couple of days since you last accessed the project. It's a good idea to "Pull" any recent changes before you start working.
Take a look at the image below: you will notice 3 arrows.
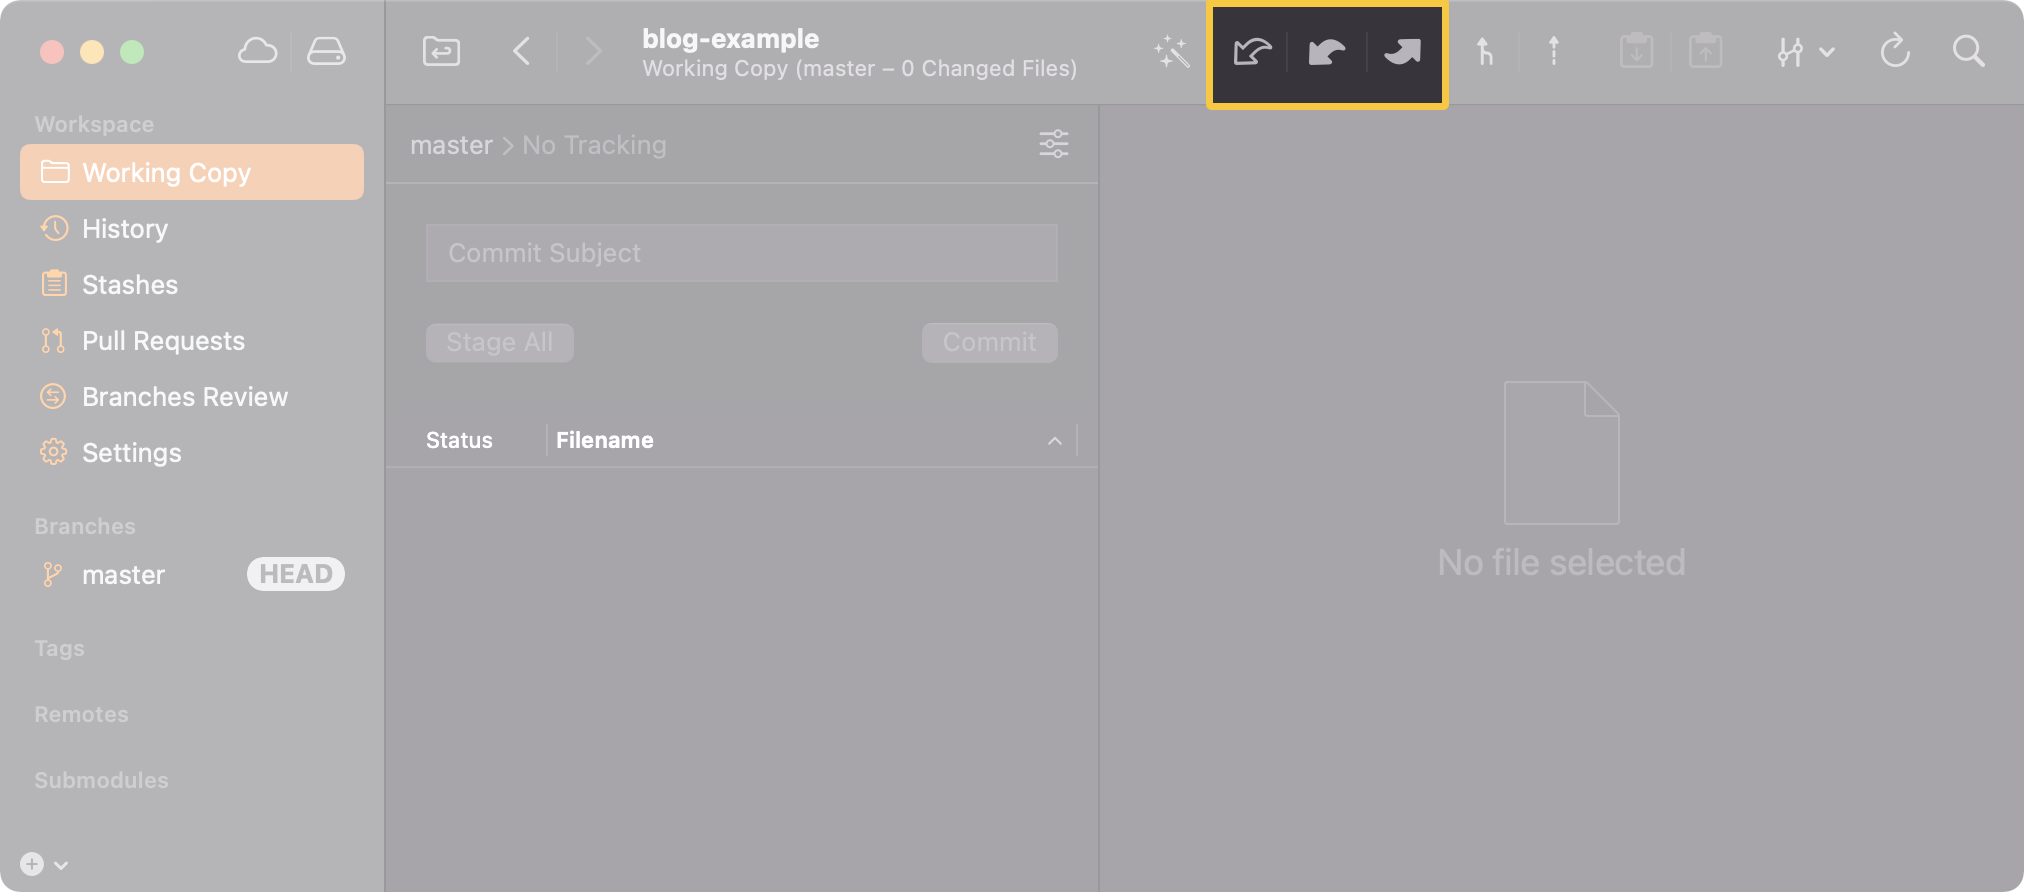
The first arrow refers to "Fetch": an action similar to Pull, but that does not actually download anything — useful if you simply want to know if there were any recent changes made to the project (Tower even does this periodically). The next arrow will effectively "Pull" all fresh changes, integrating them into your local repository.
The third and final arrow will be responsible for "Pushing" any commits you would like to add to the remote repository. Just make sure you commit everything to your local repository first.
Branching and Merging
Time to become familiar with branching! On the left, you will notice a "Branches" section. If you're working on a new repository like in this example, "master" (or "main") will be the only available branch. But, if you cloned another project, you may have dozens of branches to choose from.
Let's create a new branch based on "master". Right-click the desired branch and select "Create New Branch from "master"". This is the most common workflow, but you could even pick a specific commit as the starting point of your new branch.
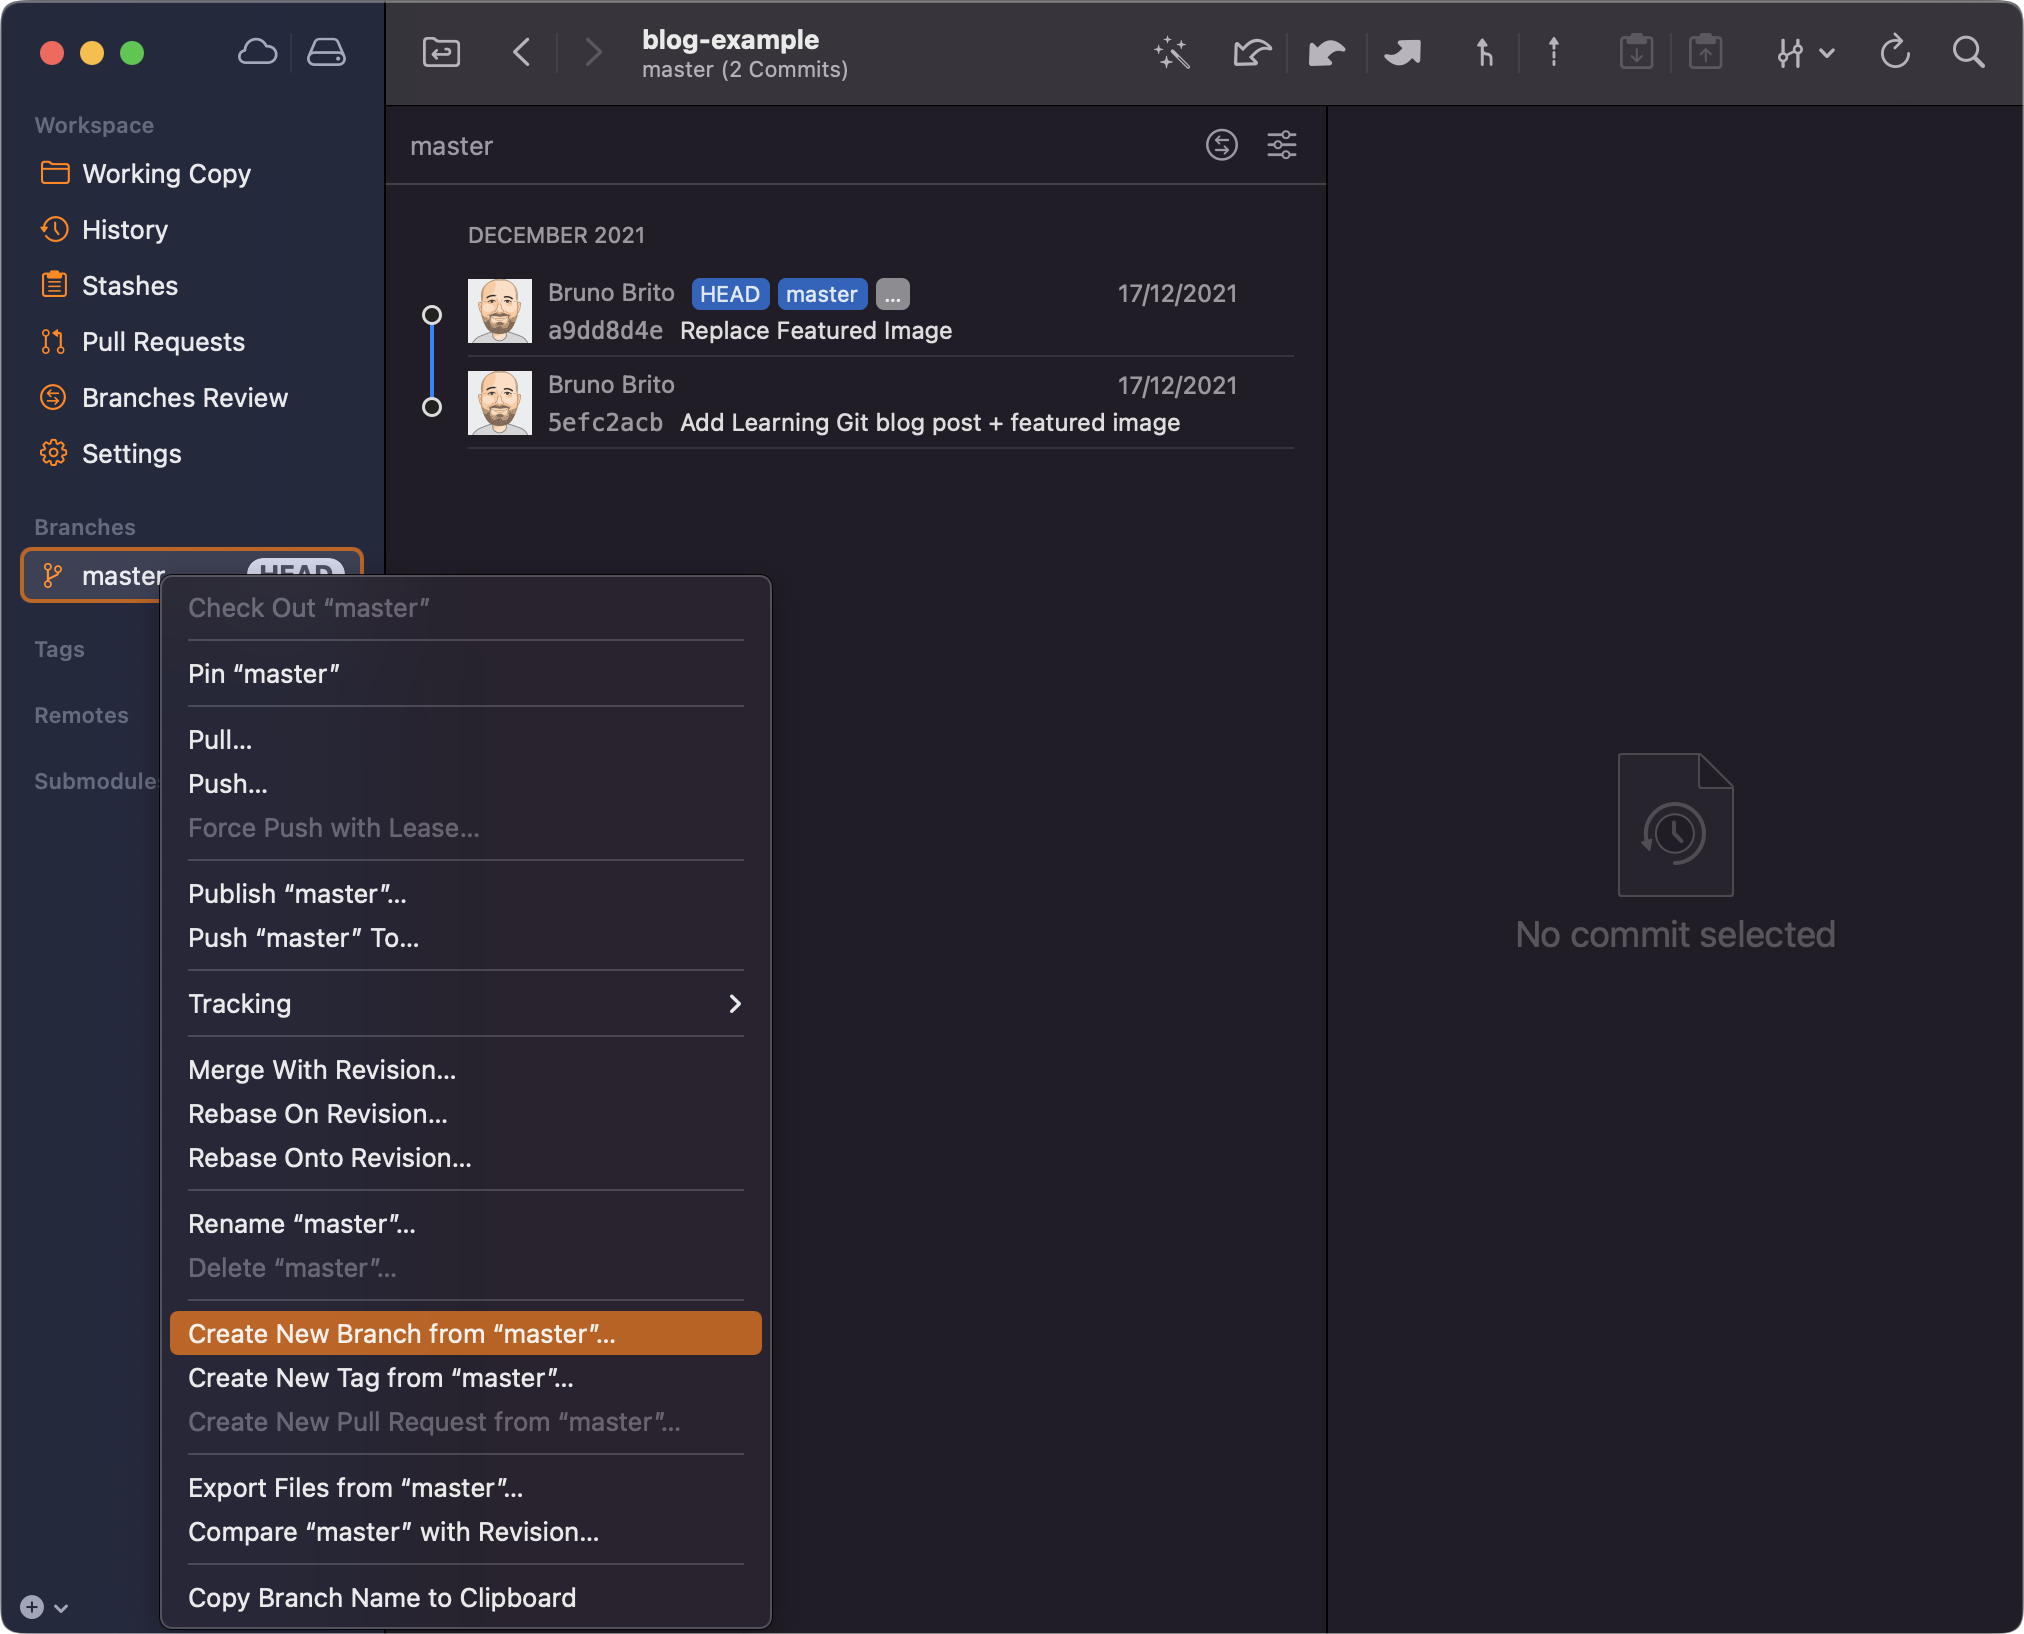
Before naming your branch, it may make sense to check with your team if there's a convention they would prefer you to use. Giving it the name of the feature you'll be introducing usually makes sense; we will add a new blog post named "How Branches Work", so let's name it "how-branches-work-post".
Double-click the newly created branch — you will notice the "HEAD" moved from "master" to "how-branches-work-post". This means you're now ready to work independently from the "master" branch. When the post is ready and we have nothing left to commit, it's time to merge!
As an example, I added 2 new commits to this branch. To merge with Tower, we can simply drag and drop. Let's checkout "master" again, to make it our current "HEAD" branch, and then drag the "how-branches-work-post" branch to this one.
Success! With our second blog post published we can now delete our other branch — as repositories grow larger, it's always a good idea to delete these short-lived branches when we don't need them anymore.
Assuming you have write permissions to the repository, this should cover the basics of collaborating with Git. But even if you don't, you can always contribute to a project you like — that's the beauty of open-source.
Forking and Pull Requests
A fork is not a built-in feature in Git itself, but a concept provided by several Git hosting services. GitHub, Bitbucket and GitLab all support this functionality.
A fork of a repository includes a complete copy of that repository — all its code, branches and history — and will also “know” from which repository it has been forked.
As an example, let's fork the popular Ruby on Rails project. We just need to press the "Fork" button on the upper right of the screen. If you're a member of an organization, you'll get to choose where to fork the repository. I picked my personal account.

When this action is complete, you can switch to Tower to clone that repository to your computer. It should be under the "Services" view ("View > Show Services"). Just pick the desired repository and click "Clone".
Create a new branch to work on and commit your changes/improvements. When you're done, push those changes so that your branch is now also available in your remote repository.
If you head back to GitHub, you will notice the yellow notification asking if you would like to compare your changes and create a new Pull Request.

If you click on the "Compare & pull request" button, you will then be able to write your Pull Request message and review what changed. GitHub will also let you know if your work can be merged without any conflicts.
Make sure the "base repository" is the repository you forked (the original project) and that the head repository is your own project. By default, GitHub usually sets up everything nicely.
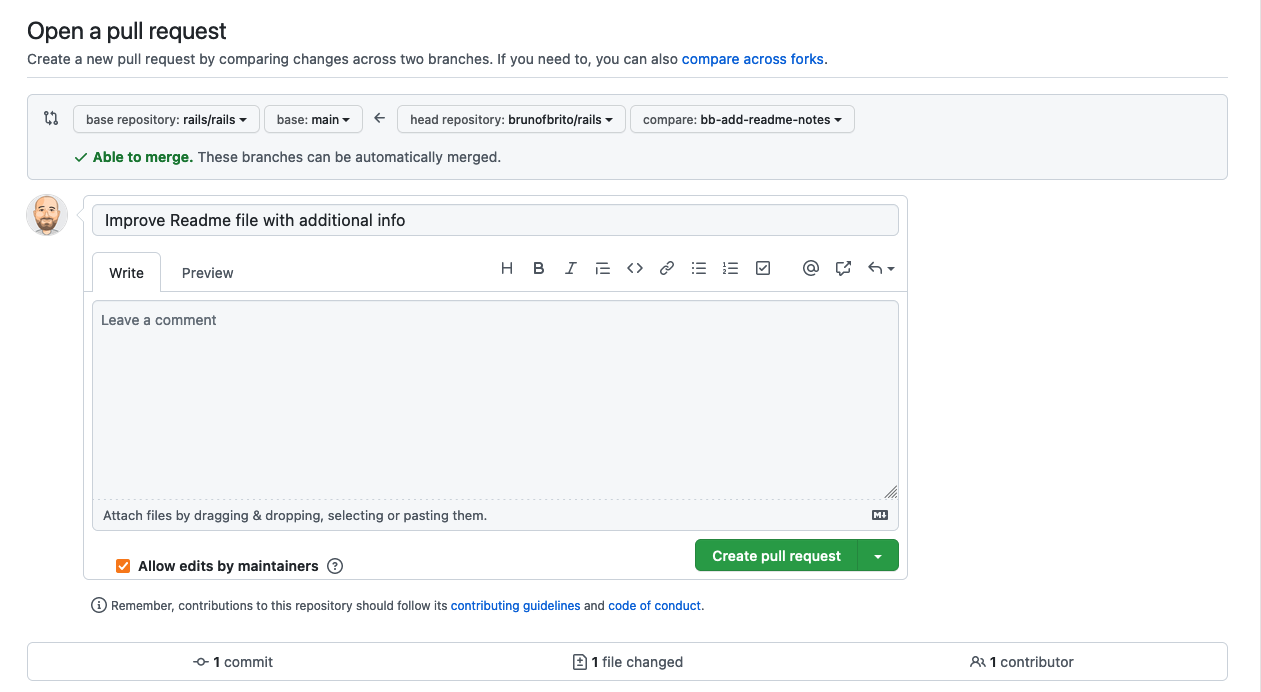
That's it! You're all set to create your first PR. Before contributing, make sure you always have a look at the project's contributing guidelines and the code of conduct.
Final Words
Congratulations! After reading this article (and practising a bit), you are ready to take advantage of Git's enormous power. You have just become a more complete Marketing professional without ever opening the terminal or writing a single line of code 😎
We covered everything you need to get started, but Git and Tower have a lot to offer. To learn more, visit our Learn section — you will find videos, books, and webinars.
Not a Tower user yet? Download our 30-day free trial and experience a better way to work with Git!
PS: Did you know? Tower Pro is now free for students as well as teachers and educational institutions!
