With the release of 1Password 8, a new SSH agent has been introduced that can generate and import your SSH keys. This allows you to access them without ever leaving 1Password, which comes in handy when you need to log in to virtual machines or work with Git - there's no need for GPG keys! ✌️
In this short guide, we will show you how to get up and running with 1Password's SSH agent in order to perform Git operations in Tower, such as pushing, pulling, and signing commits.
We will split this tutorial into two main parts:
- Configuring SSH for remote operations
- Configuring commit signing with SSH keys
We will be using a Mac for this demonstration, but the process is fairly similar on Windows. Let's get started!
Configuring SSH for Remote Operations
1. Installing and Configuring 1Password 8
Let's begin by downloading 1Password 8 for Mac from the official website. The 1Password browser extension will also come in handy, so make sure you download it if you haven't already.
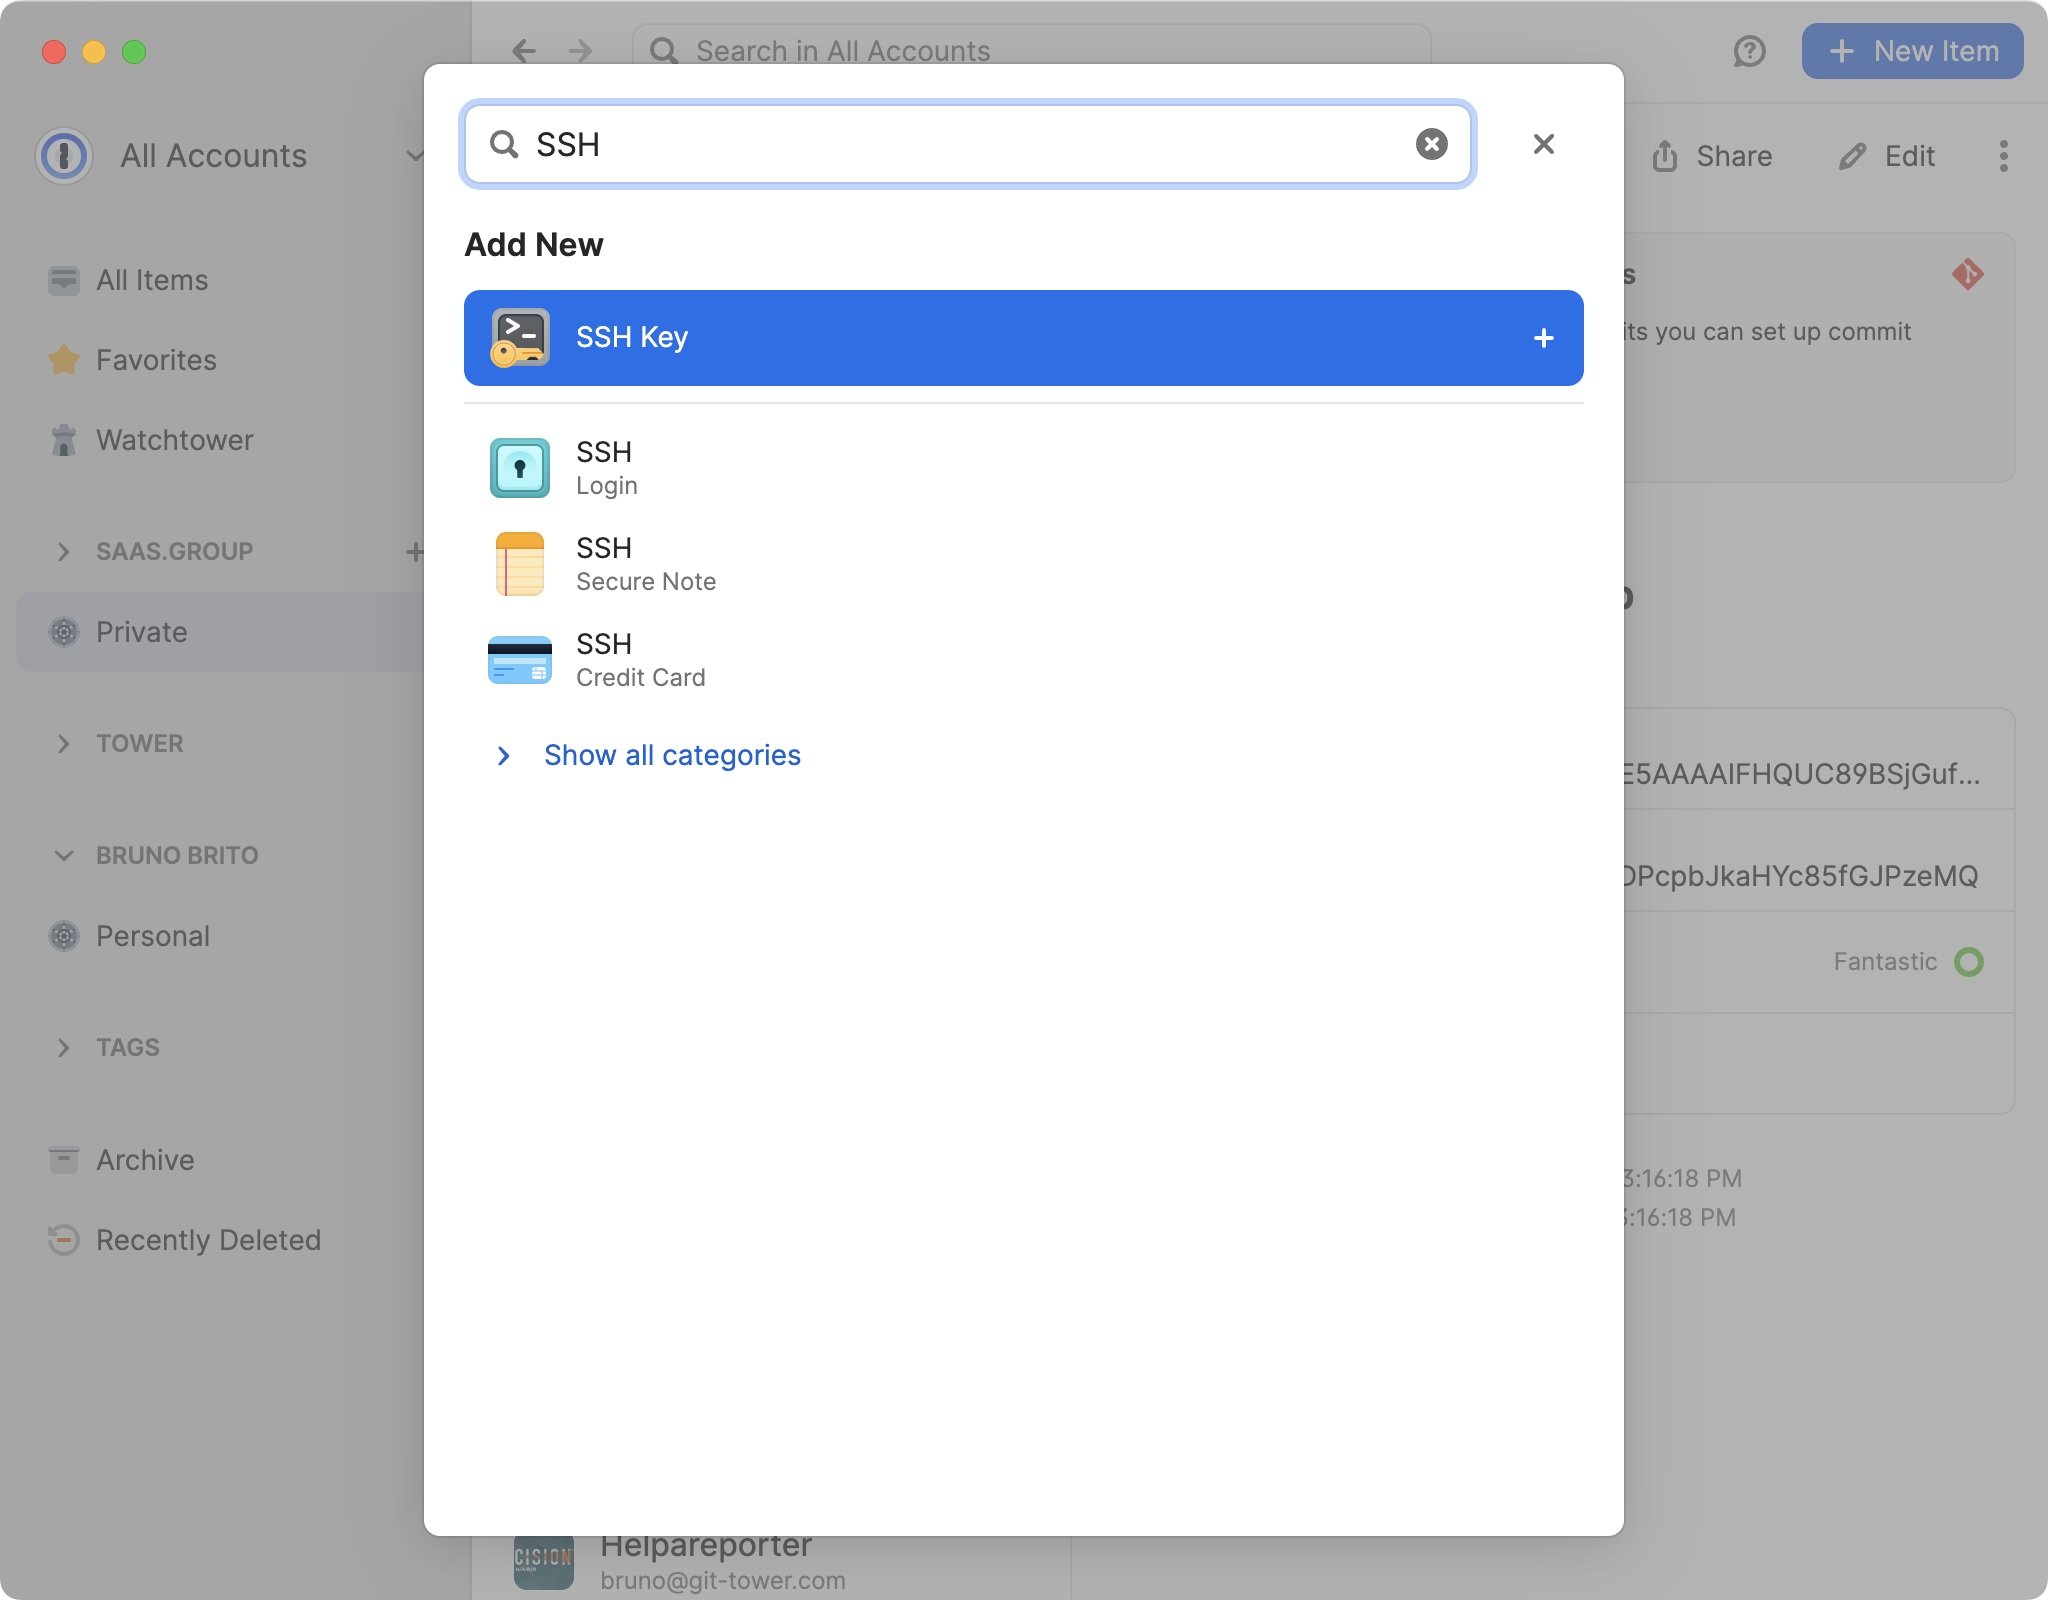
When you're logged in, press ⌘ + N and type "SSH" to easily add (or import) a new SSH key. We will create a brand new one for this tutorial.
1Password will do the heavy lifting for us, so all we need to do is click on "Add Private Key" and then choose "Generate a New Key".
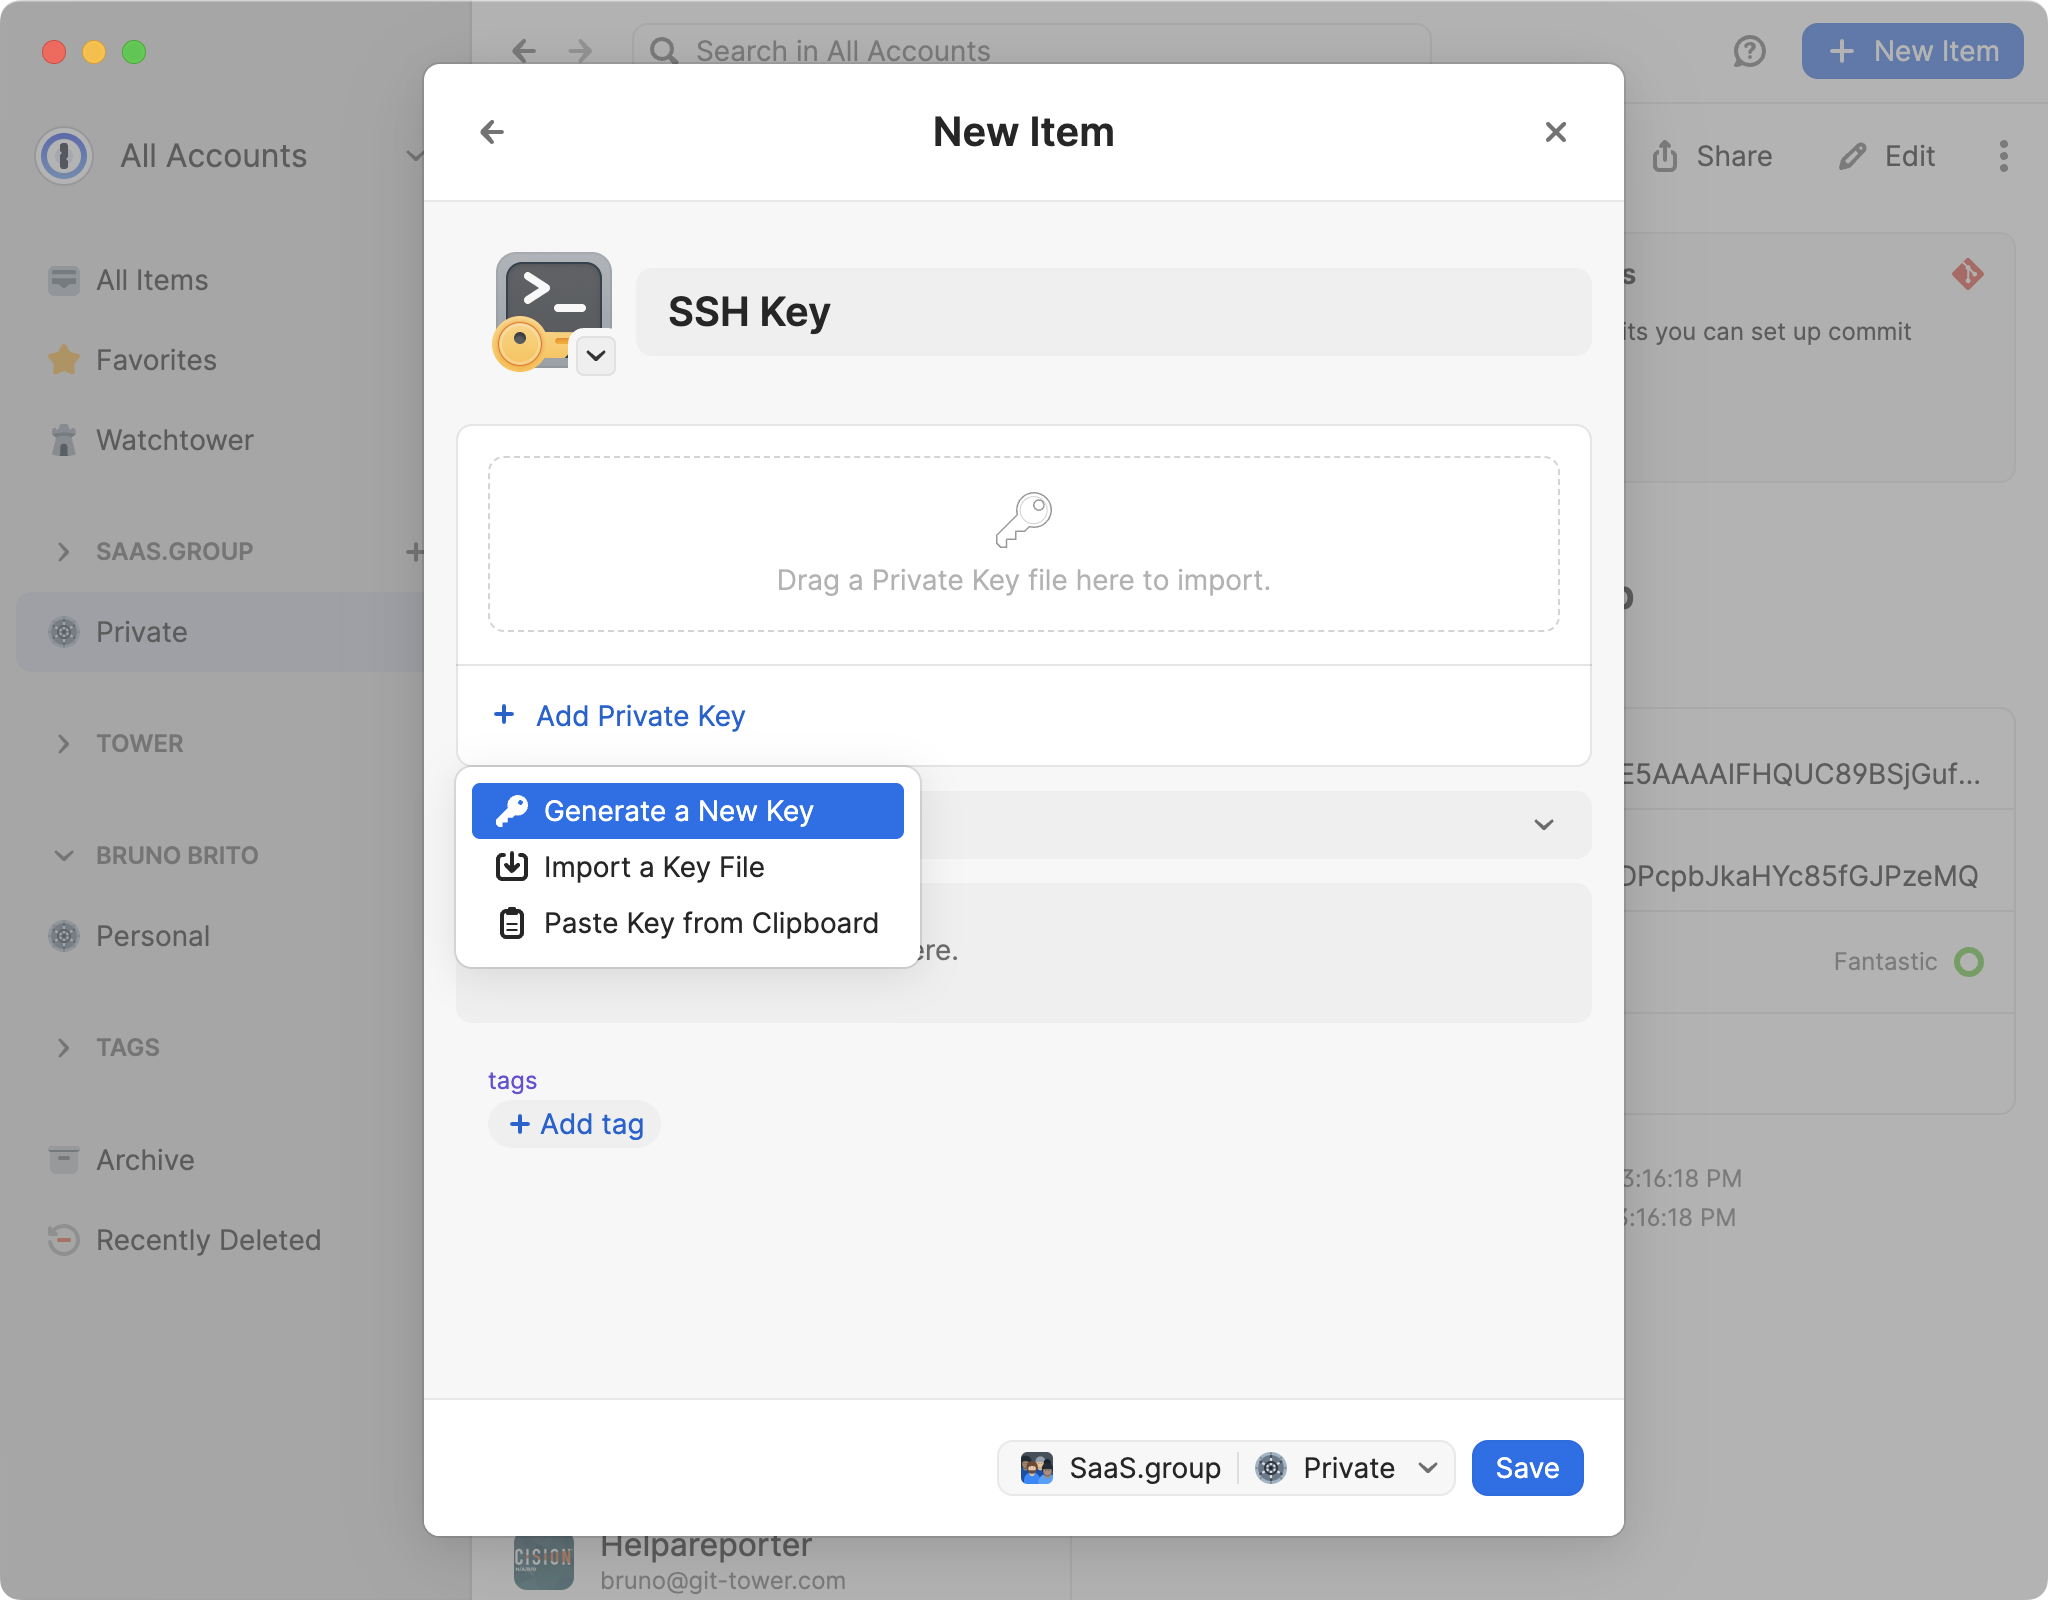
Select an SSH key type — Ed25519 (recommended) or RSA — from the options available, and then click "Generate".
2. Adding Your New SSH Key to GitHub
Now that we have generated an SSH key, it's time to connect it to our favorite remote hosting service. In this example, we will use GitHub.
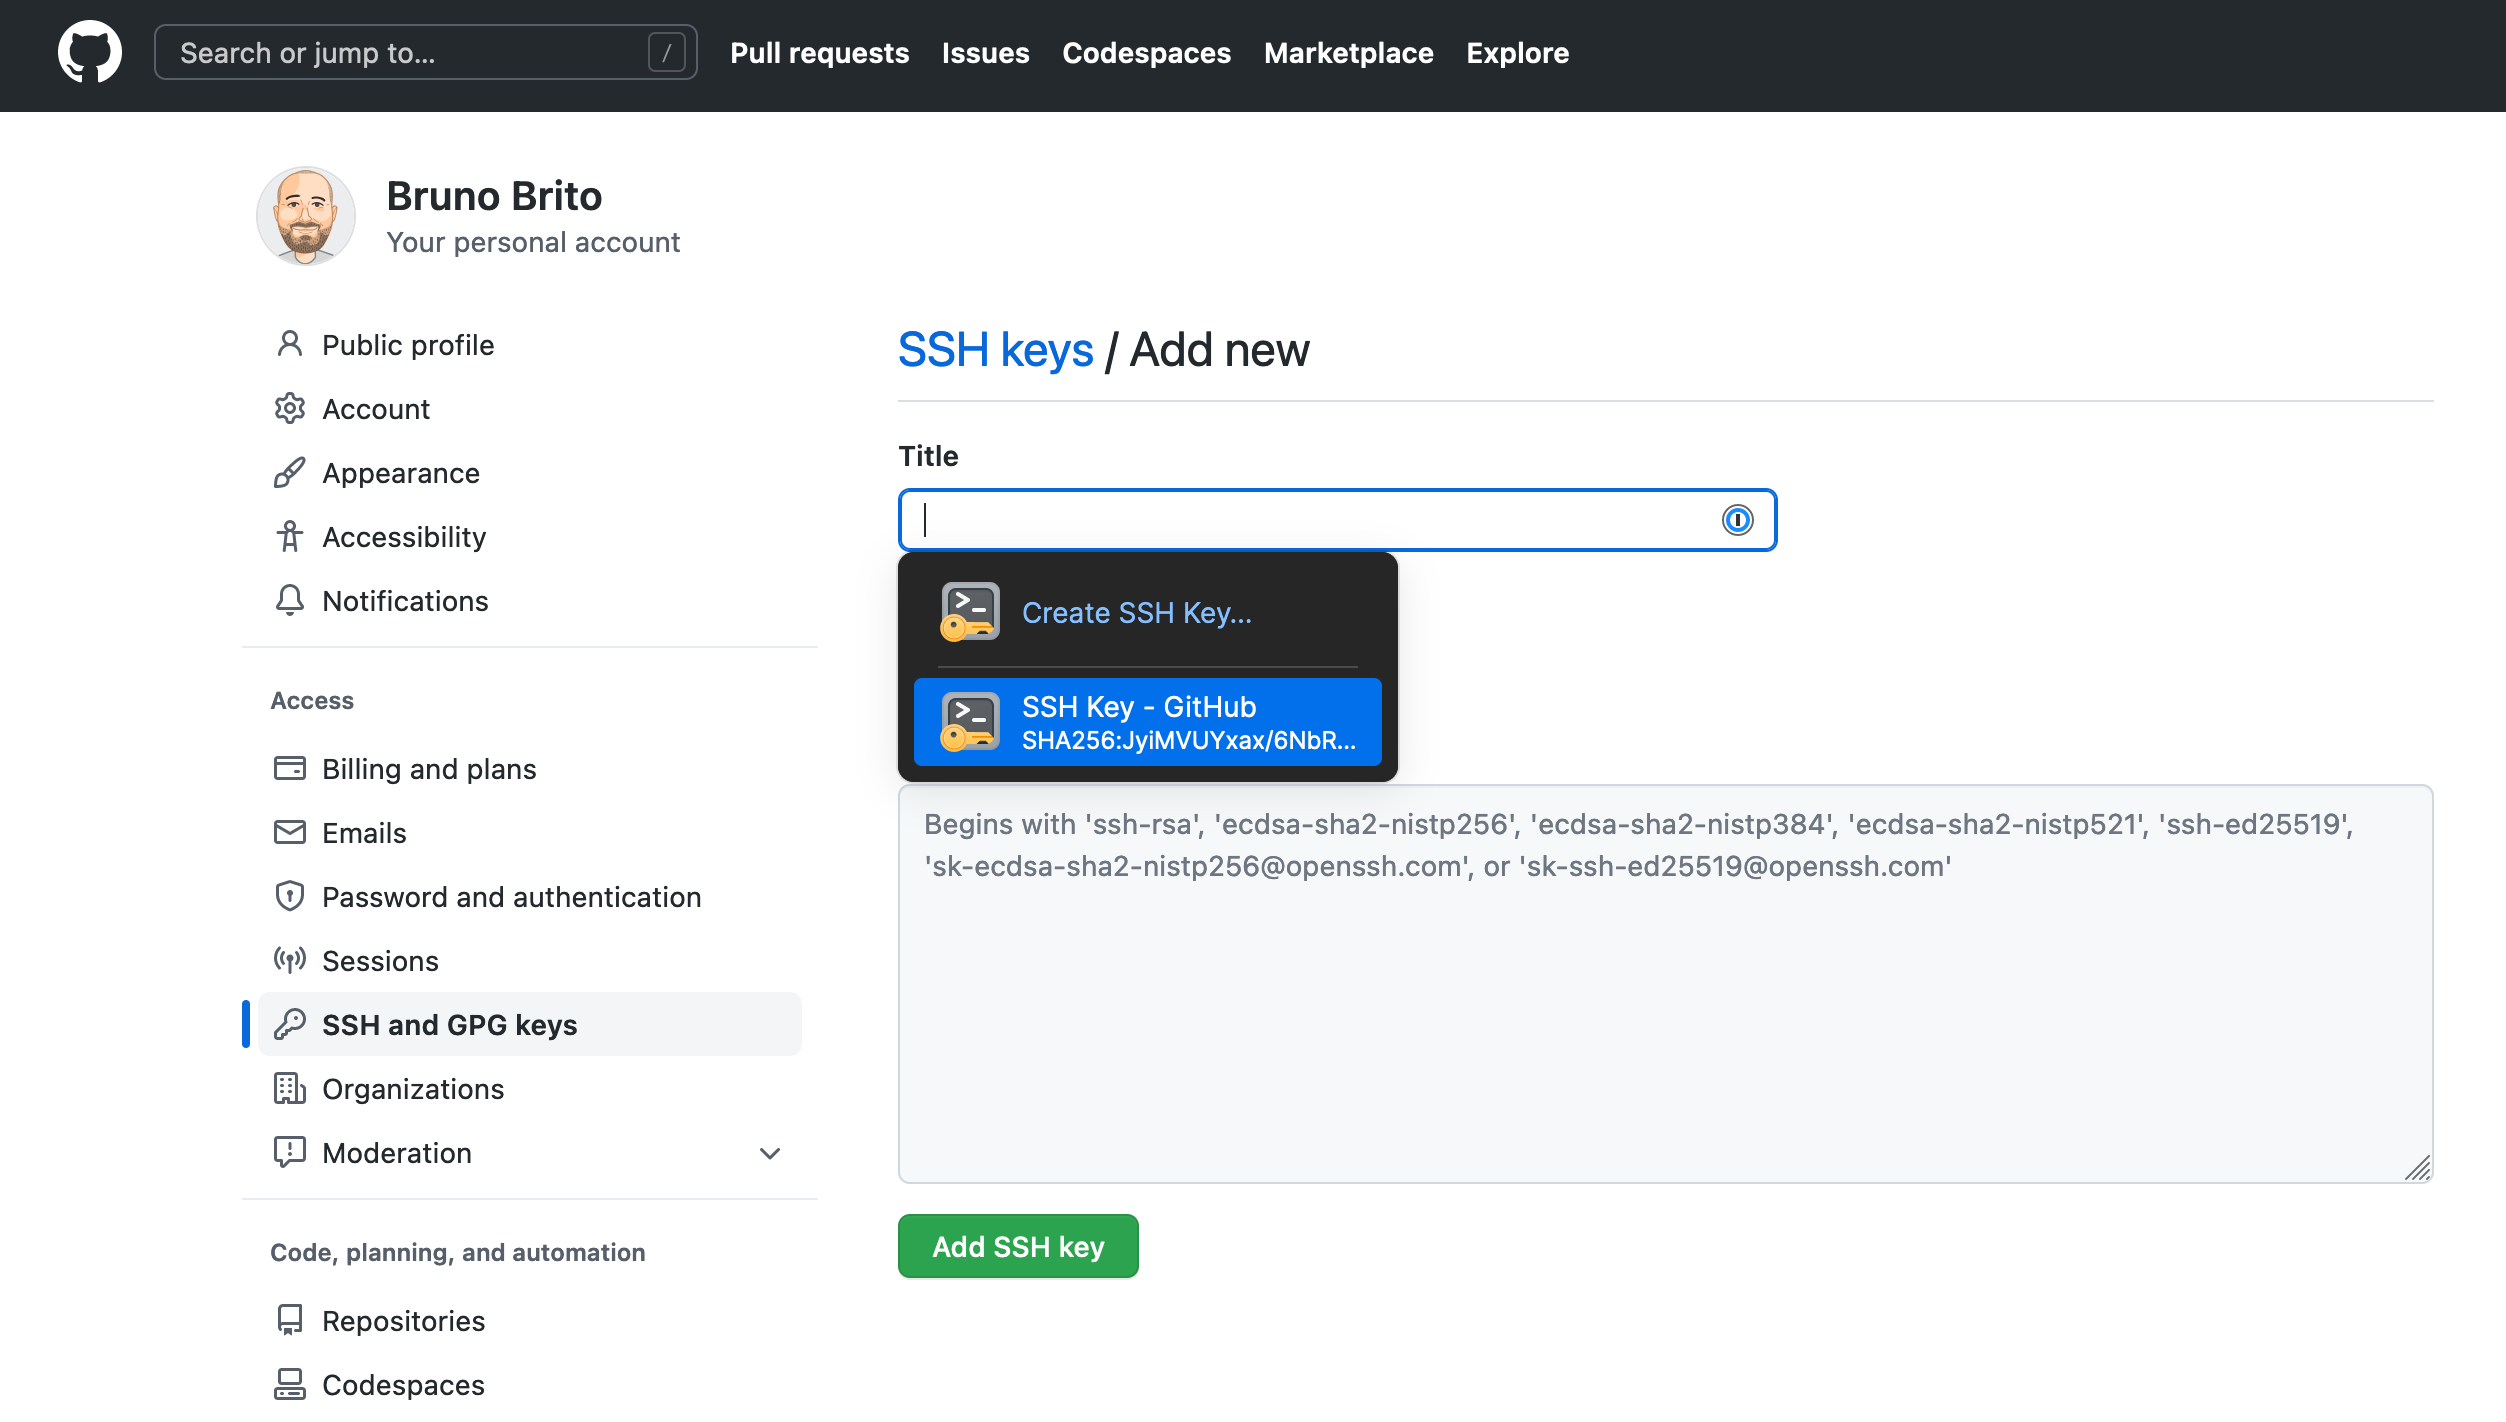
Visit the GitHub SSH key settings page to upload your public key as an “Authentication Key“. If you have 1Password's browser extension installed, 1Password will automatically fill the title and public key for you.
3. Turning On the 1Password SSH Agent
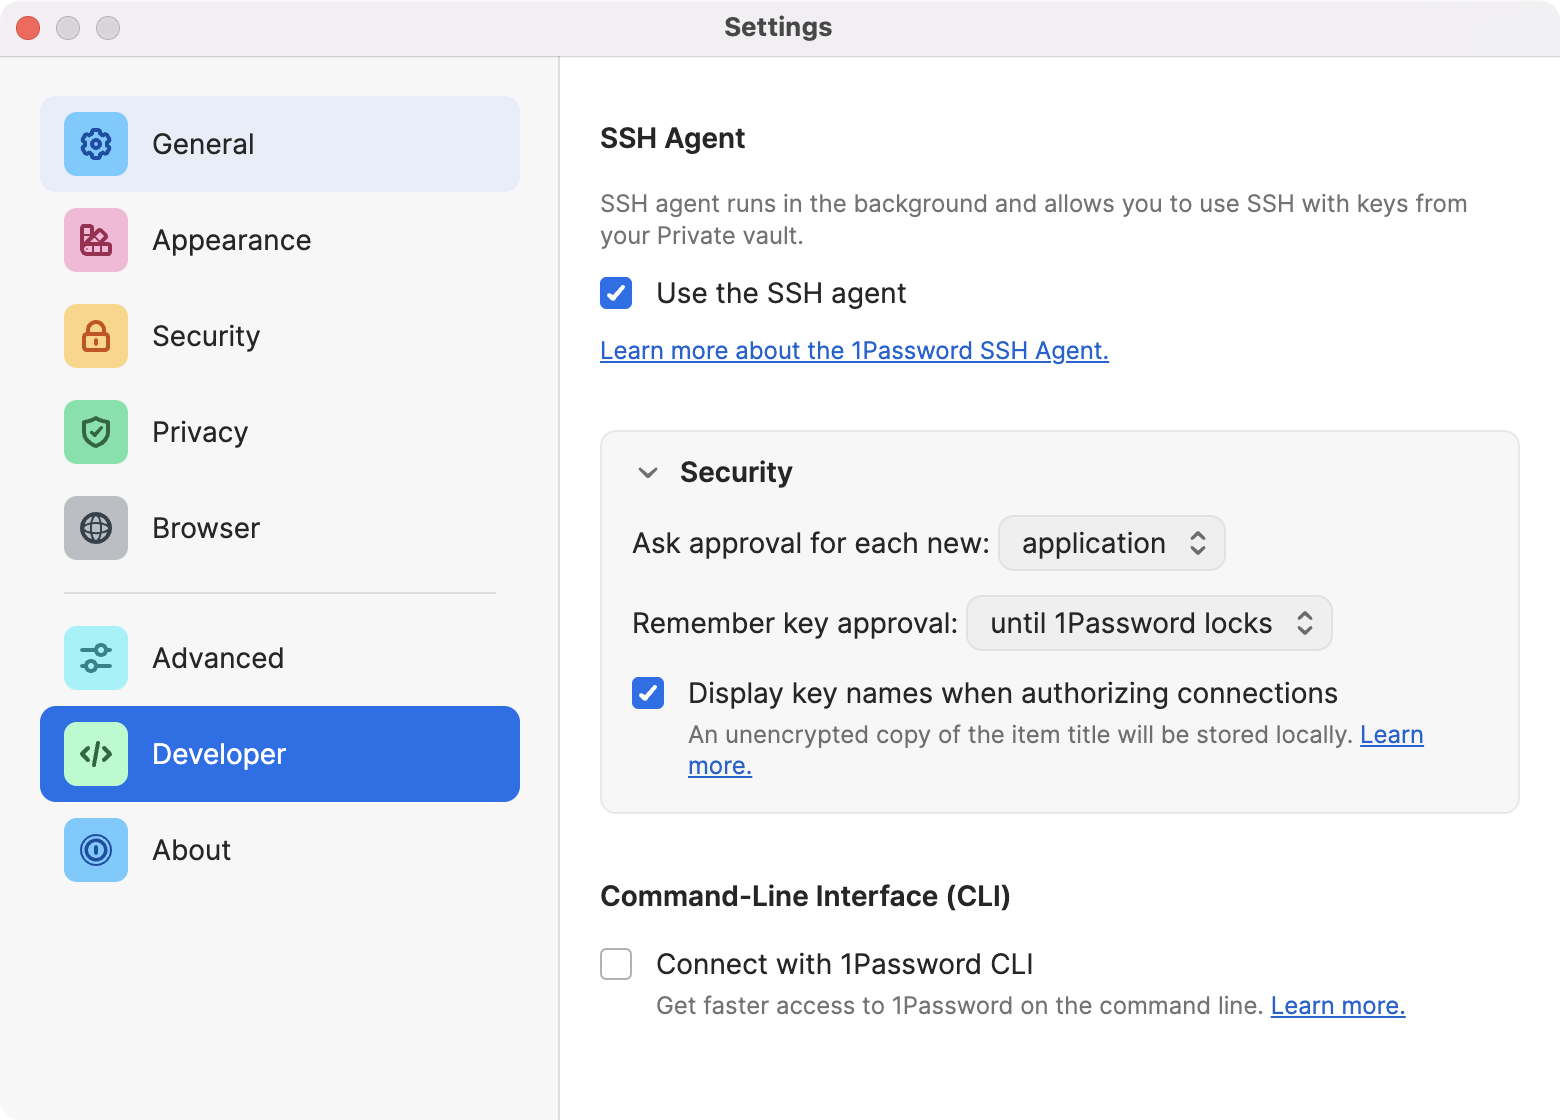
Head back to 1Password 8 to activate the 1Password SSH Agent. The agent will run in the background and use any SSH keys that are saved in your Personal or Private vault to authenticate SSH requests.
Go to Preferences > Developer and make sure "Use the SSH Agent" is turned on. Optionally, you can also select the checkbox to "Display key names when authorizing connections".
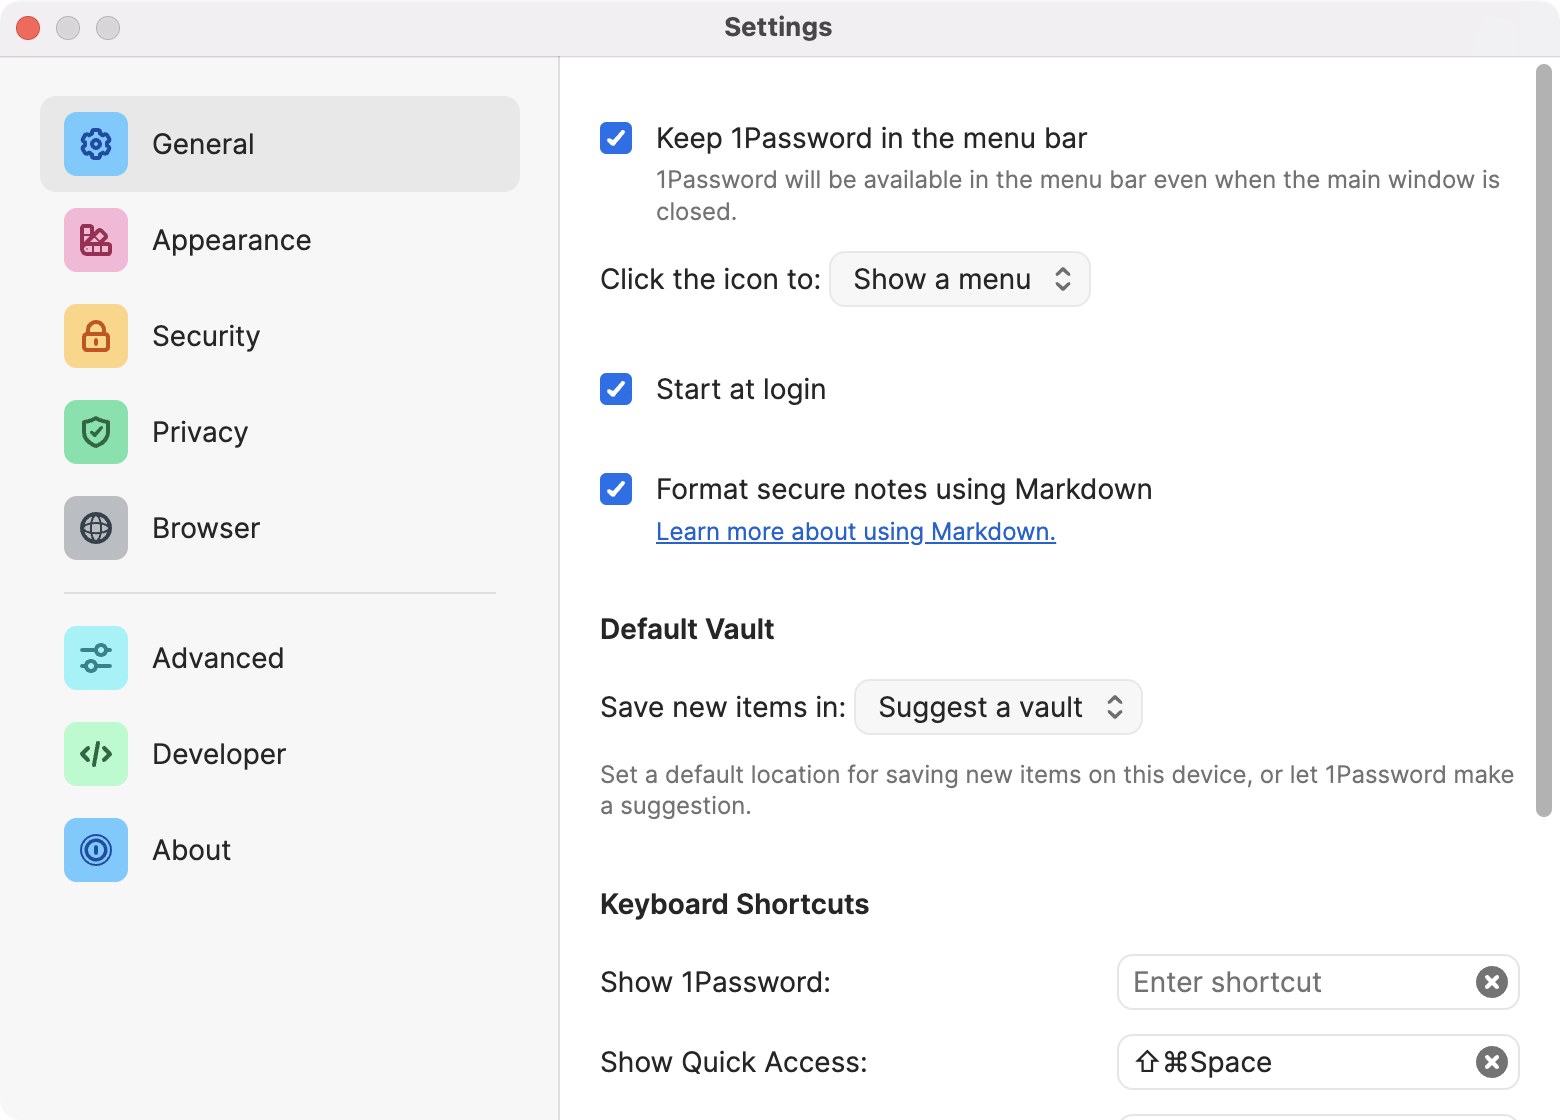
To ensure that the SSH agent is always running (even when the 1Password app is closed), go to Preferences > General and select the checkboxes to "Keep 1Password in the menu bar" and "Start at login".
4. Adding the IdentityAgent snippet
Finally, you will need to add the following snippet to your ~/.ssh/config file (if you don't have that file yet, you should create it):
Host *
  IdentityAgent "~/Library/Group Containers/2BUA8C4S2C.com.1password/t/agent.sock"
Your SSH clients will use the 1Password SSH agent for all hosts.
Part 1 is done! Let's see what else we need to do to enable commit signing.
Configuring Commit Signing with SSH Keys
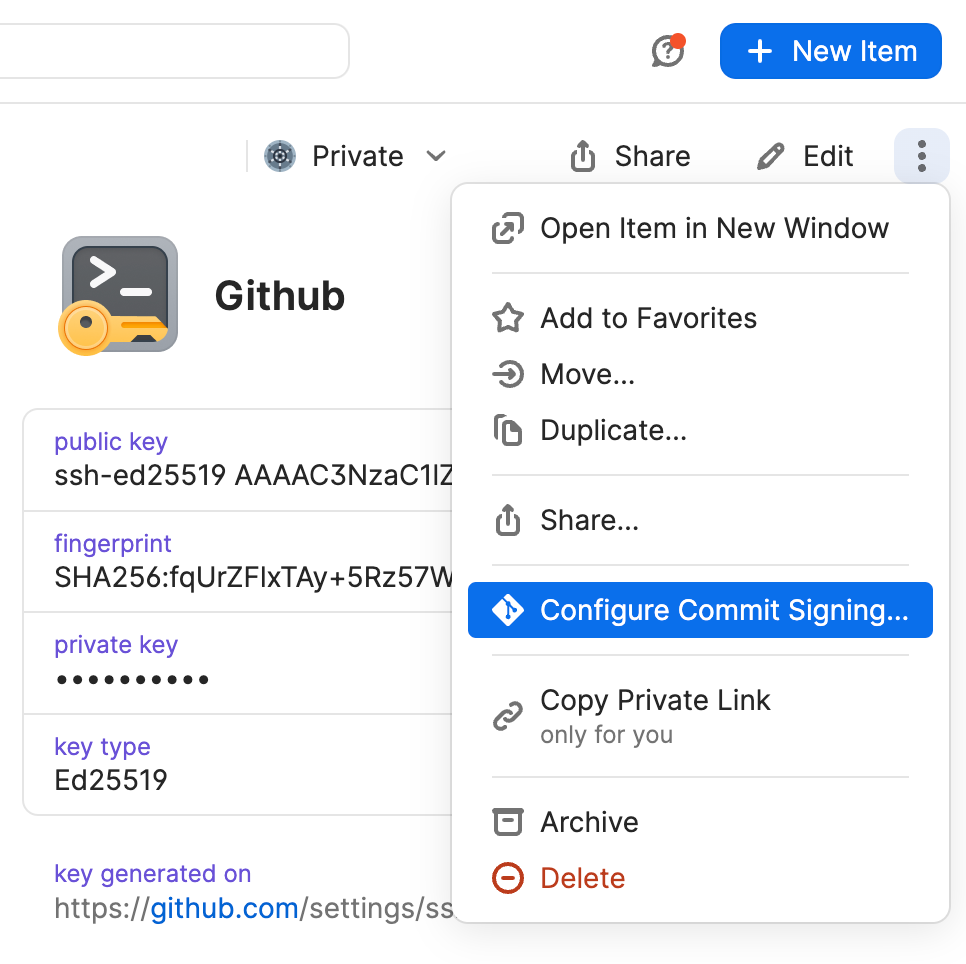
Back to 1Password. Select your SSH key and click on the 3 dots on the right. You will see there's a "Configure Commit Signing..." option.
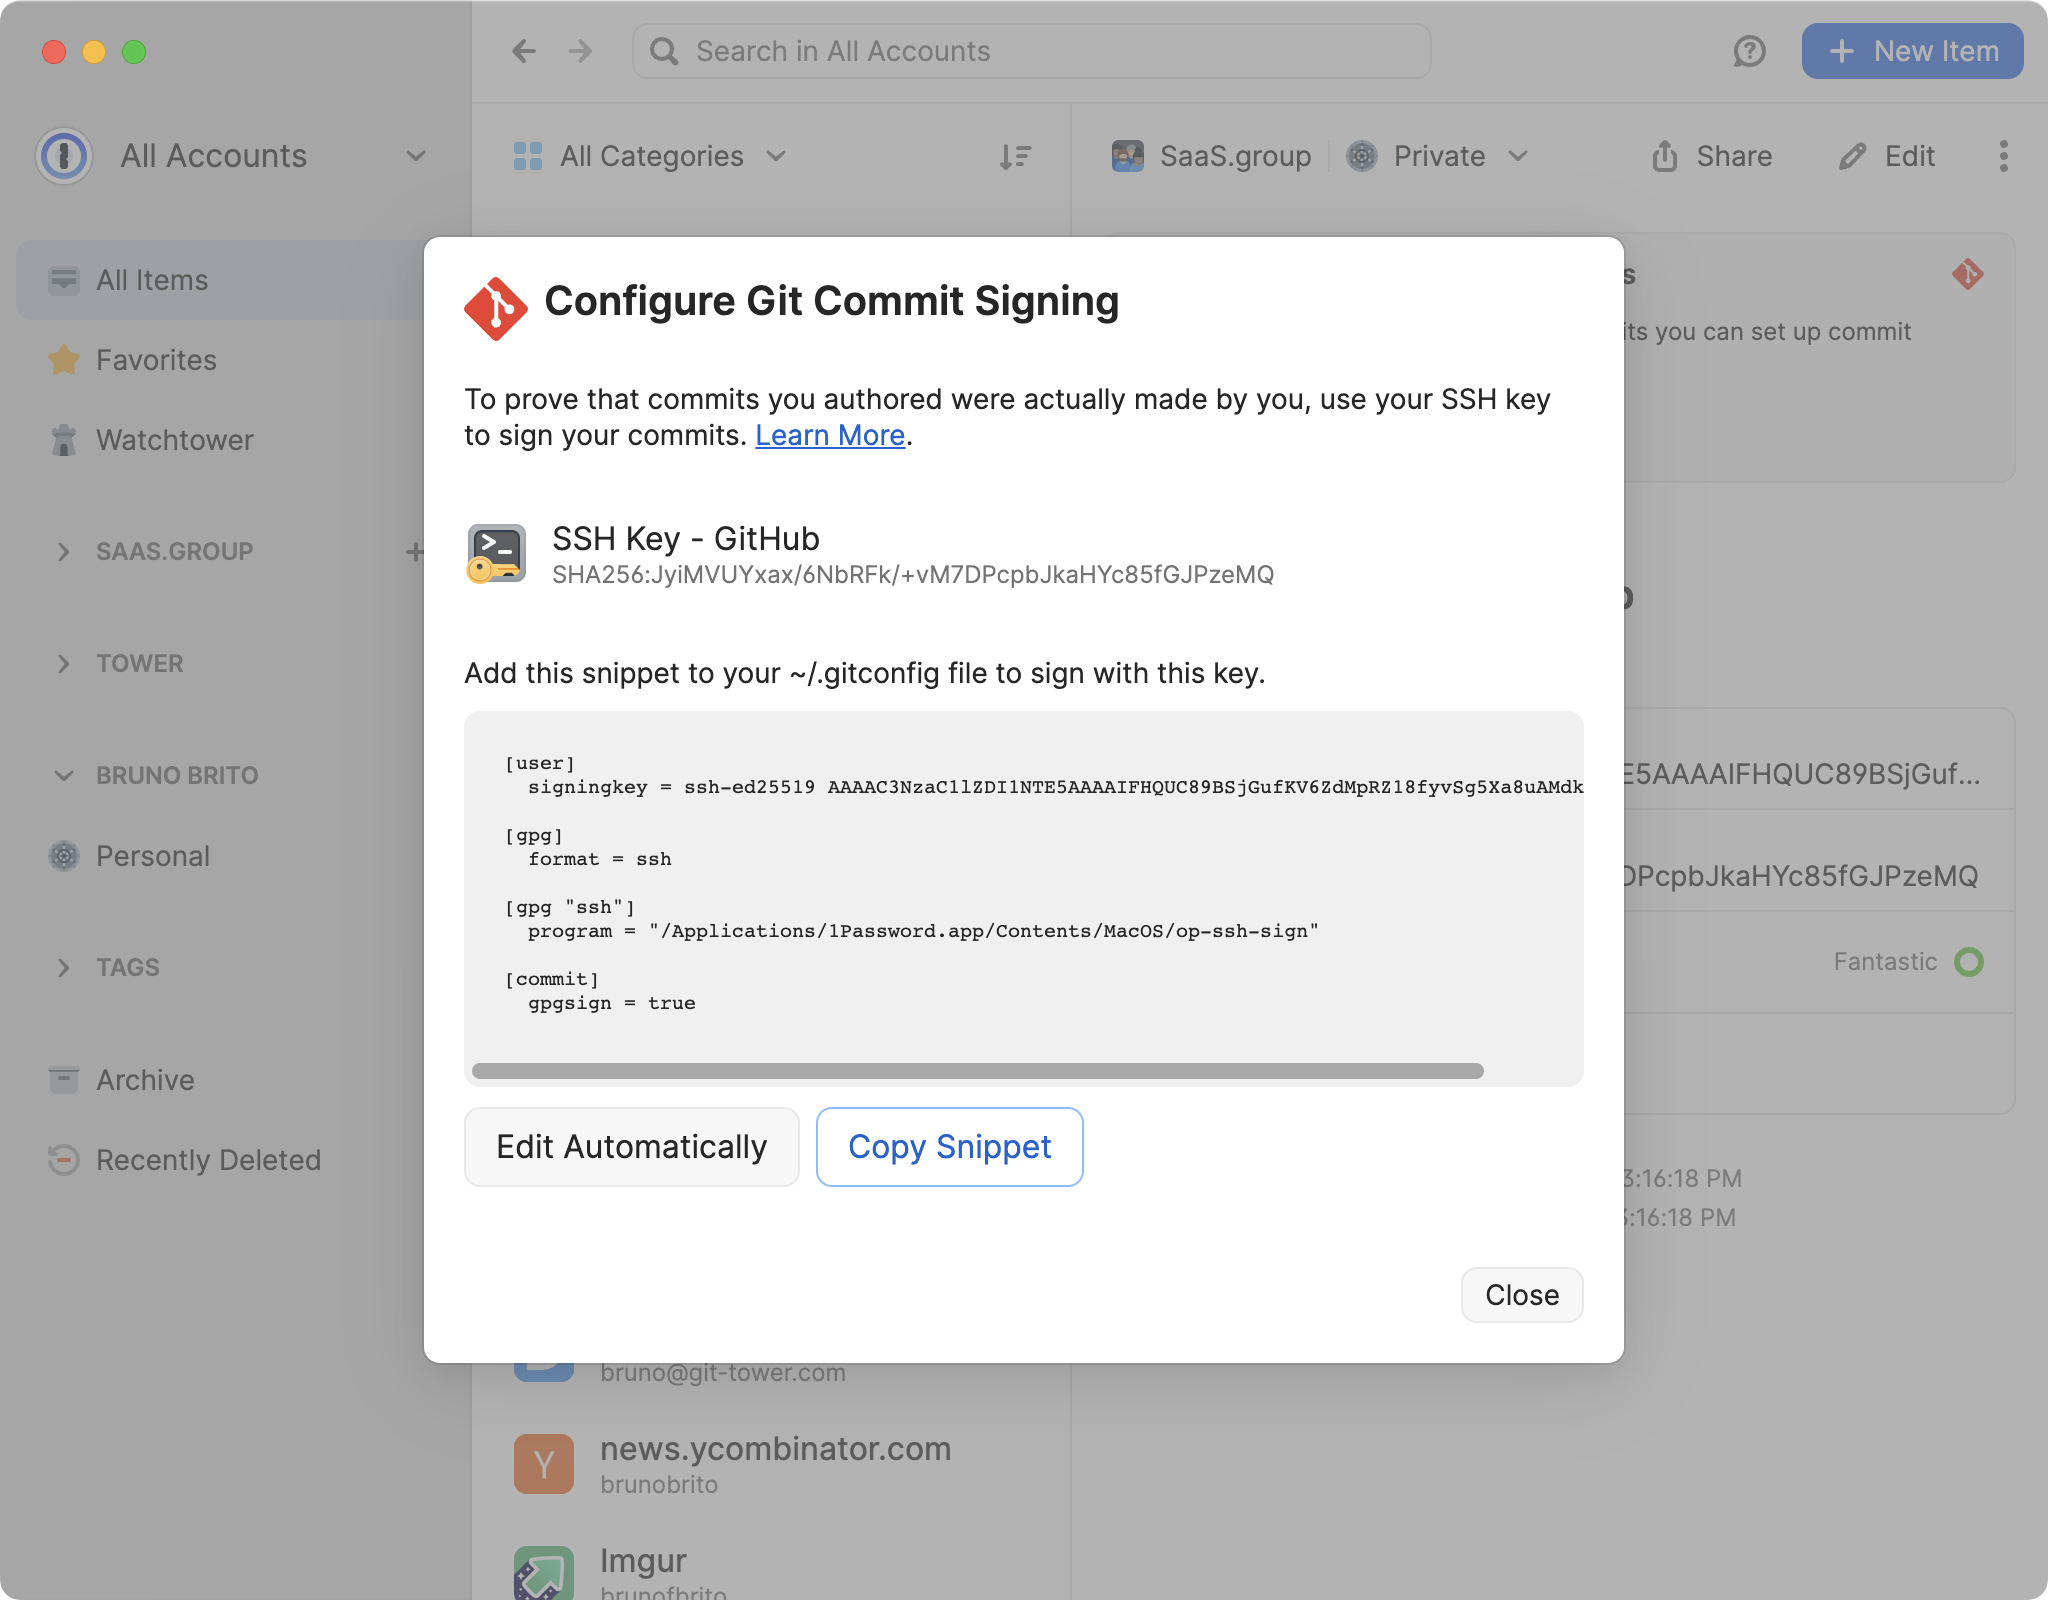
Now, we will need to copy the configuration snippet from 1Password and add it to the global Git config (or a specific repository). Click on "Edit Automatically" if you'd like 1Password to edit the ~/.gitconfig file for you, or "Copy Snippet" if you'd prefer to do this manually.
Adding Your SSH Key as a Signing Key on GitHub
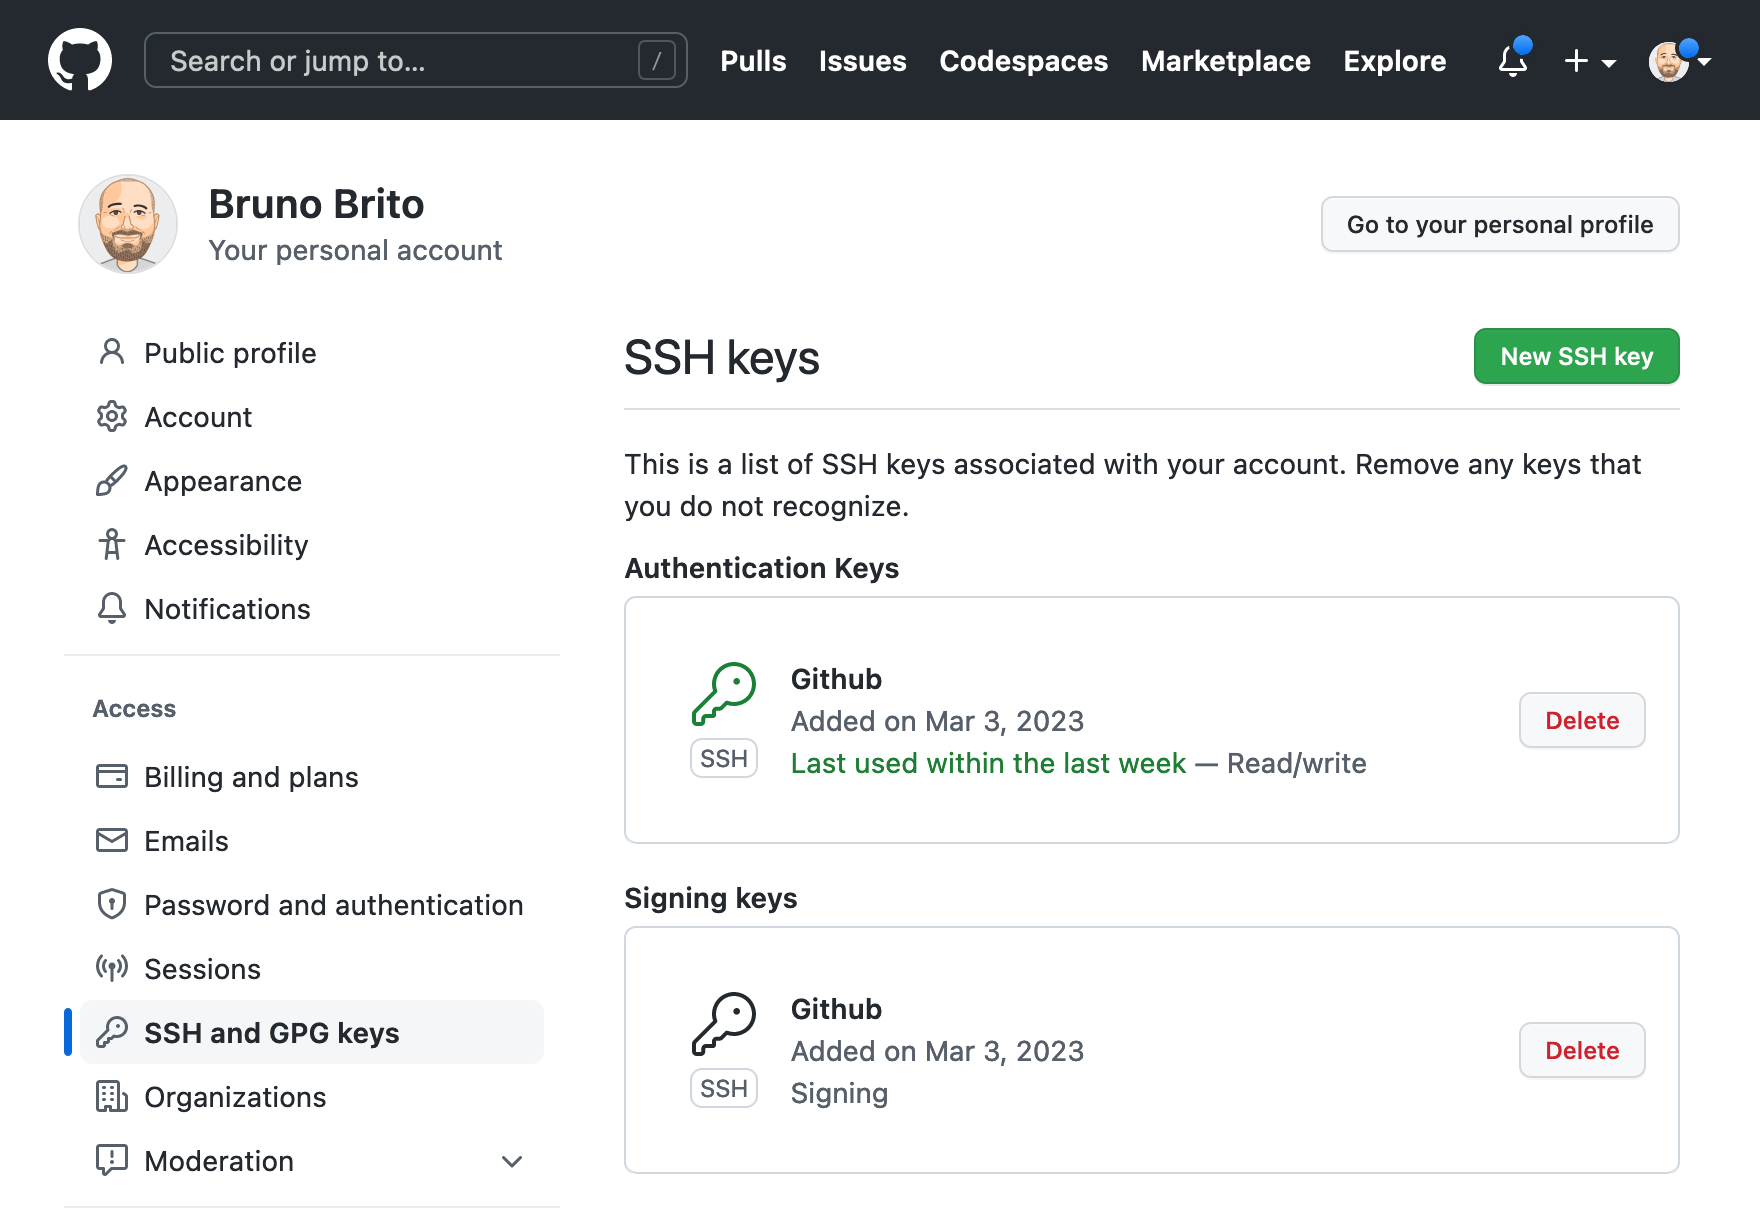
Just like before, we will need to revisit the GitHub SSH key settings page to upload our public key — but, this time, we will pick "Signing Key" instead (once again, the 1Password's browser extension should automatically fill the title and key for you).
You should now have two SSH keys associated with your account.
After adding a commit, a new "Verified" label will be shown next to your commits.

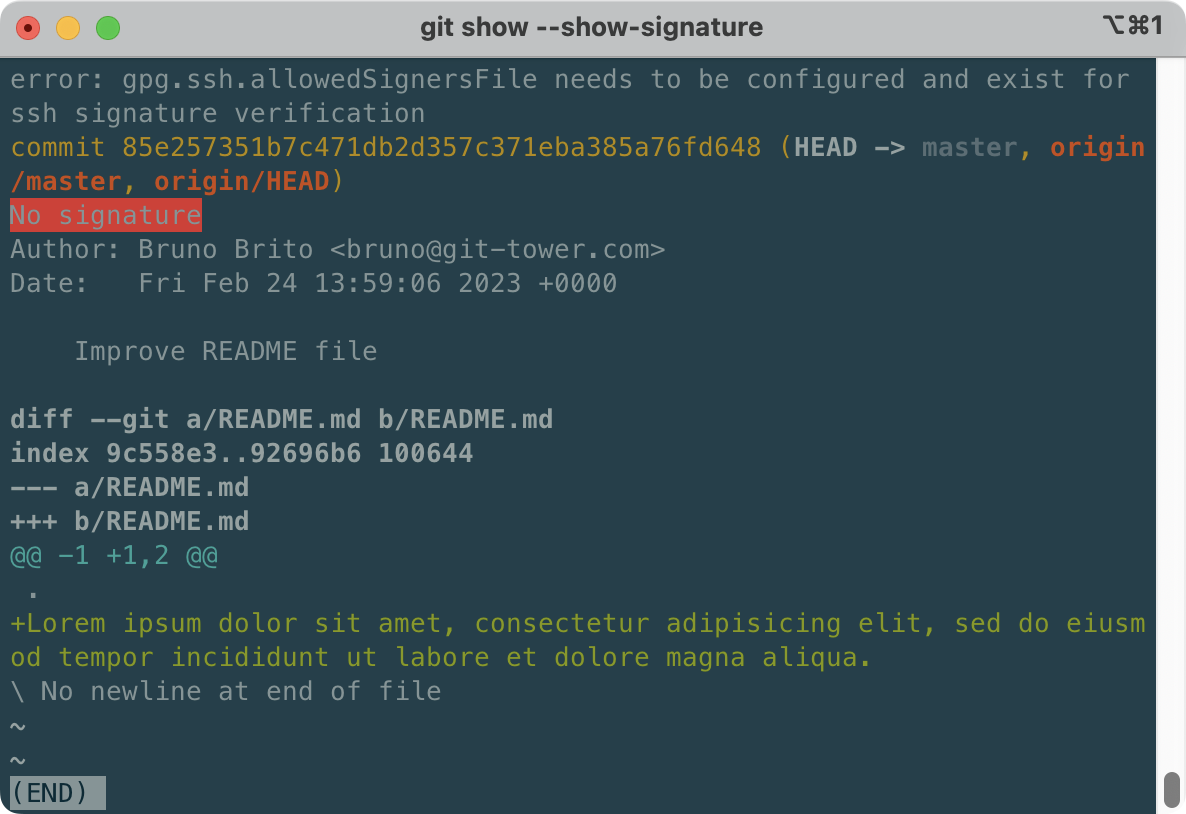
Great! Unfortunately, if you run git show --show-signature in the command line, you will see that there's actually no signature present:
Let's change that.
Creating an Allowed Signers File
The reason why this signature cannot be verified is because Git lacks trusted SSH keys — you will need to maintain a list of trusted keys on your computer.
You can create this “allowed signers” file anywhere — my recommendation is under the ~/.config/git/ folder. The contents of the file should be your email address and your public key, copied from 1Password. Here's an example:
bruno@git-tower.com ssh-ed25519 AAAAC3NzaC1lZDI1NTE5AAAAIFZSV8LQpdNrwUrR4jB8eHnuH6ZKuqJwjdmis1UUBXG1Finally, we will need to use its path as the value for the gpg.ssh.allowedSignersFile global Git config.
If you chose the same path as I did, type the following:
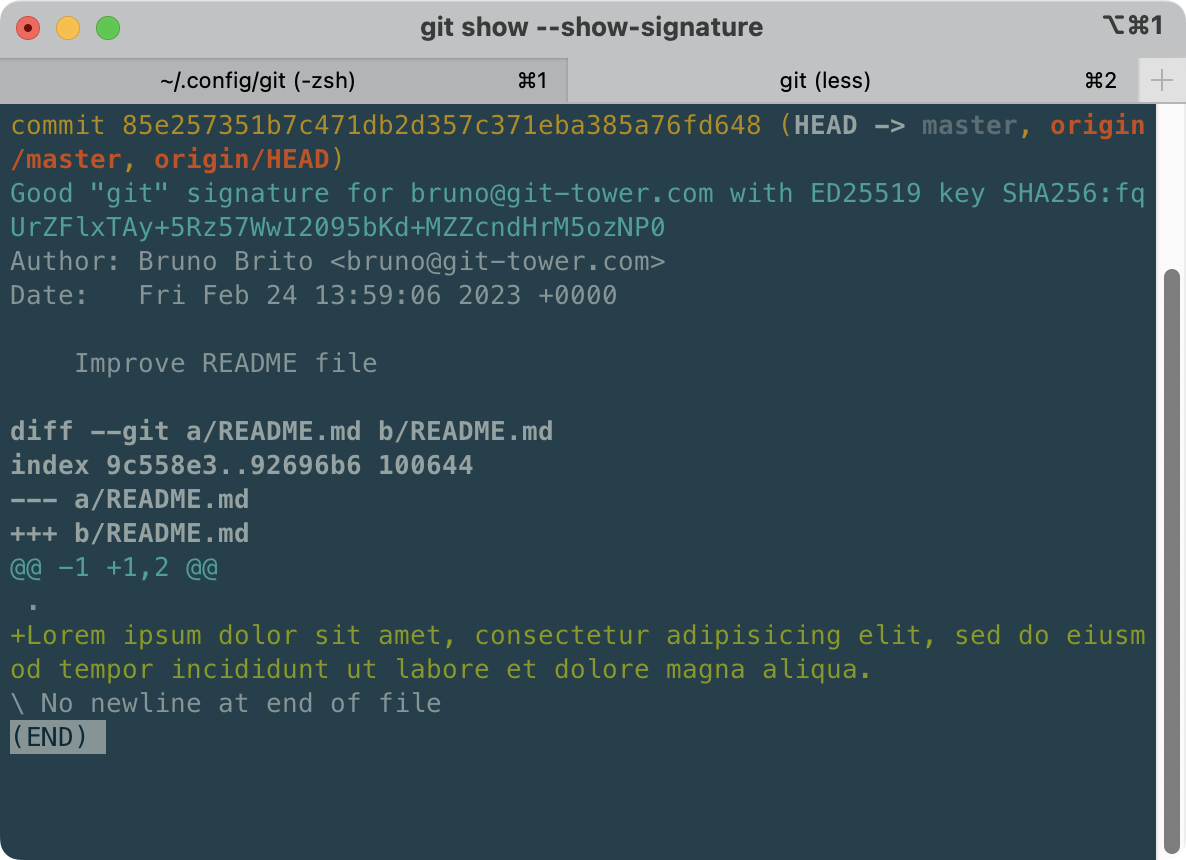
git config --global gpg.ssh.allowedSignersFile "$HOME/.config/git/allowed_signers"That's it! Now we can see that our signature is valid. Congrats! 🎉
1Password 8 and Tower
Tower 9.4 for Mac added full SSH support, enabling you to conveniently manage SSH keys and sign/verify commits and tags right from within Tower. However, to get the most out of our Git client, there are still a few additional tweaks that we should make in order to be able to sign commits.
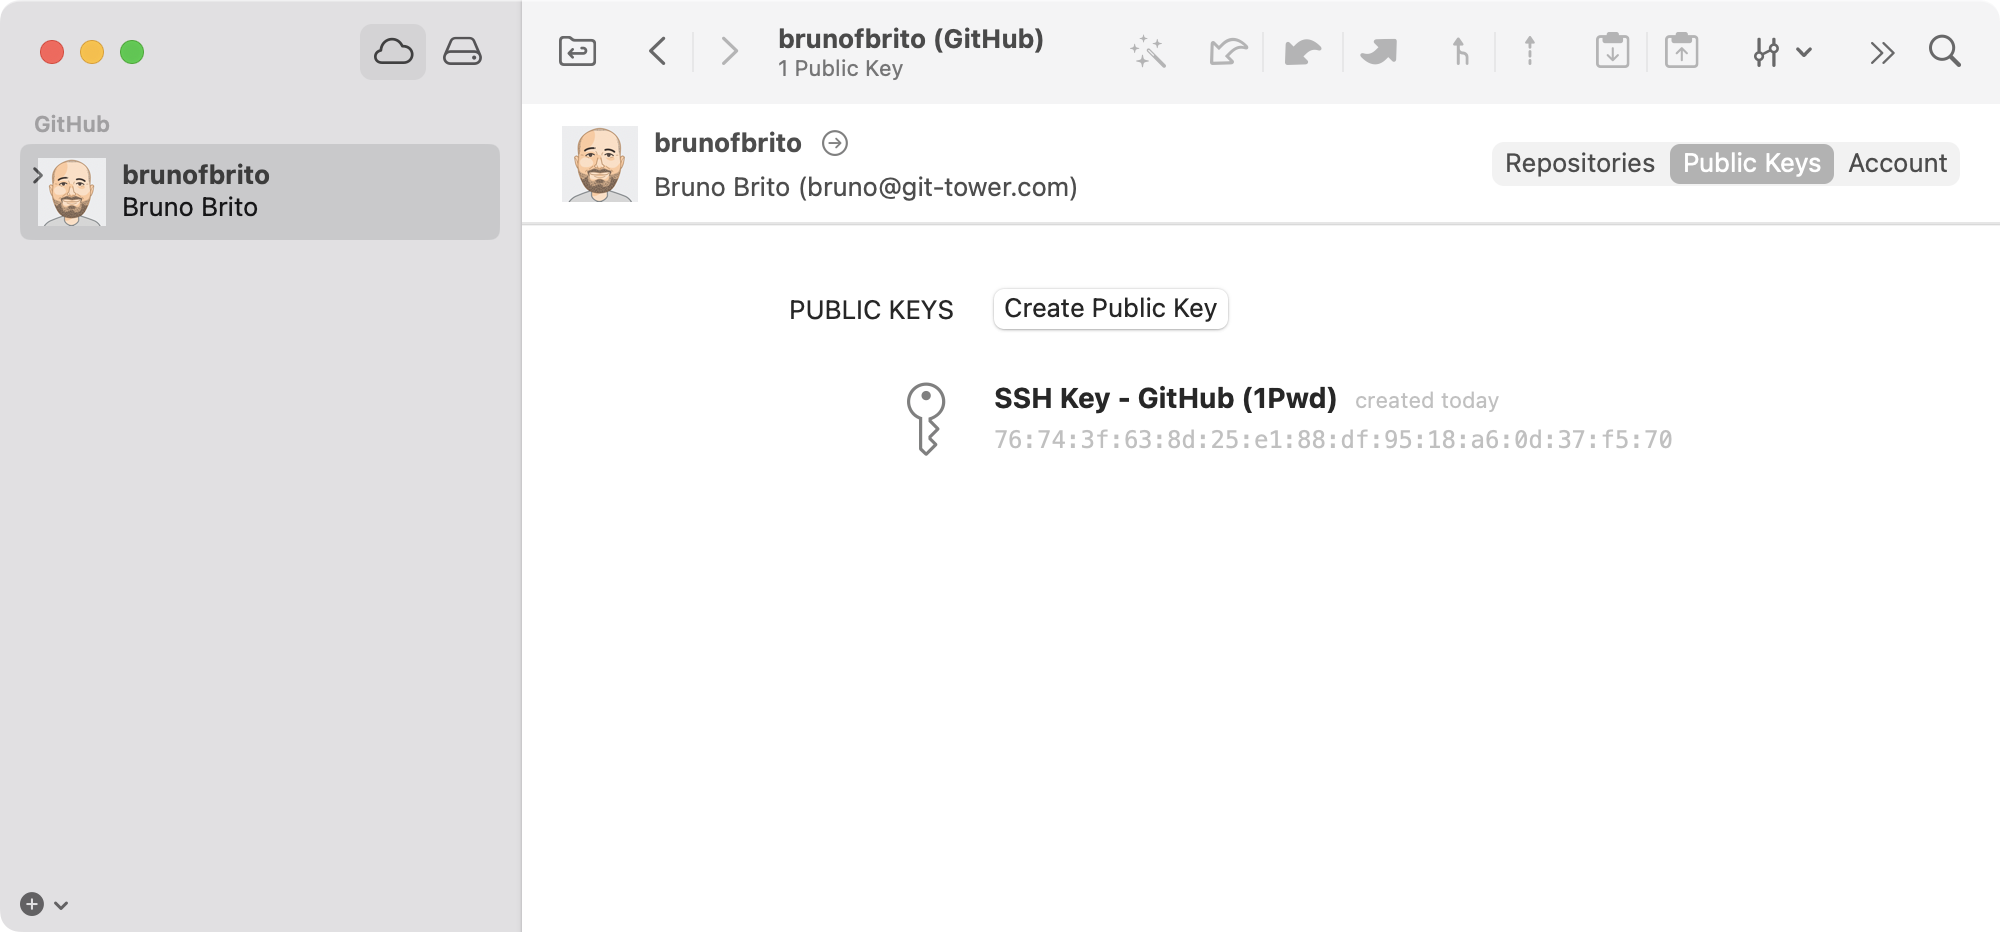
Assuming you have already added your GitHub account to our Git client, you will notice that the SSH key has been automatically included in the "Public Keys" view.
For remote connections, if your configuration works on the command line, it will also work seamlessly in Tower. Tower will utilize the instructions you have added to the ~/.ssh/config file.
But the Host * setting is only employed for connections. Since no remote connection is established when signing commits, the config line will have no effect on this action. In short, you can't sign commits with 1Password just yet.
To address this, you will need to create or edit your environment.plist file, located at ~/Library/Application Support/com.fournova.Tower3/, as Tower (like any other GUI OS X app) does not know about your Shell environment. You can learn more about this in our documentation.
To use the 1Password agent in Tower, add the following to your environment.plist file:
<?xml version="1.0" encoding="UTF-8"?>
<!DOCTYPE plist PUBLIC "-//Apple//DTD PLIST 1.0//EN" "http://www.apple.com/DTDs/PropertyList-1.0.dtd">
<plist version="1.0">
  <dict>
    <key>SSH_AUTH_SOCK</key>
        <string>/Users/USERNAME/Library/Group Containers/2BUA8C4S2C.com.1password/t/agent.sock</string>
  </dict>
</plist>
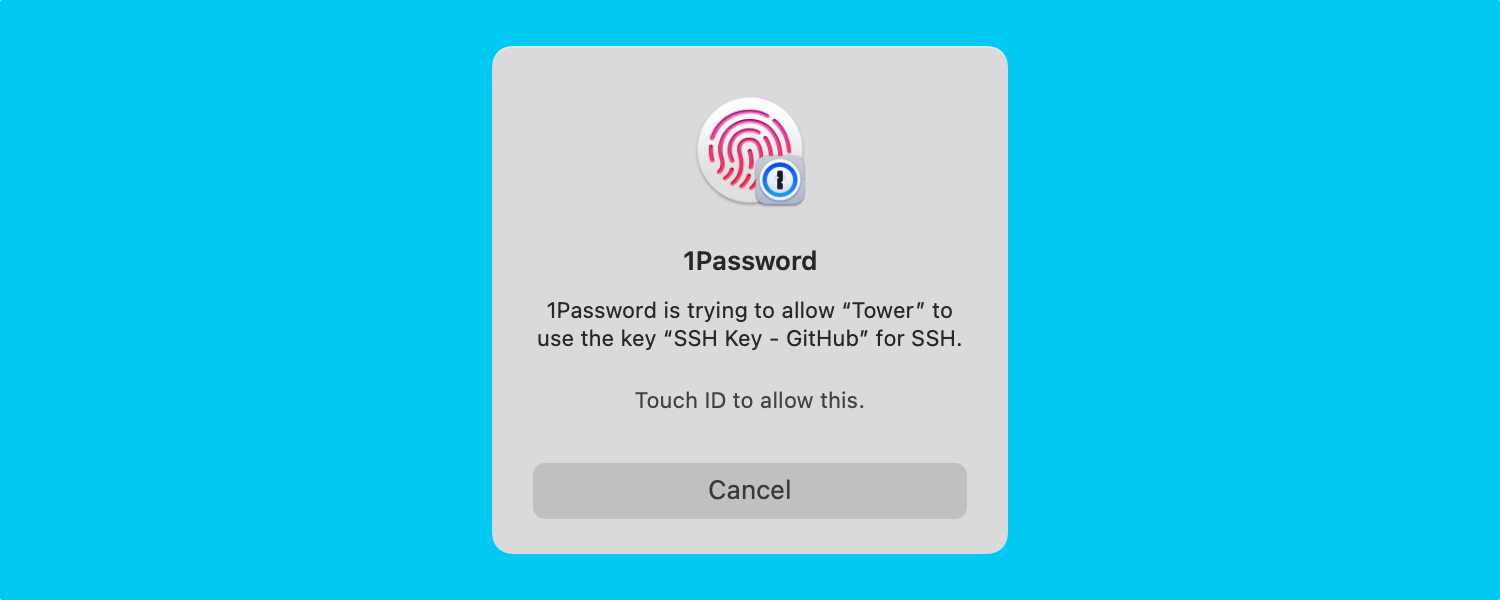
Voilà! Now, when you perform a Git operation in Tower, you will be prompted to authorize your SSH key with Touch ID (if configured) and your commit will be signed!
We hope that you found this guide useful. For more tips, don't forget to sign up for our newsletter below and follow Tower on Twitter and LinkedIn!
Join Over 100,000 Developers & Designers
Be the first to know about new content from the Tower blog as well as giveaways and freebies via email.
